
Whitelabel Workspace Set Up
Please remember that we will give them a different platform aside from their HL Agency.
Set Limitations to "9999999" (skip if option 1 is completed - Proceed to Connect Client's GHL Agency)
Add user (invite client's email)
Connect Stripe
STEP 1
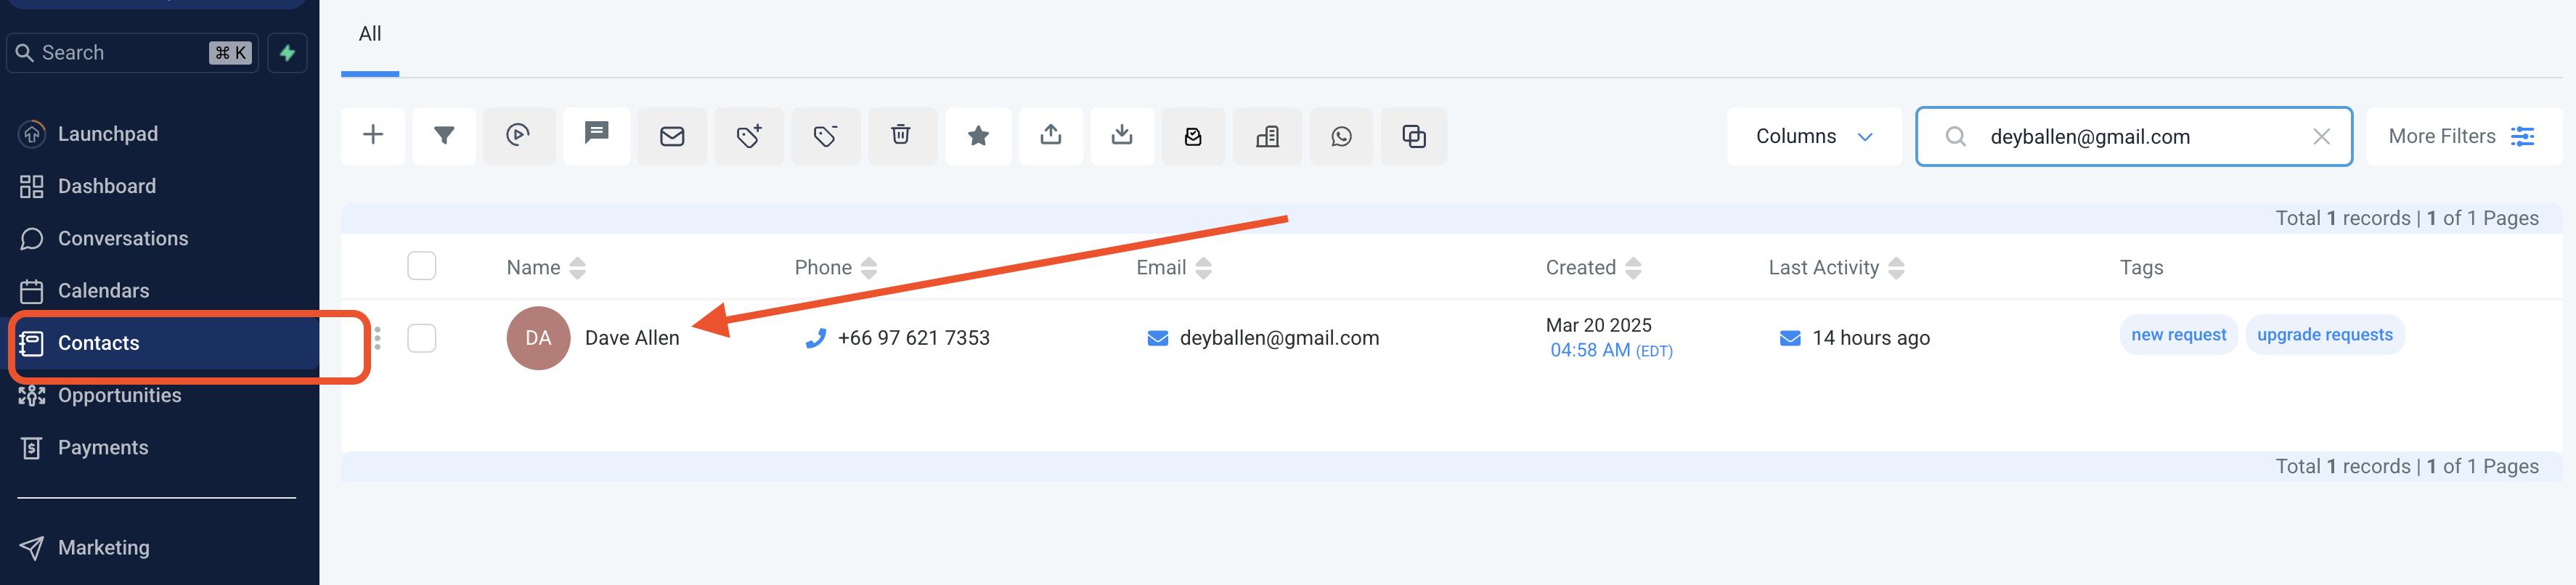
> Go to Contacts and Look for the client
> Go to Automations
then +Add
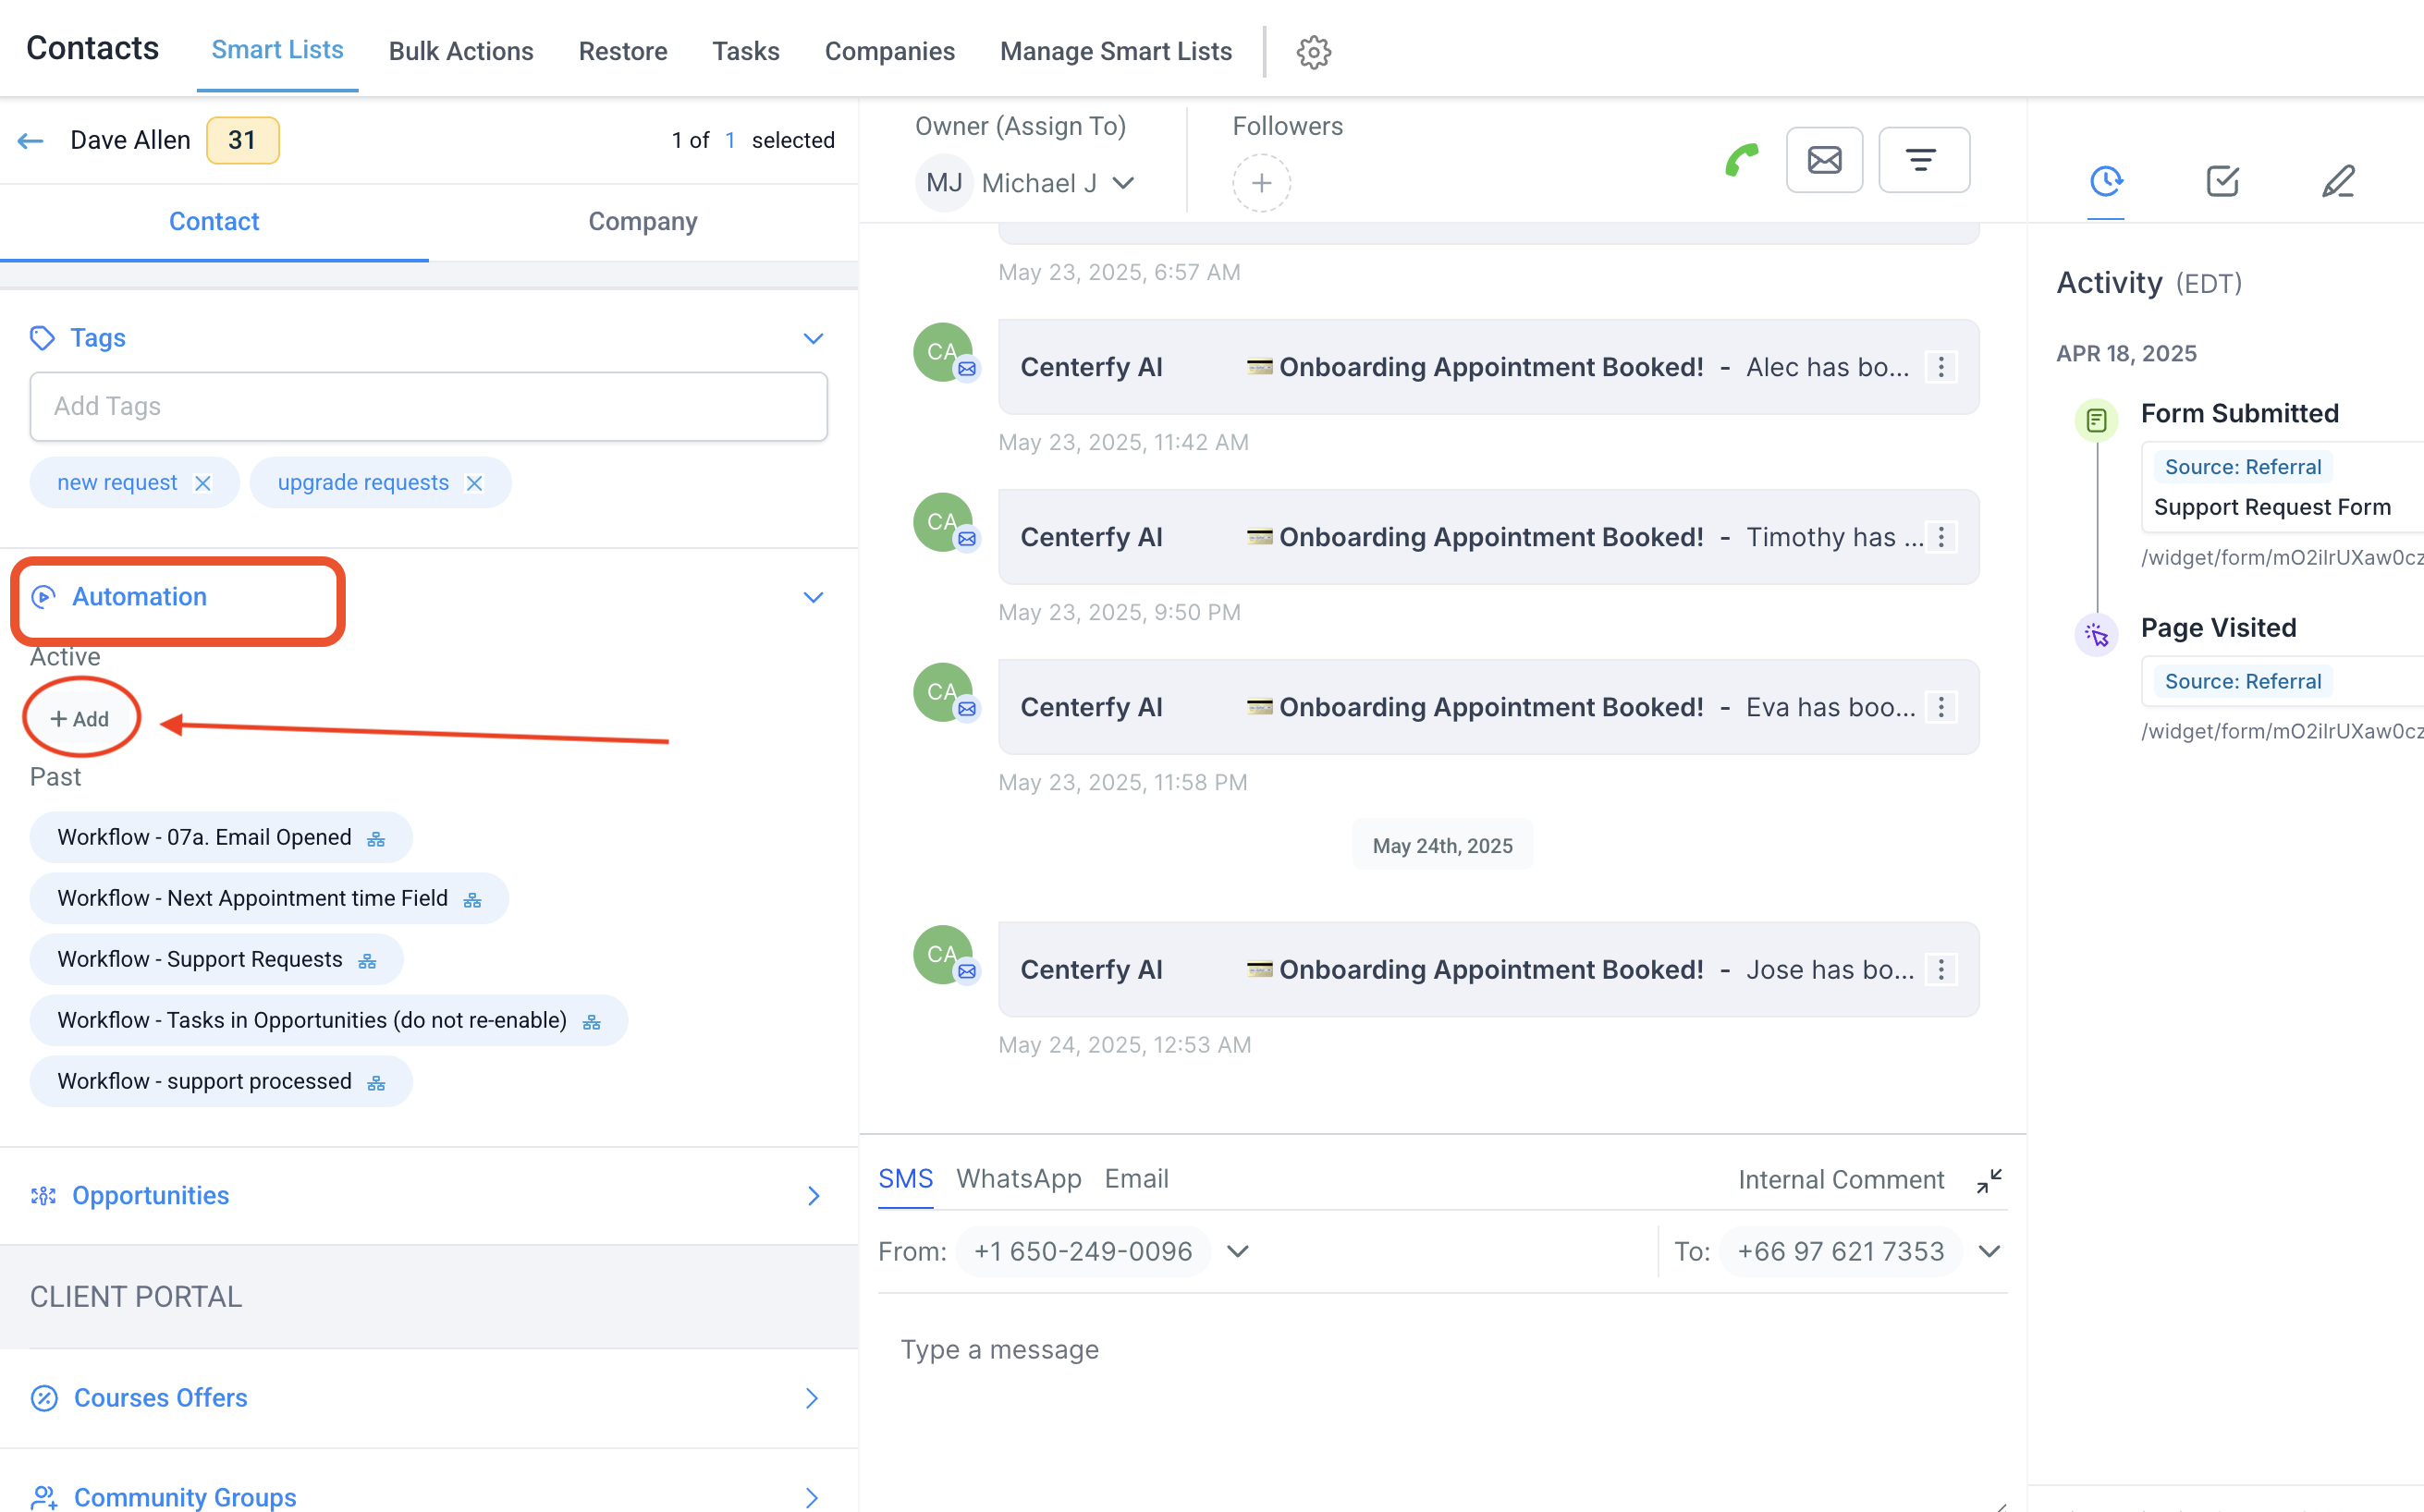
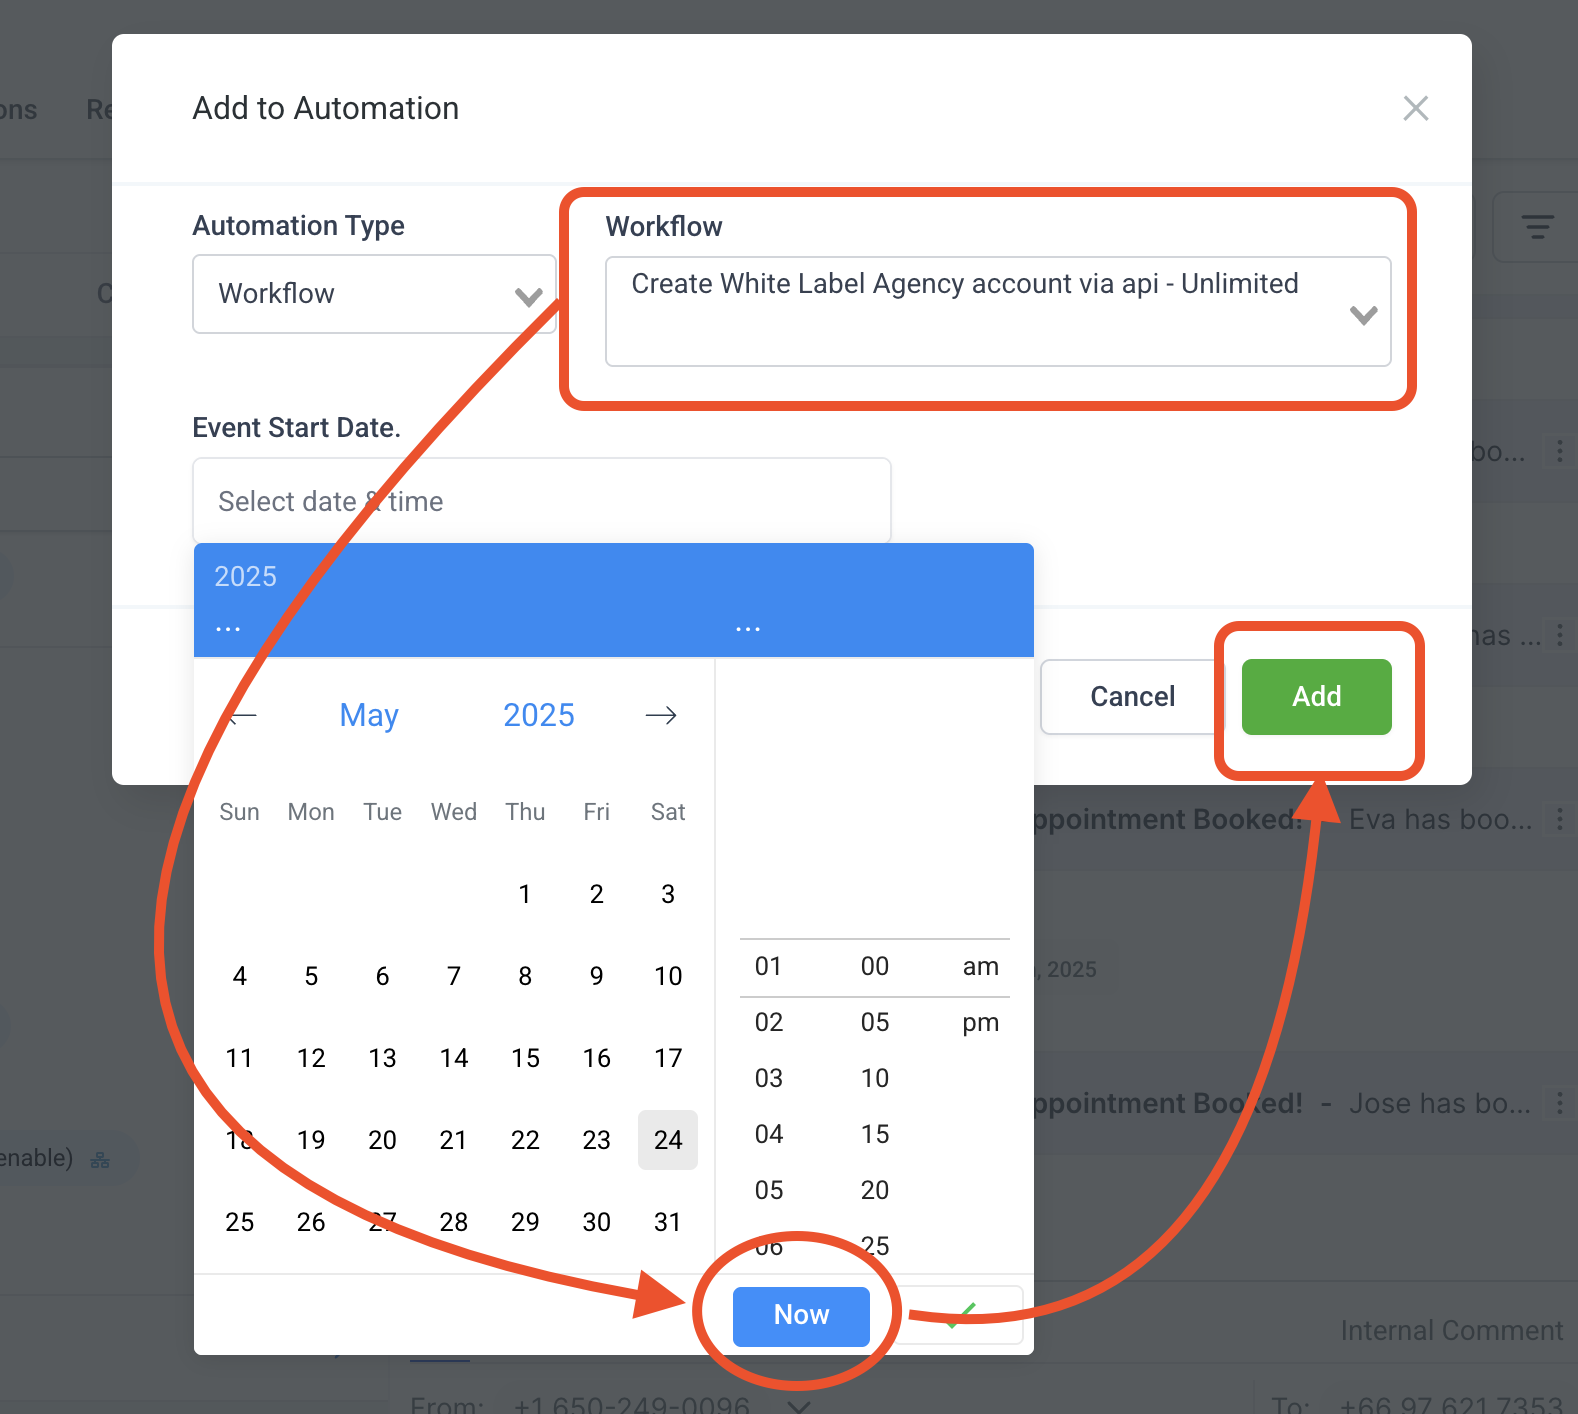
Select the following options below:
Inform the client that an email from Create Assistants will be sent to their email asking them to set their password.
SCRIPT: This is your whitelabel workspace, make sure to bookmark this page as you will mainly use this page in setting up your branding, Account integrations and Rebilling.
OPTION 2 (MANUAL SETUP) Skip if you did option 1
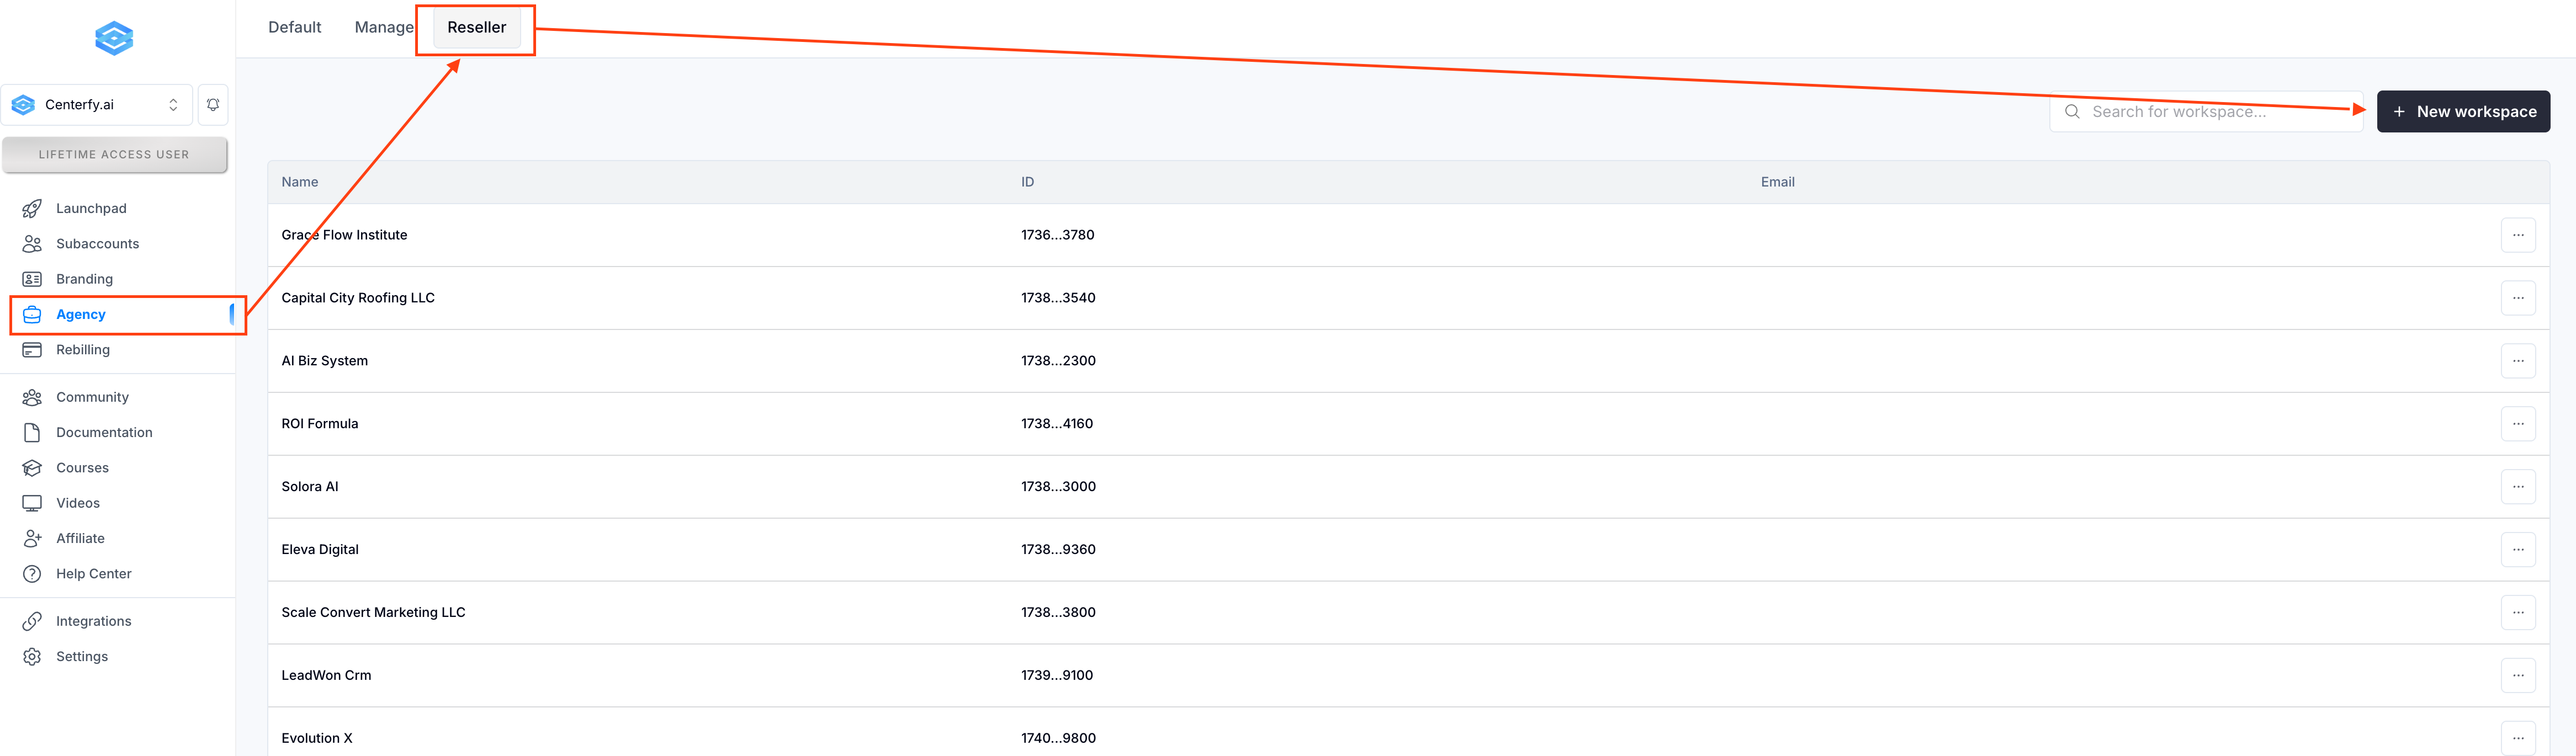
- Go to Agency
- Click on Reseller
- New workspace
Once they upgrade, make sure to remove their email address from the subaccount in within the workspace.
Once they are added as reseller...
1. Locate the worspace [Account]
2. Click the 3-dots
3. Change the numbers to 999999
4. Add user to location (use their main email)
if they upgraded from basic and unli-account, make sure to remove their email from the subaccount.
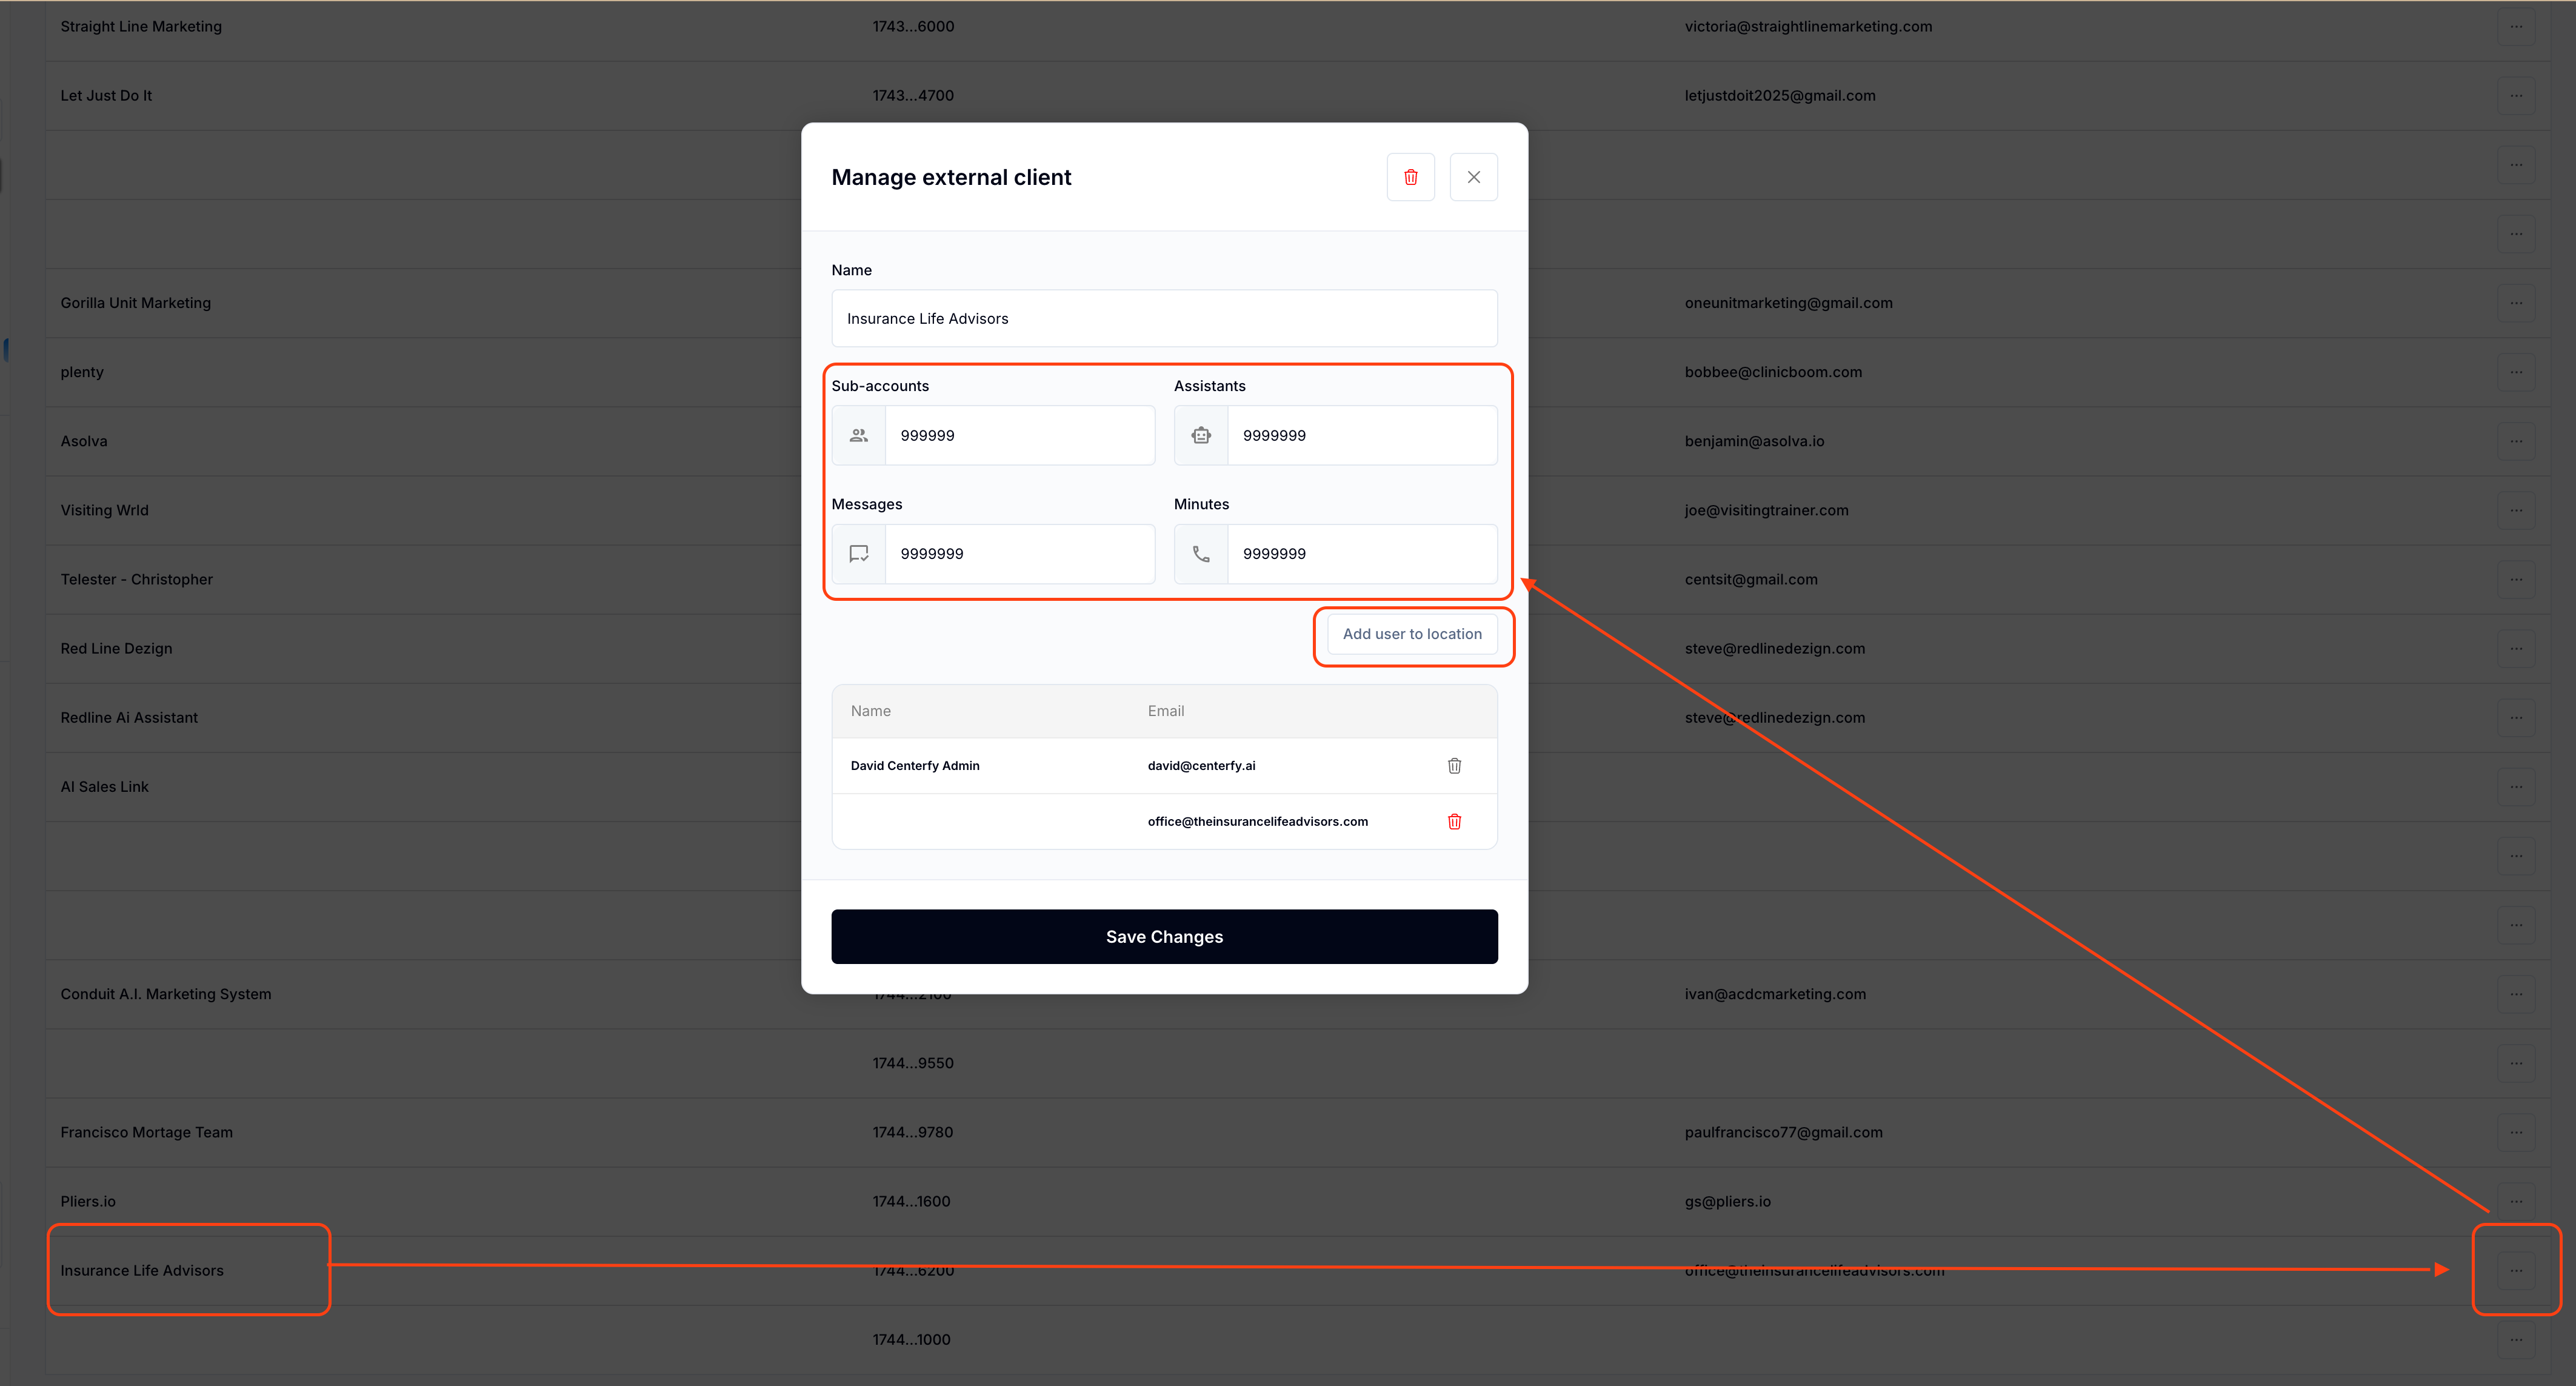
Then inform the client that they will get an email from createassistant asking them to reset their password.
- Start onboarding via Remote Access
STEP 2
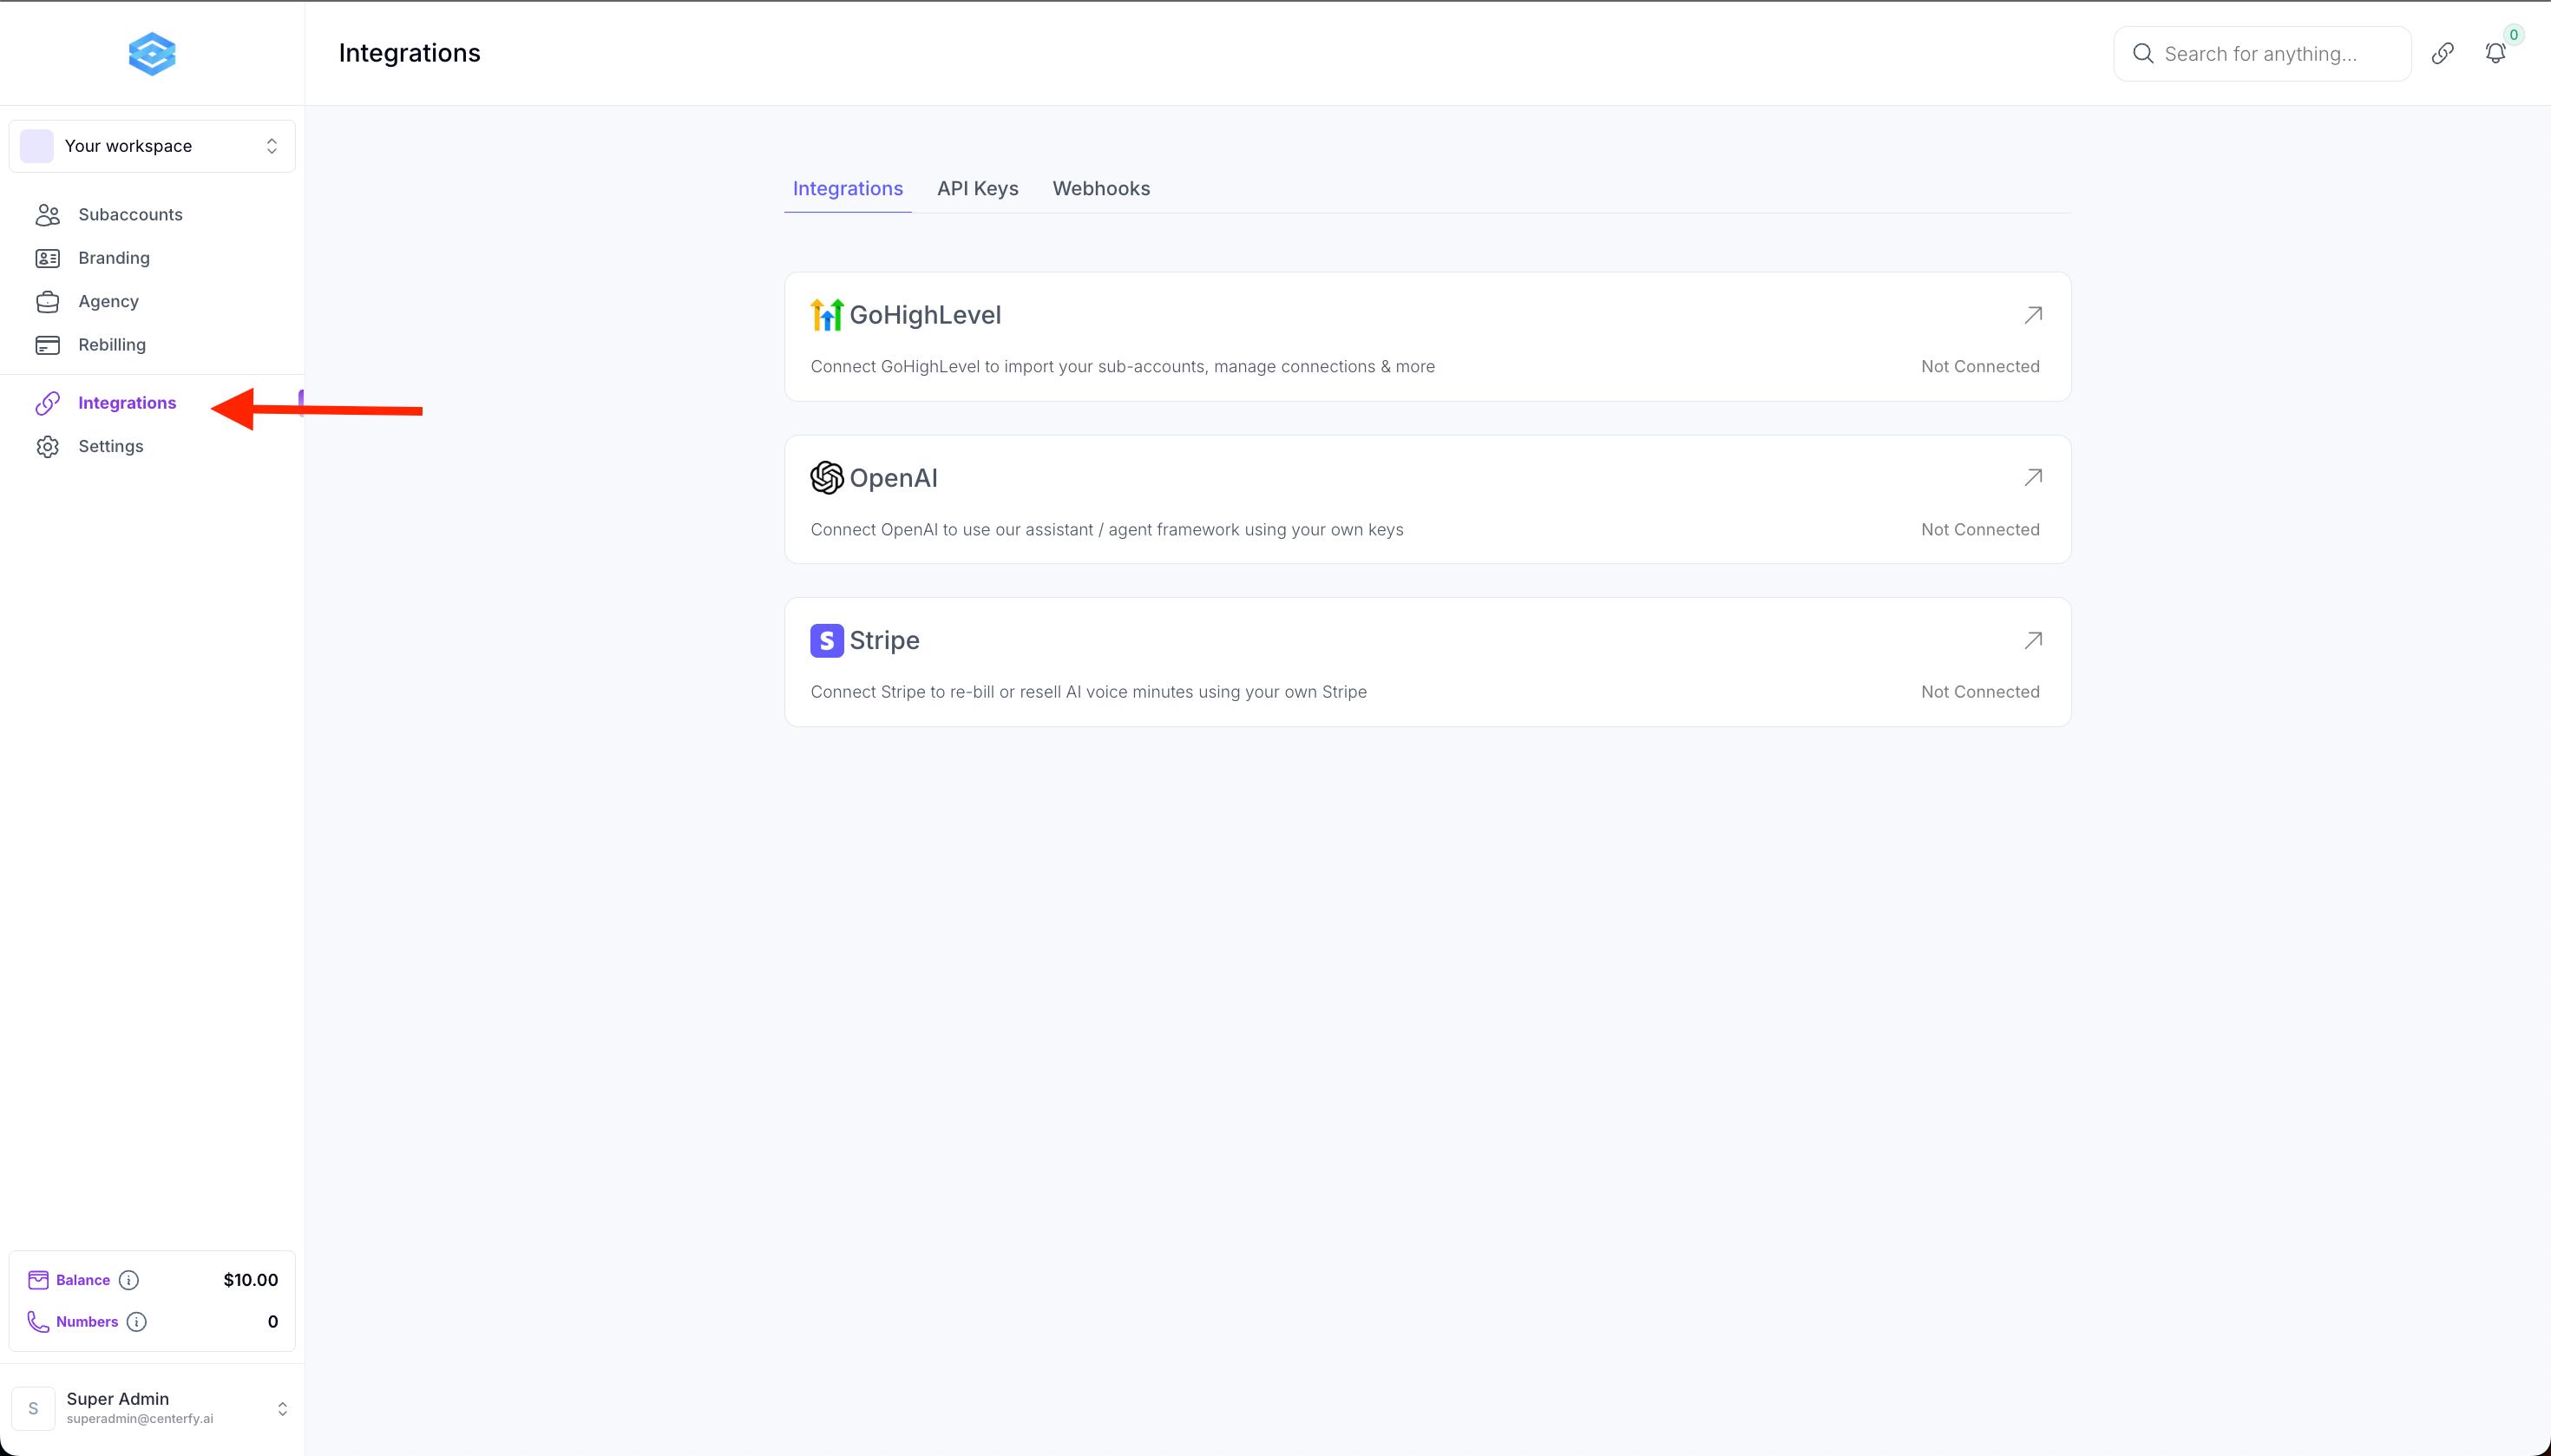
Connect Client GHL Agency
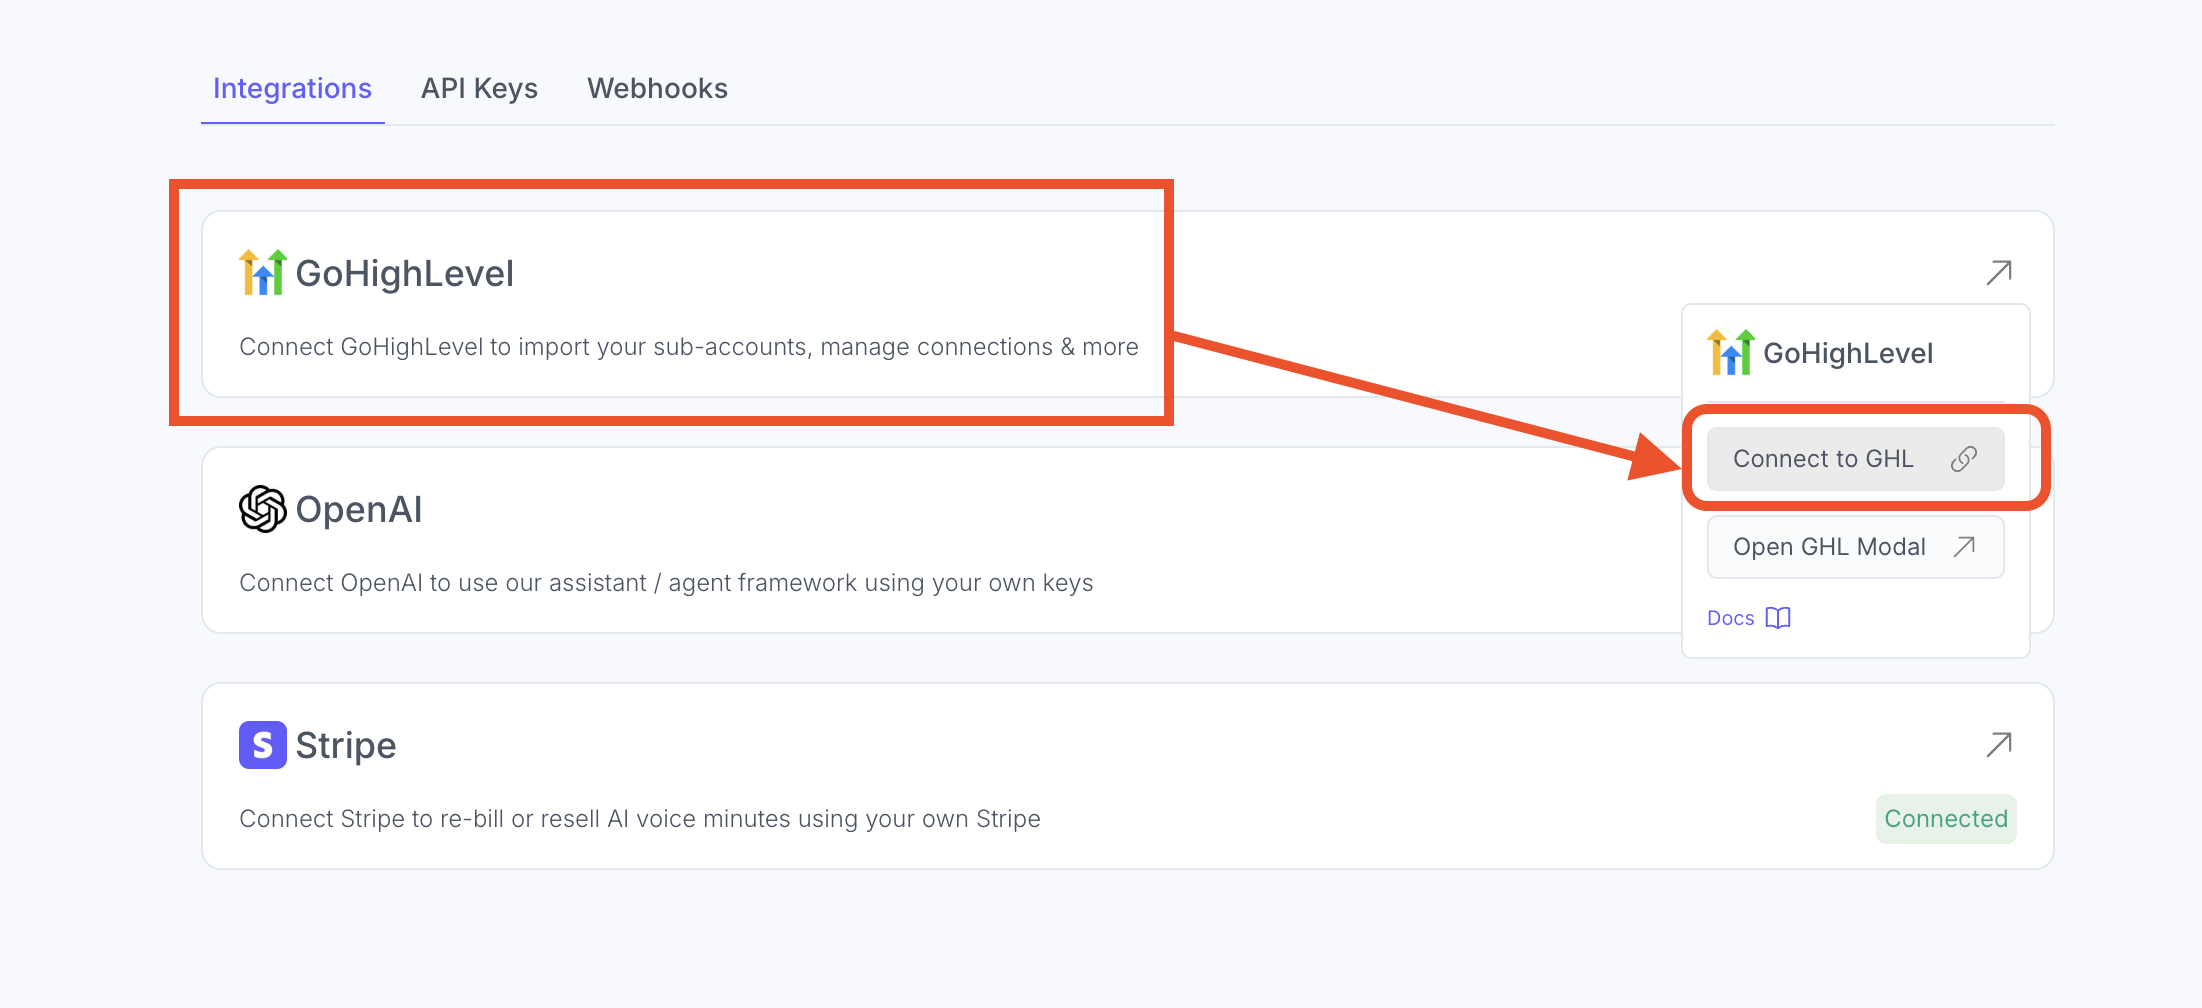
Step 1: Click Integrations to connect your GHL Agency
Step 2: Click on GoHighLevel then Connect to GHL
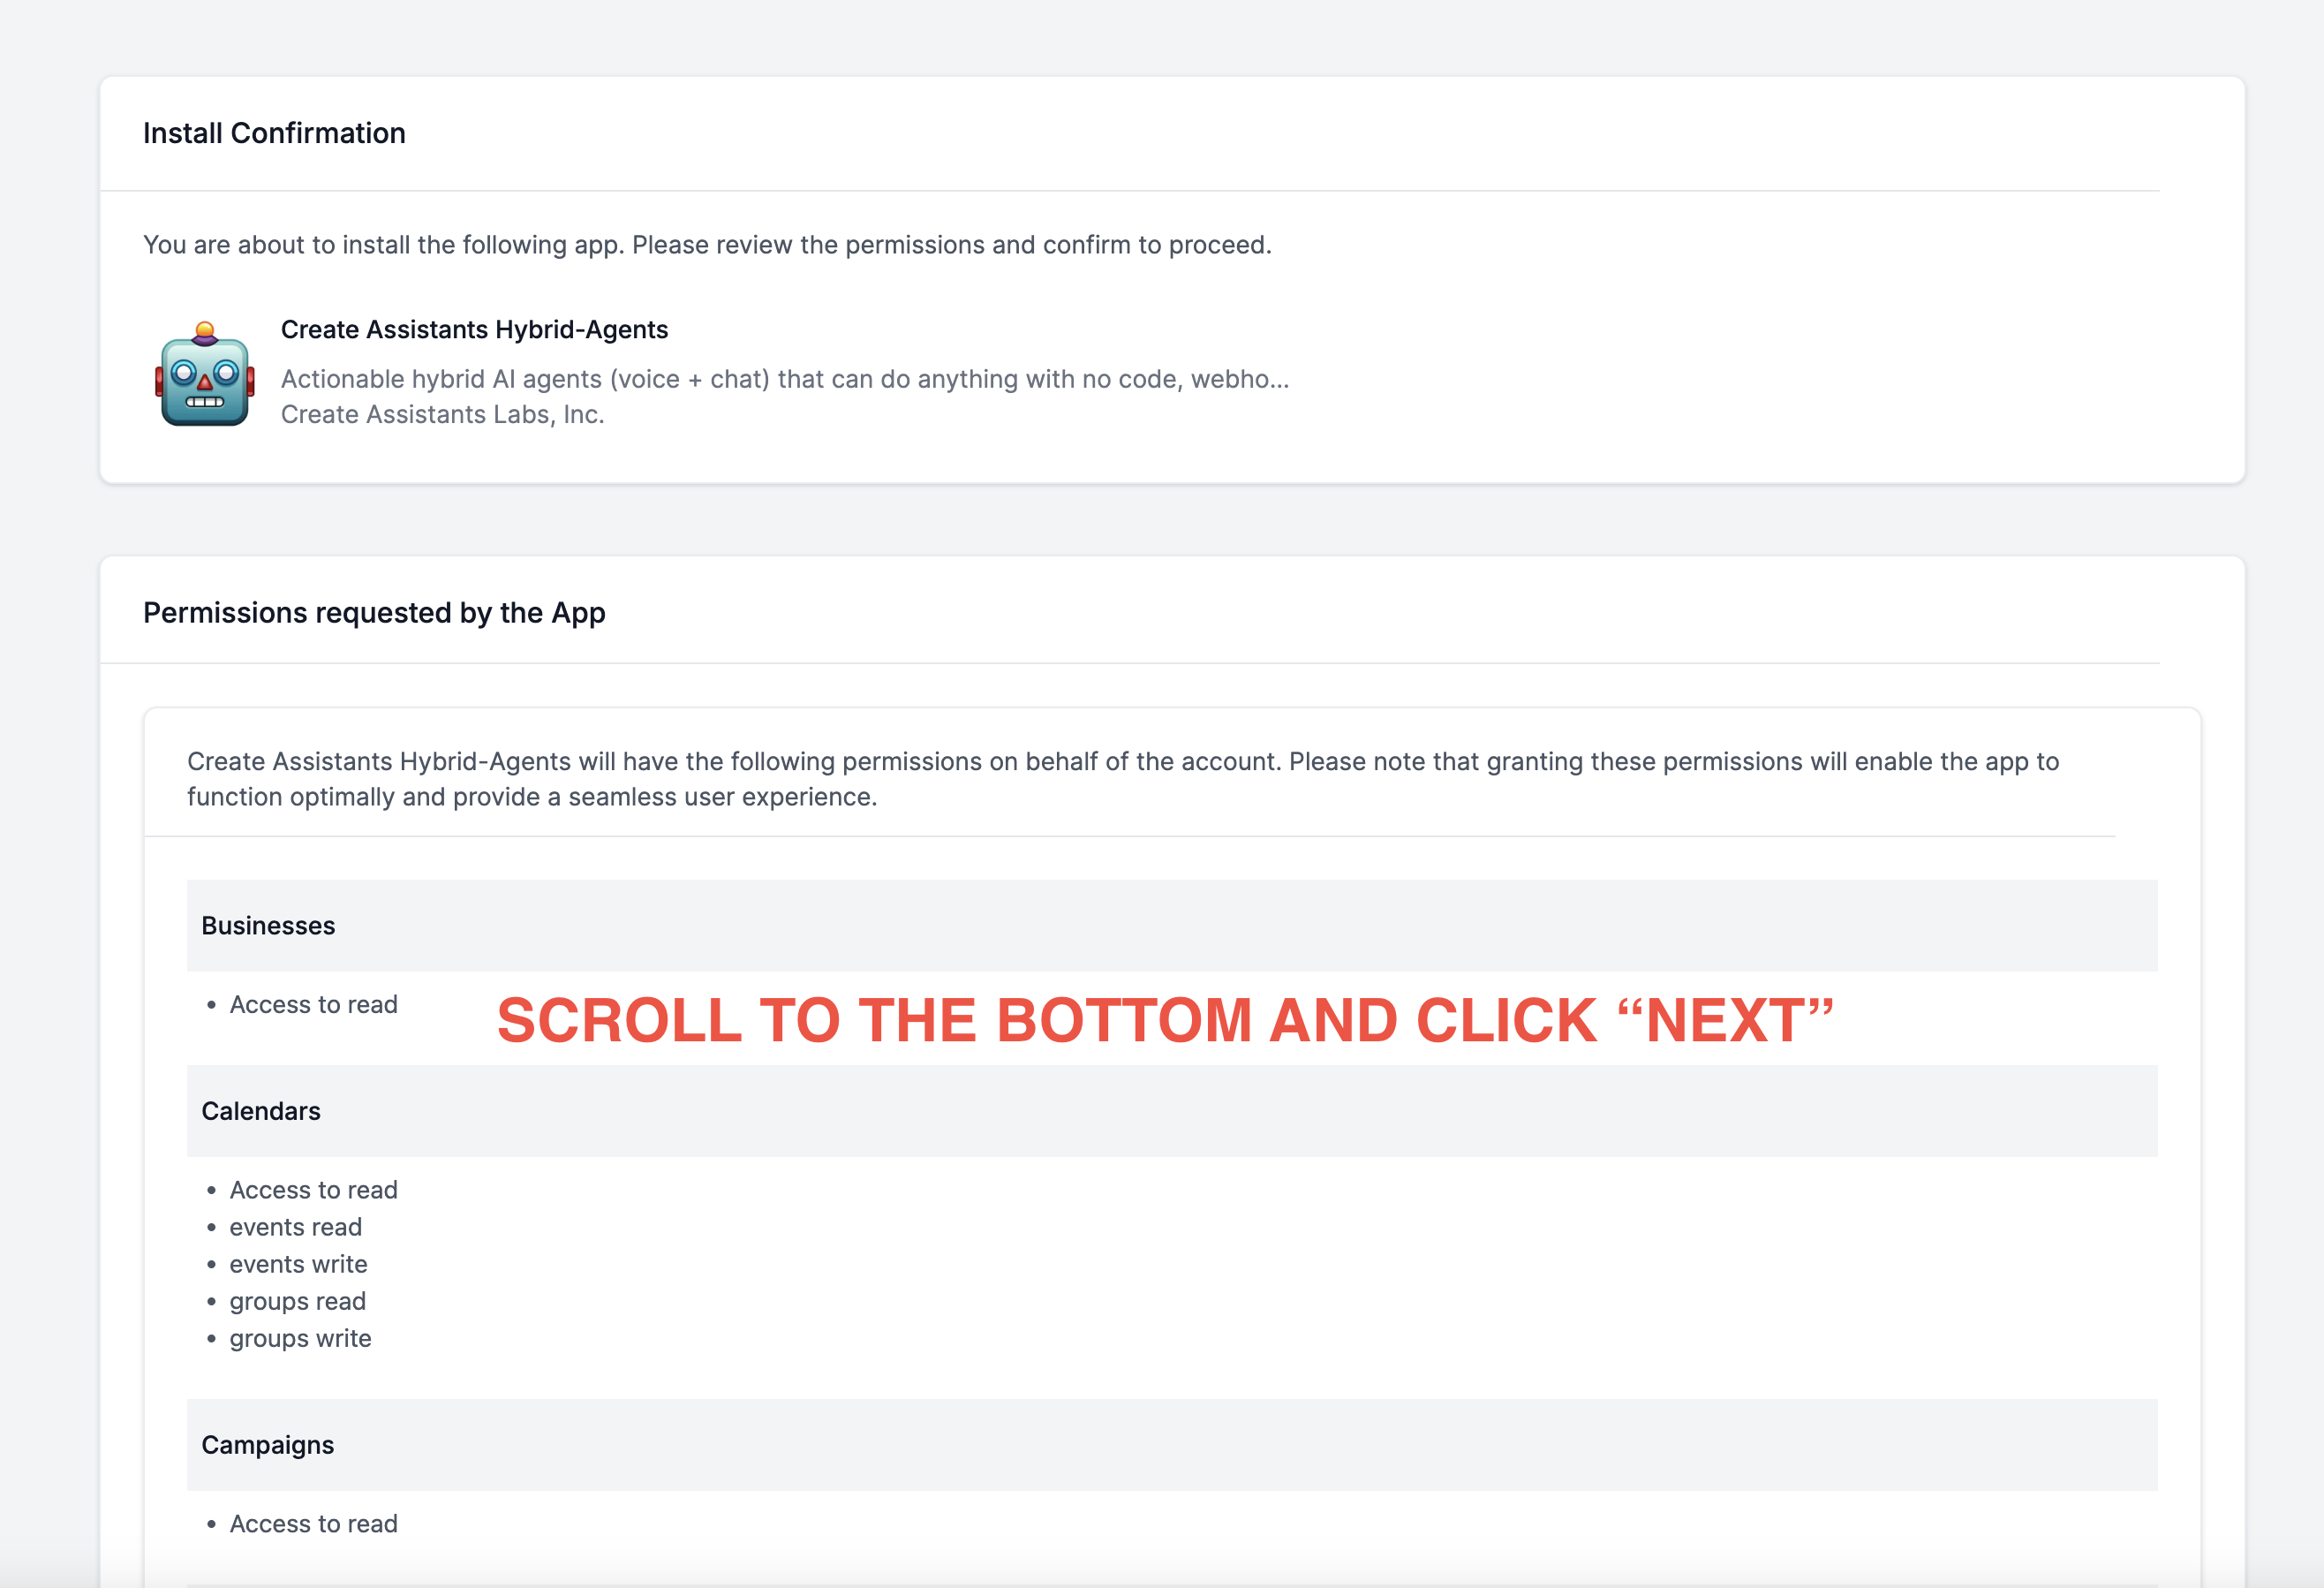
You'll be brought to this page. Make sure to Scroll down to the bottom and click "NEXT"
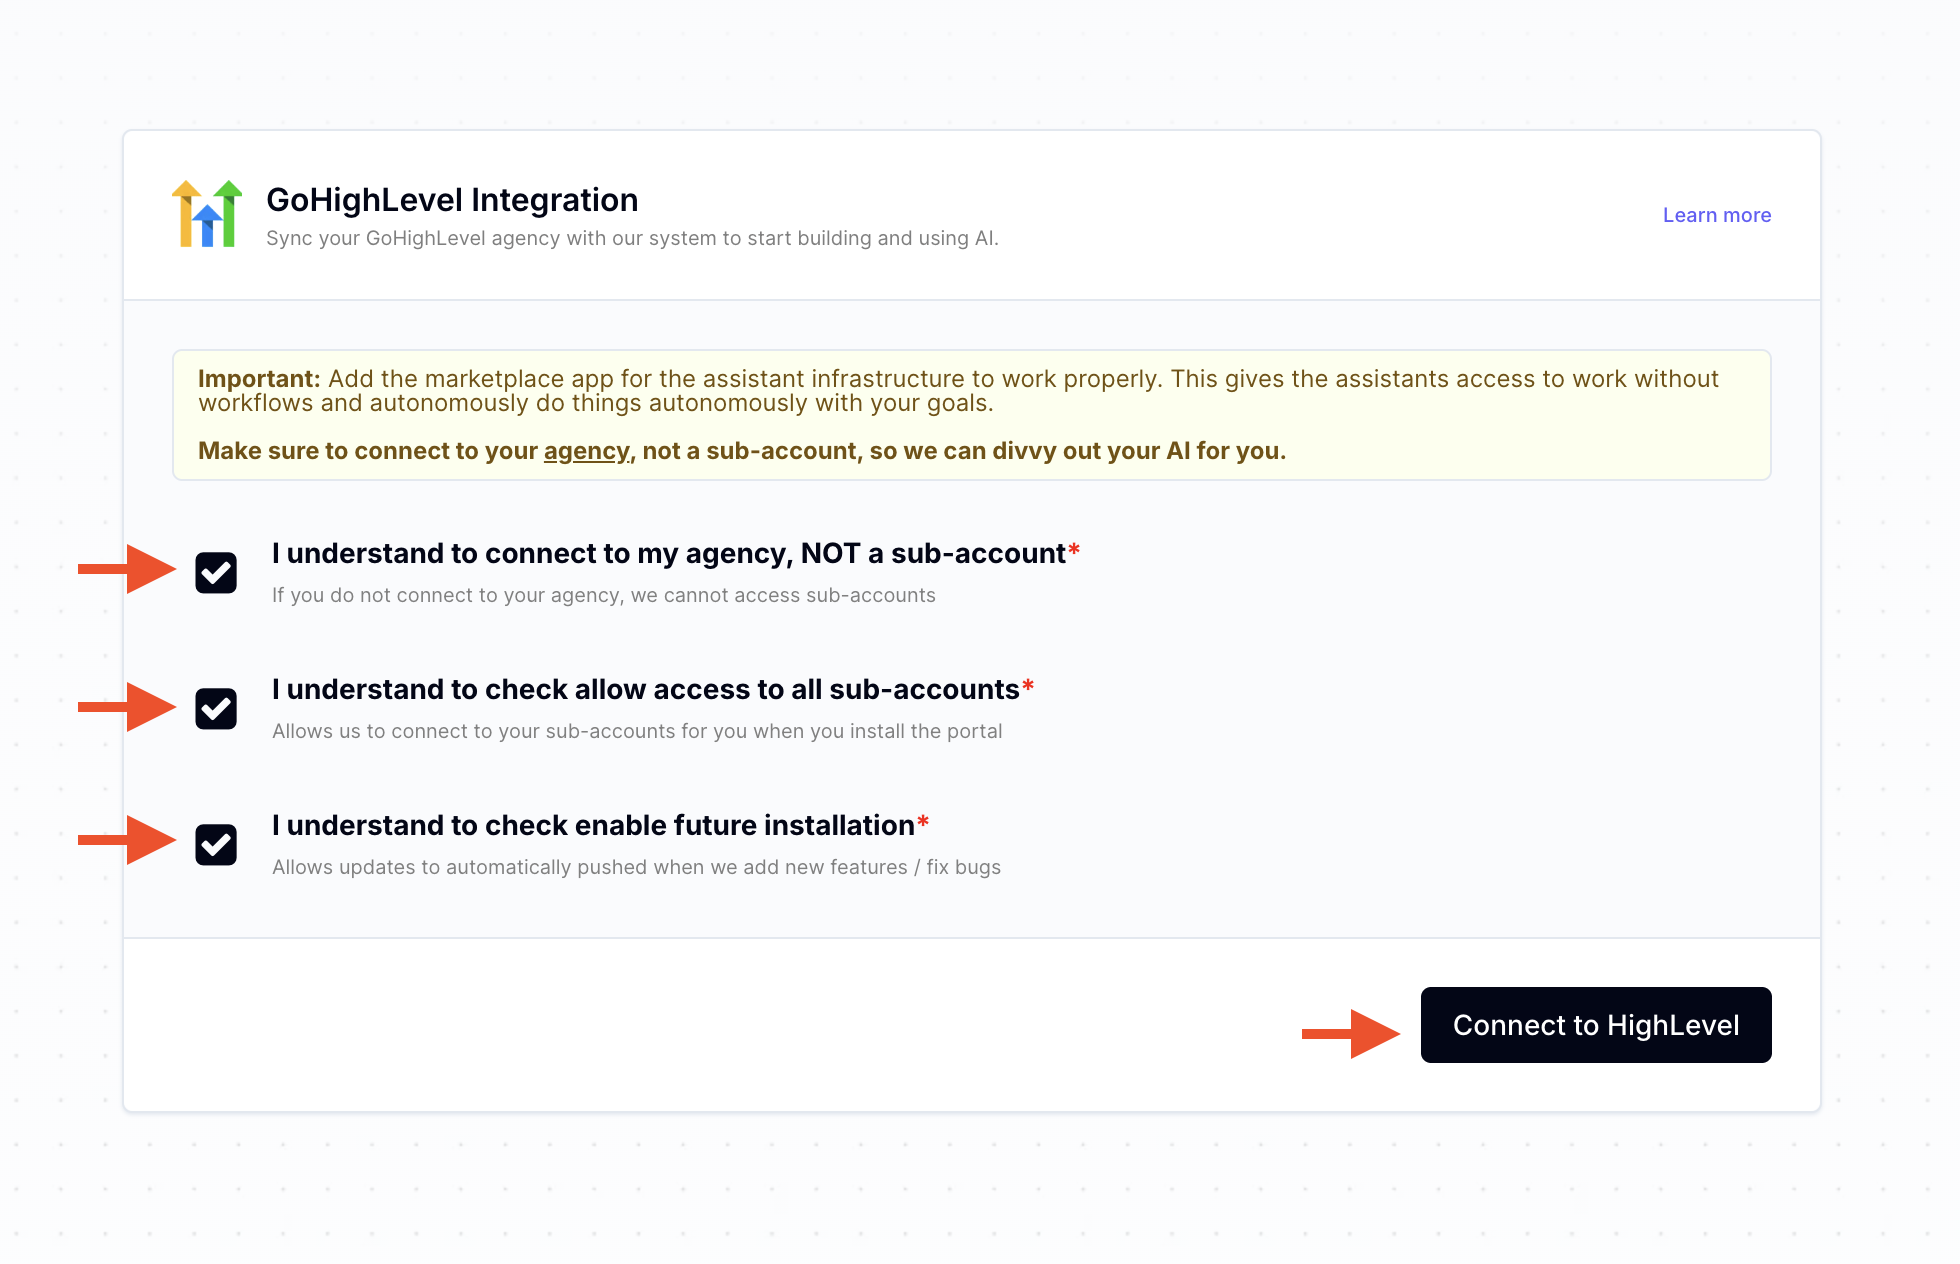
Make sure that your client is logged into their Agency within the same browser.
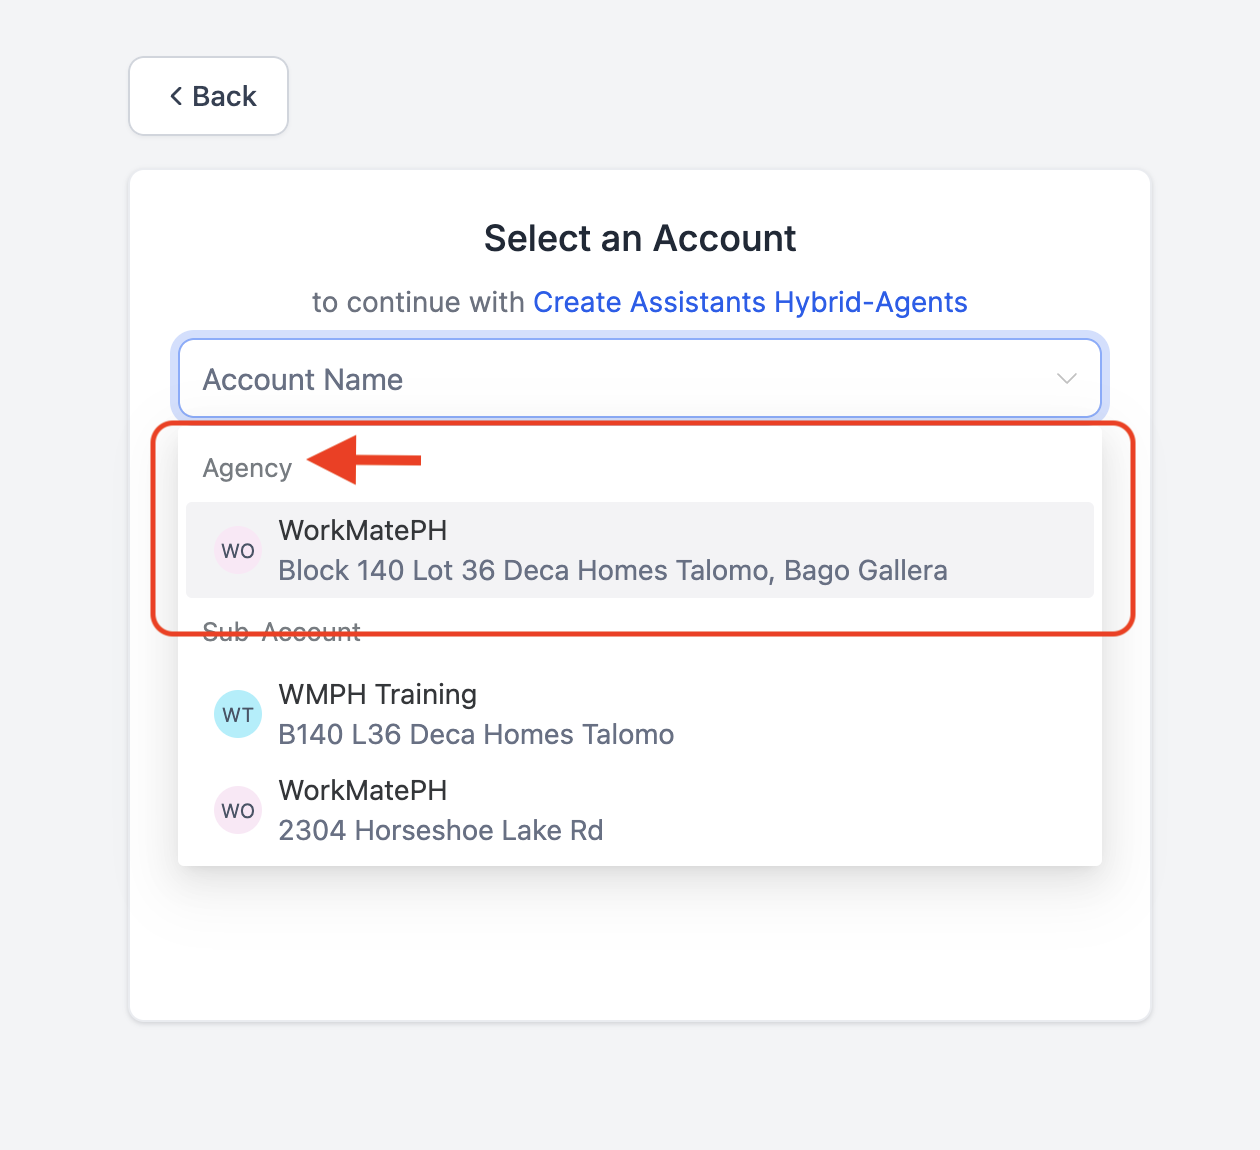
IMPORTANT** SELECT the AGENCY ACCOUNT as shown below:
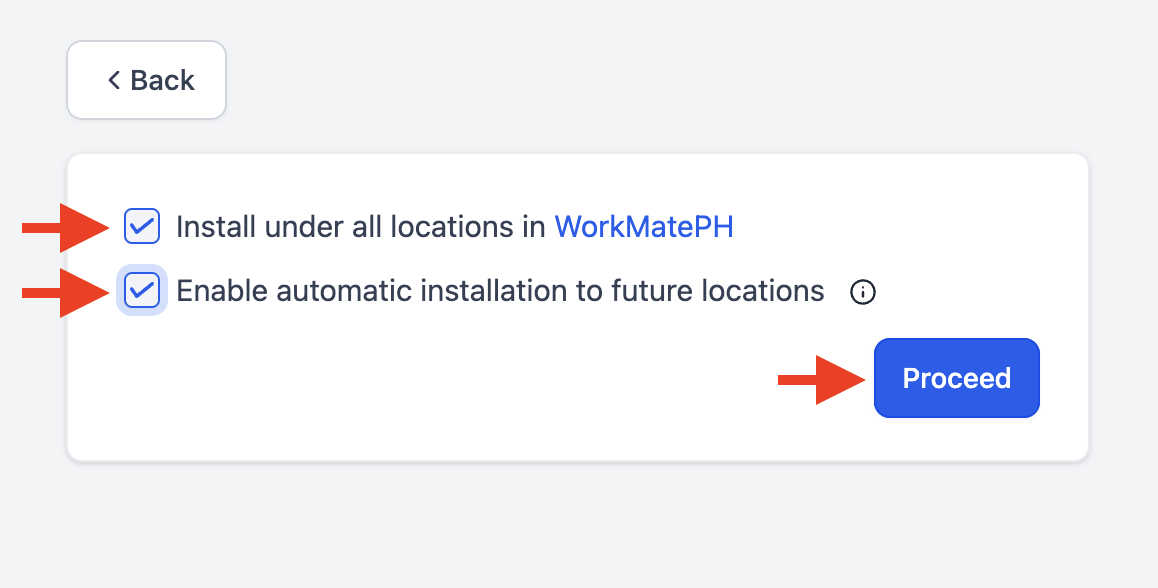
Tick the boxes below then hit proceed.
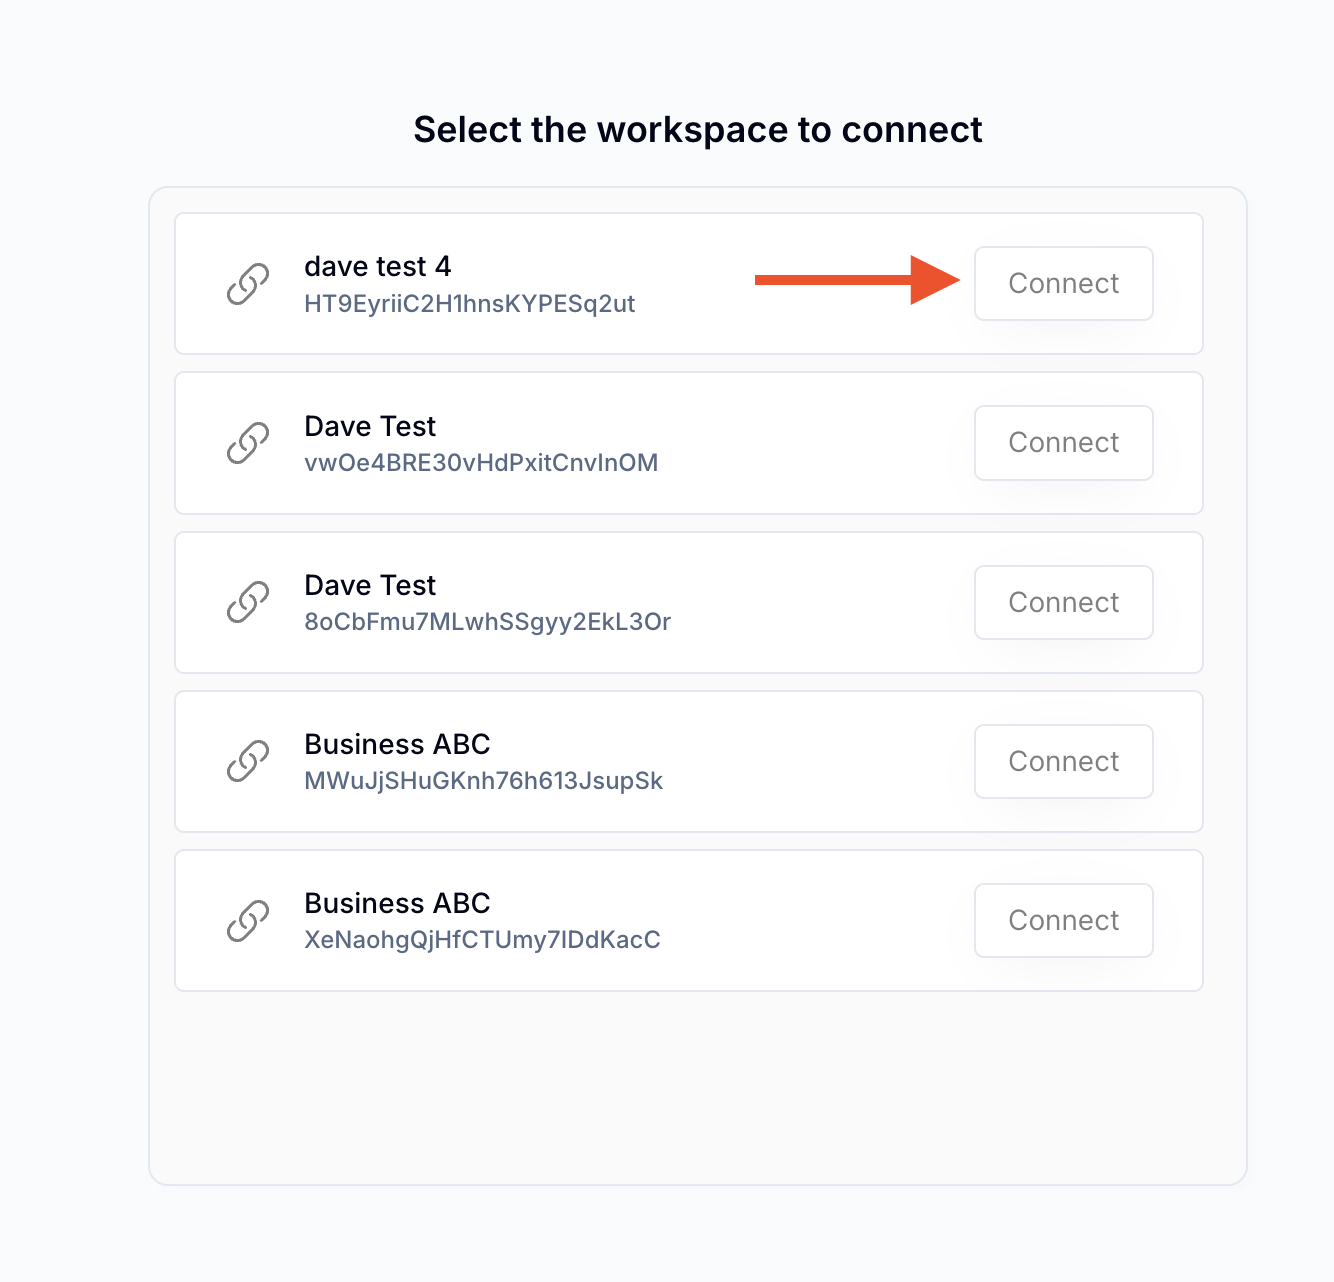
Select the Clients White Label workspace you set up in Create Assistants.
STEP 3
Once you clicked on "Connect", the workspace will establish the connection -- then go back to CreateAssistants Workspace and Proceed to Step 2
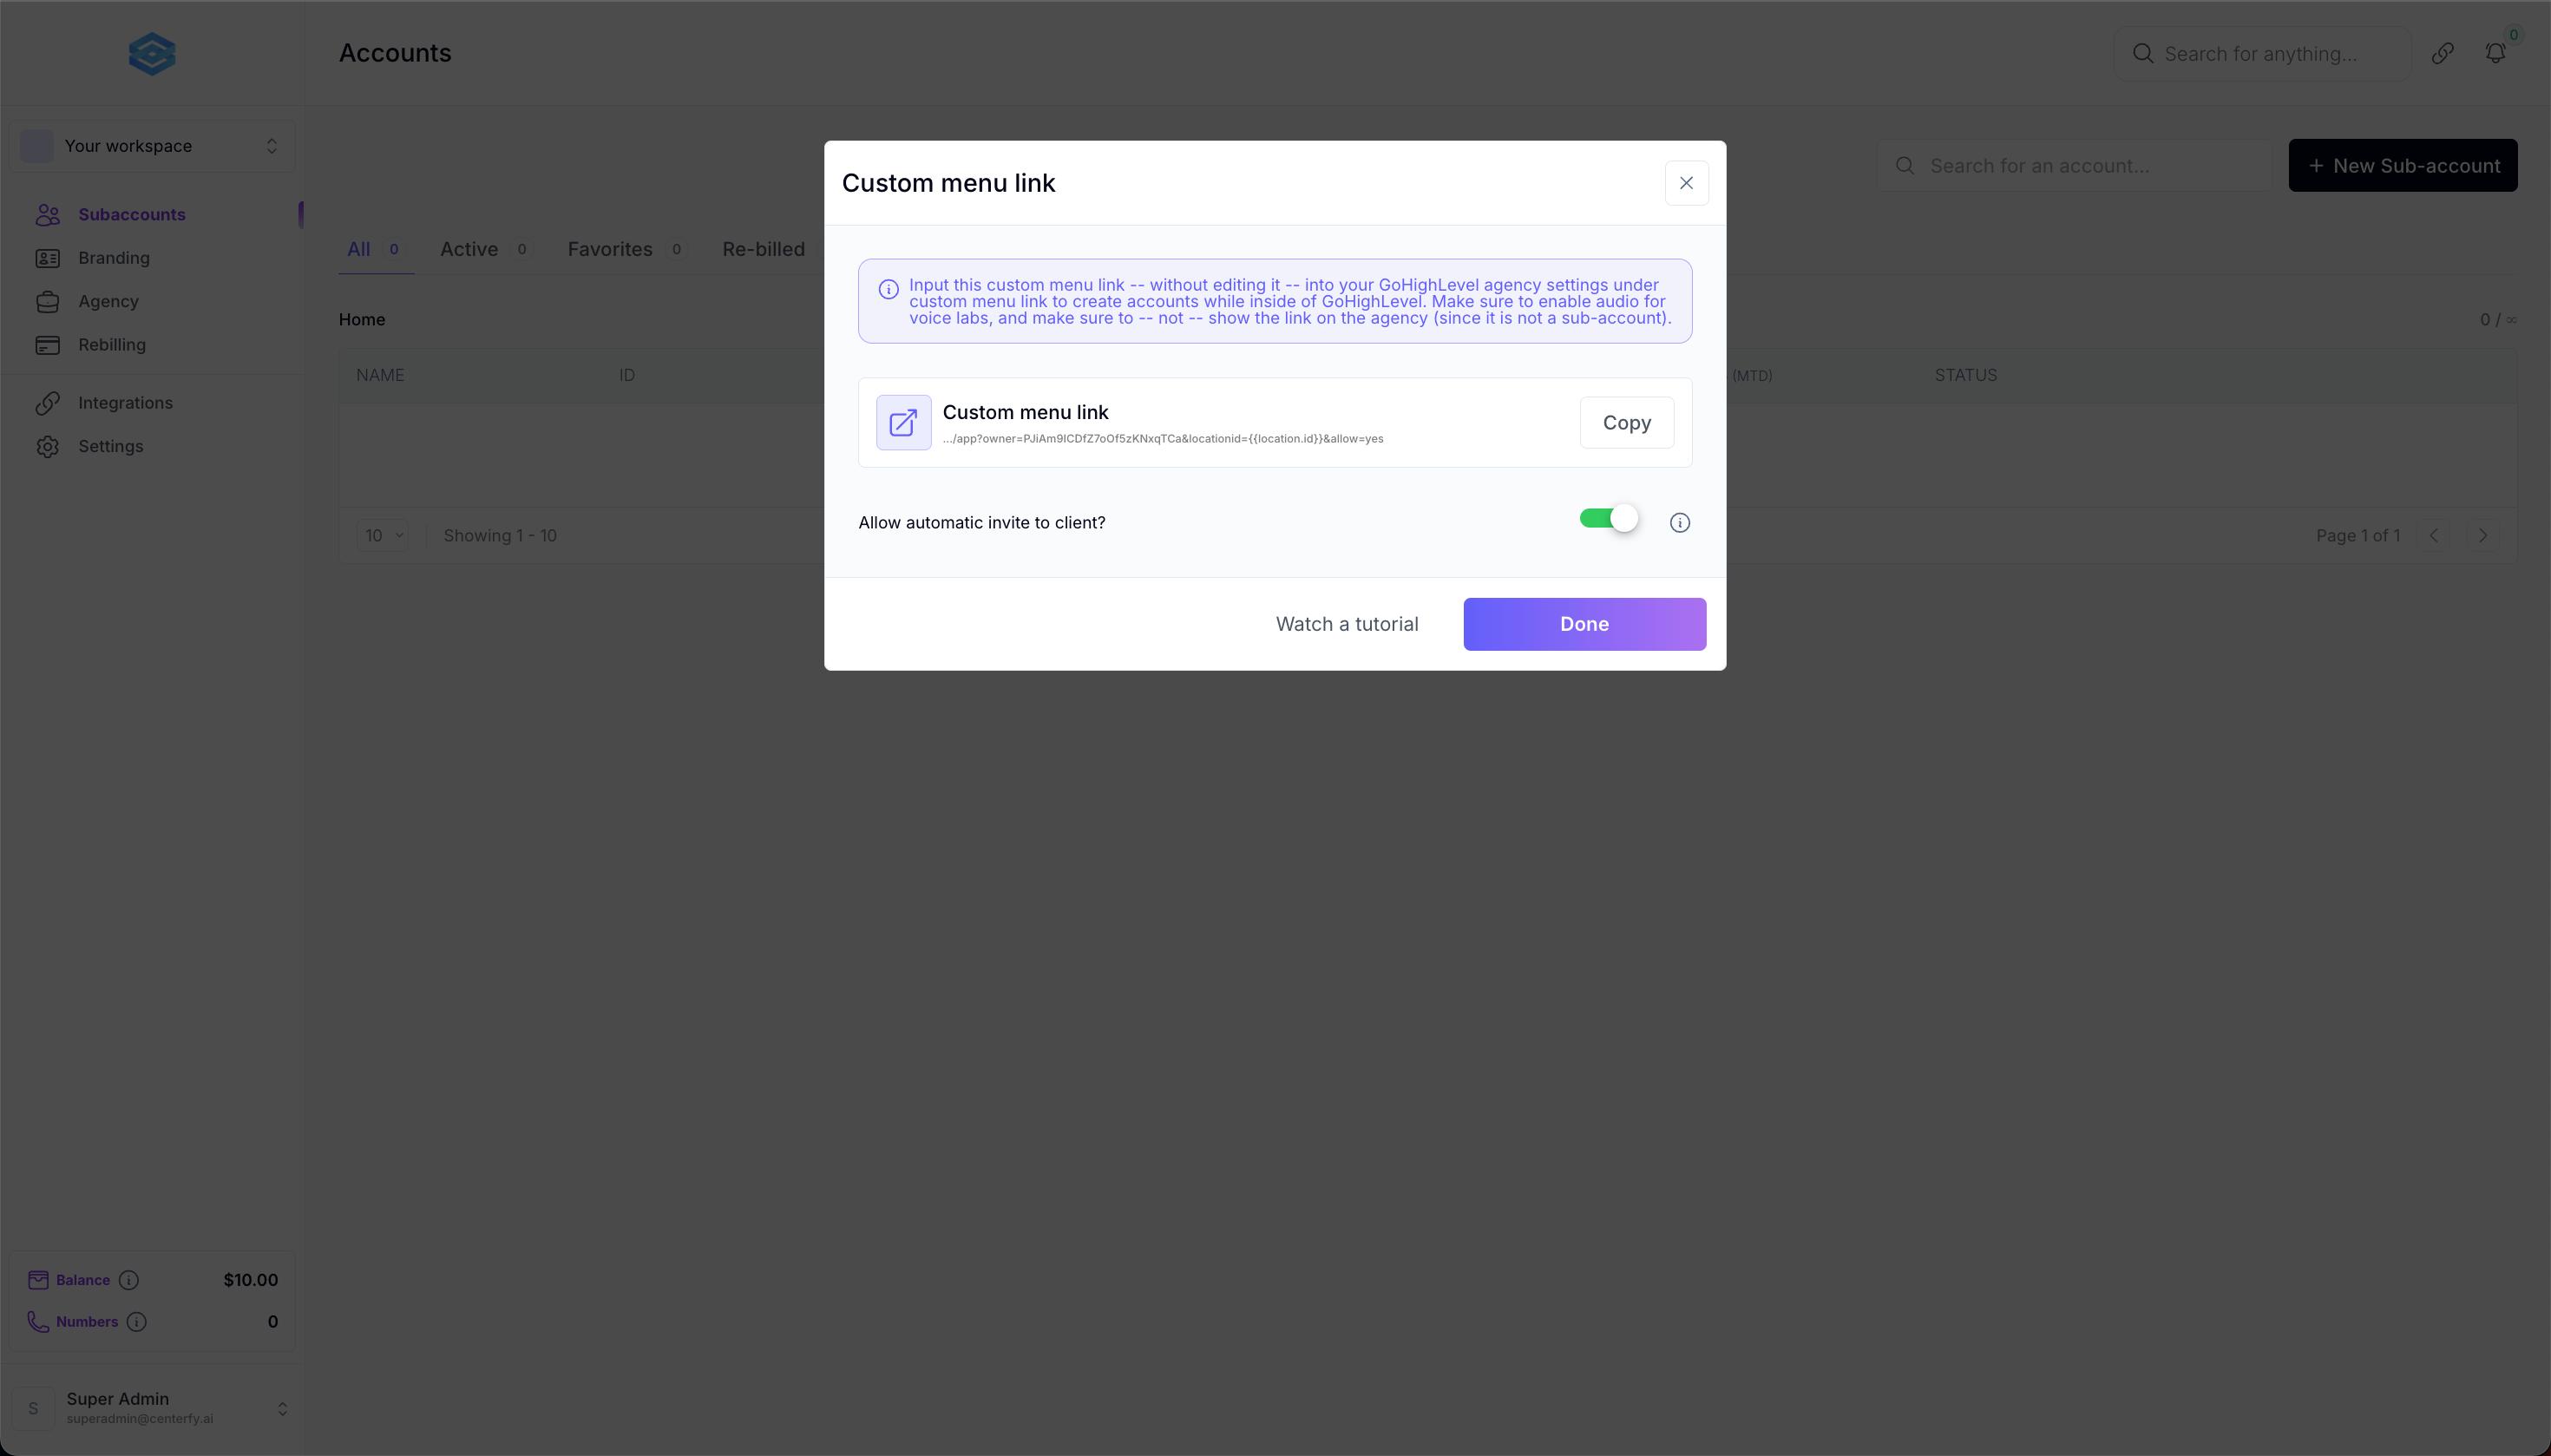
Step 2: Go to Subaccounts then click on "+New Sub-account" then Custom Menu Link.

This pop up will appear.
1. Make sure to turn on "allow automatic invite to client"
2. Copy Custom menu link
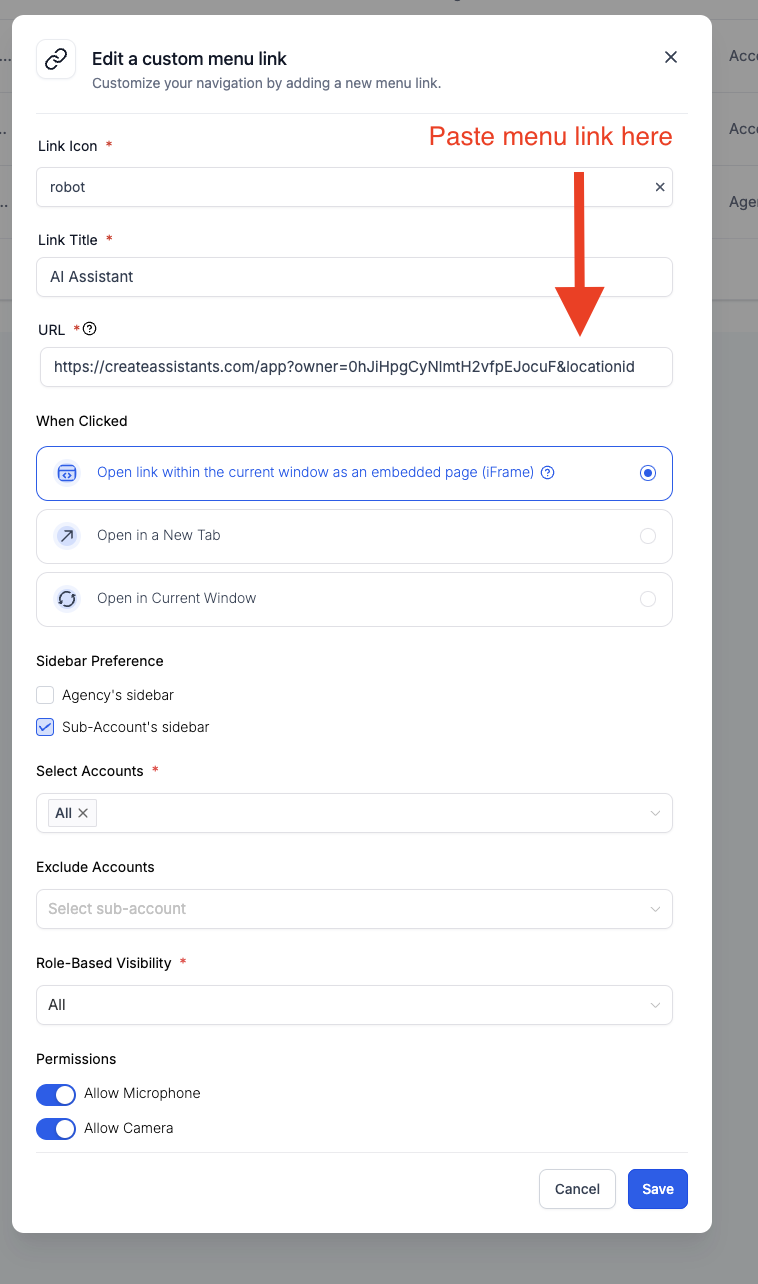
Go to Client's GHL Agency > settings > “Custom Menu Links section”
Click “create new”
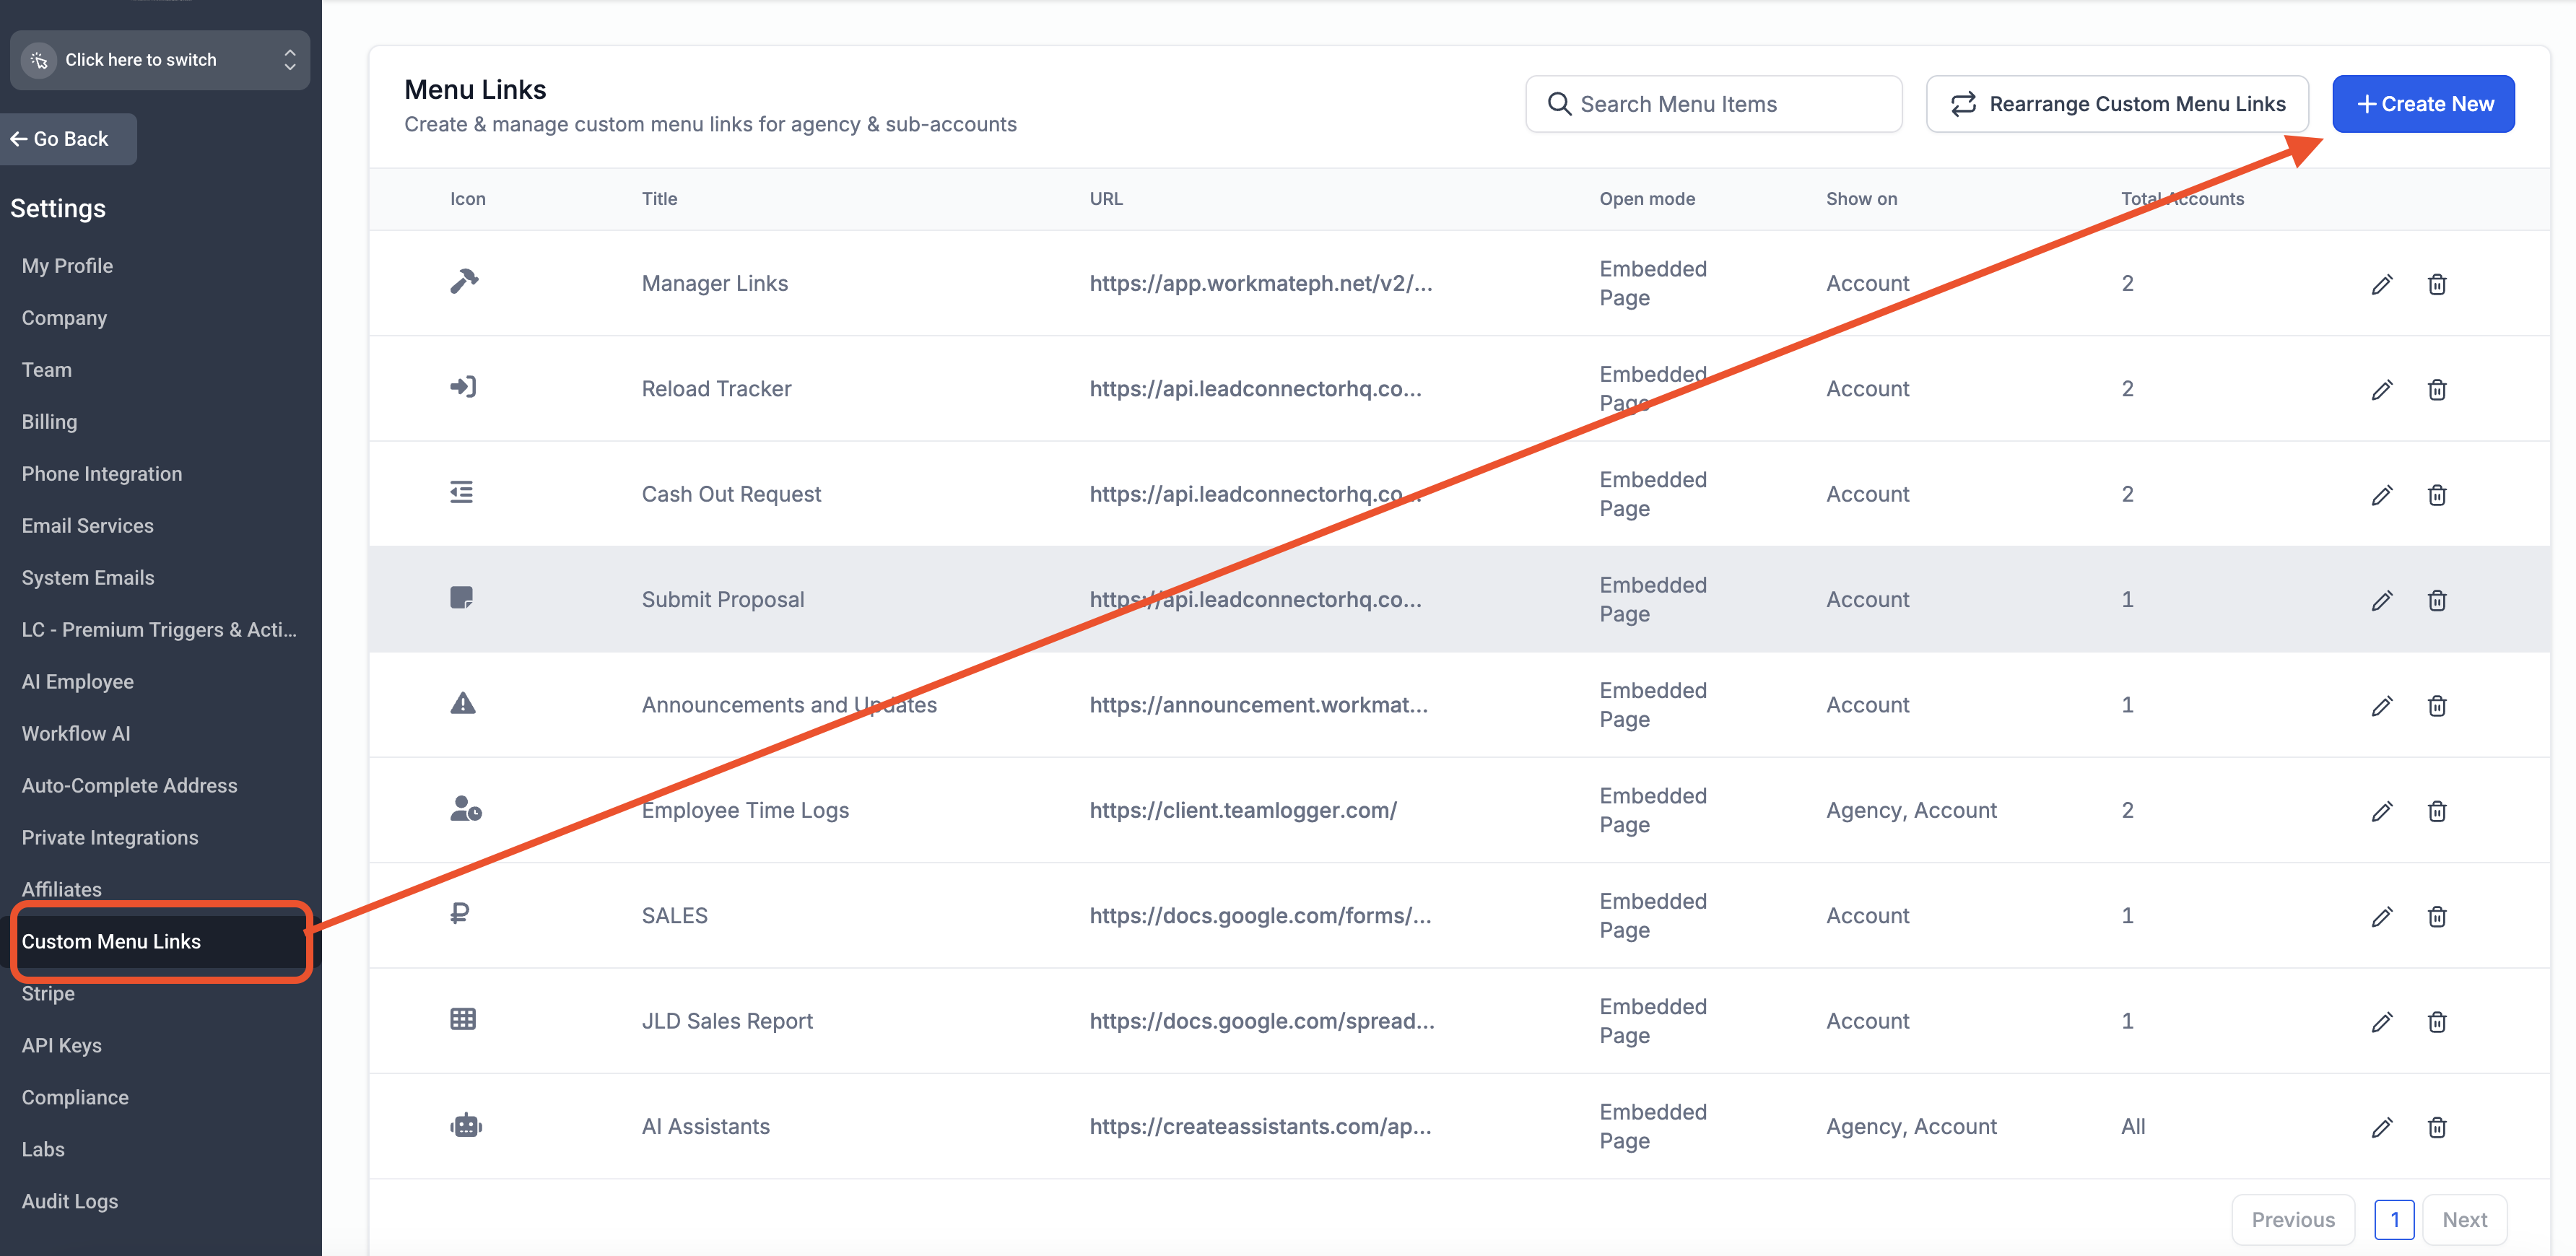
‼️‼️ Make sure to create custom menu links for:
Whitelabel SOP: https://app.gohighlevel.com/v2/preview/WH3u2ueVTpj9naQtJHq9?notrack=true
AI Assistant Training: https://hub.centerfy.ai?sessionKey=&&redirectUrl=courses/library-v2
Script: "I'm creating these menu links for your resources in case you forget the whole process of how I set your accounts up. You can always refer to these links."
STEP 4
Import Centerfy Master Snapshot
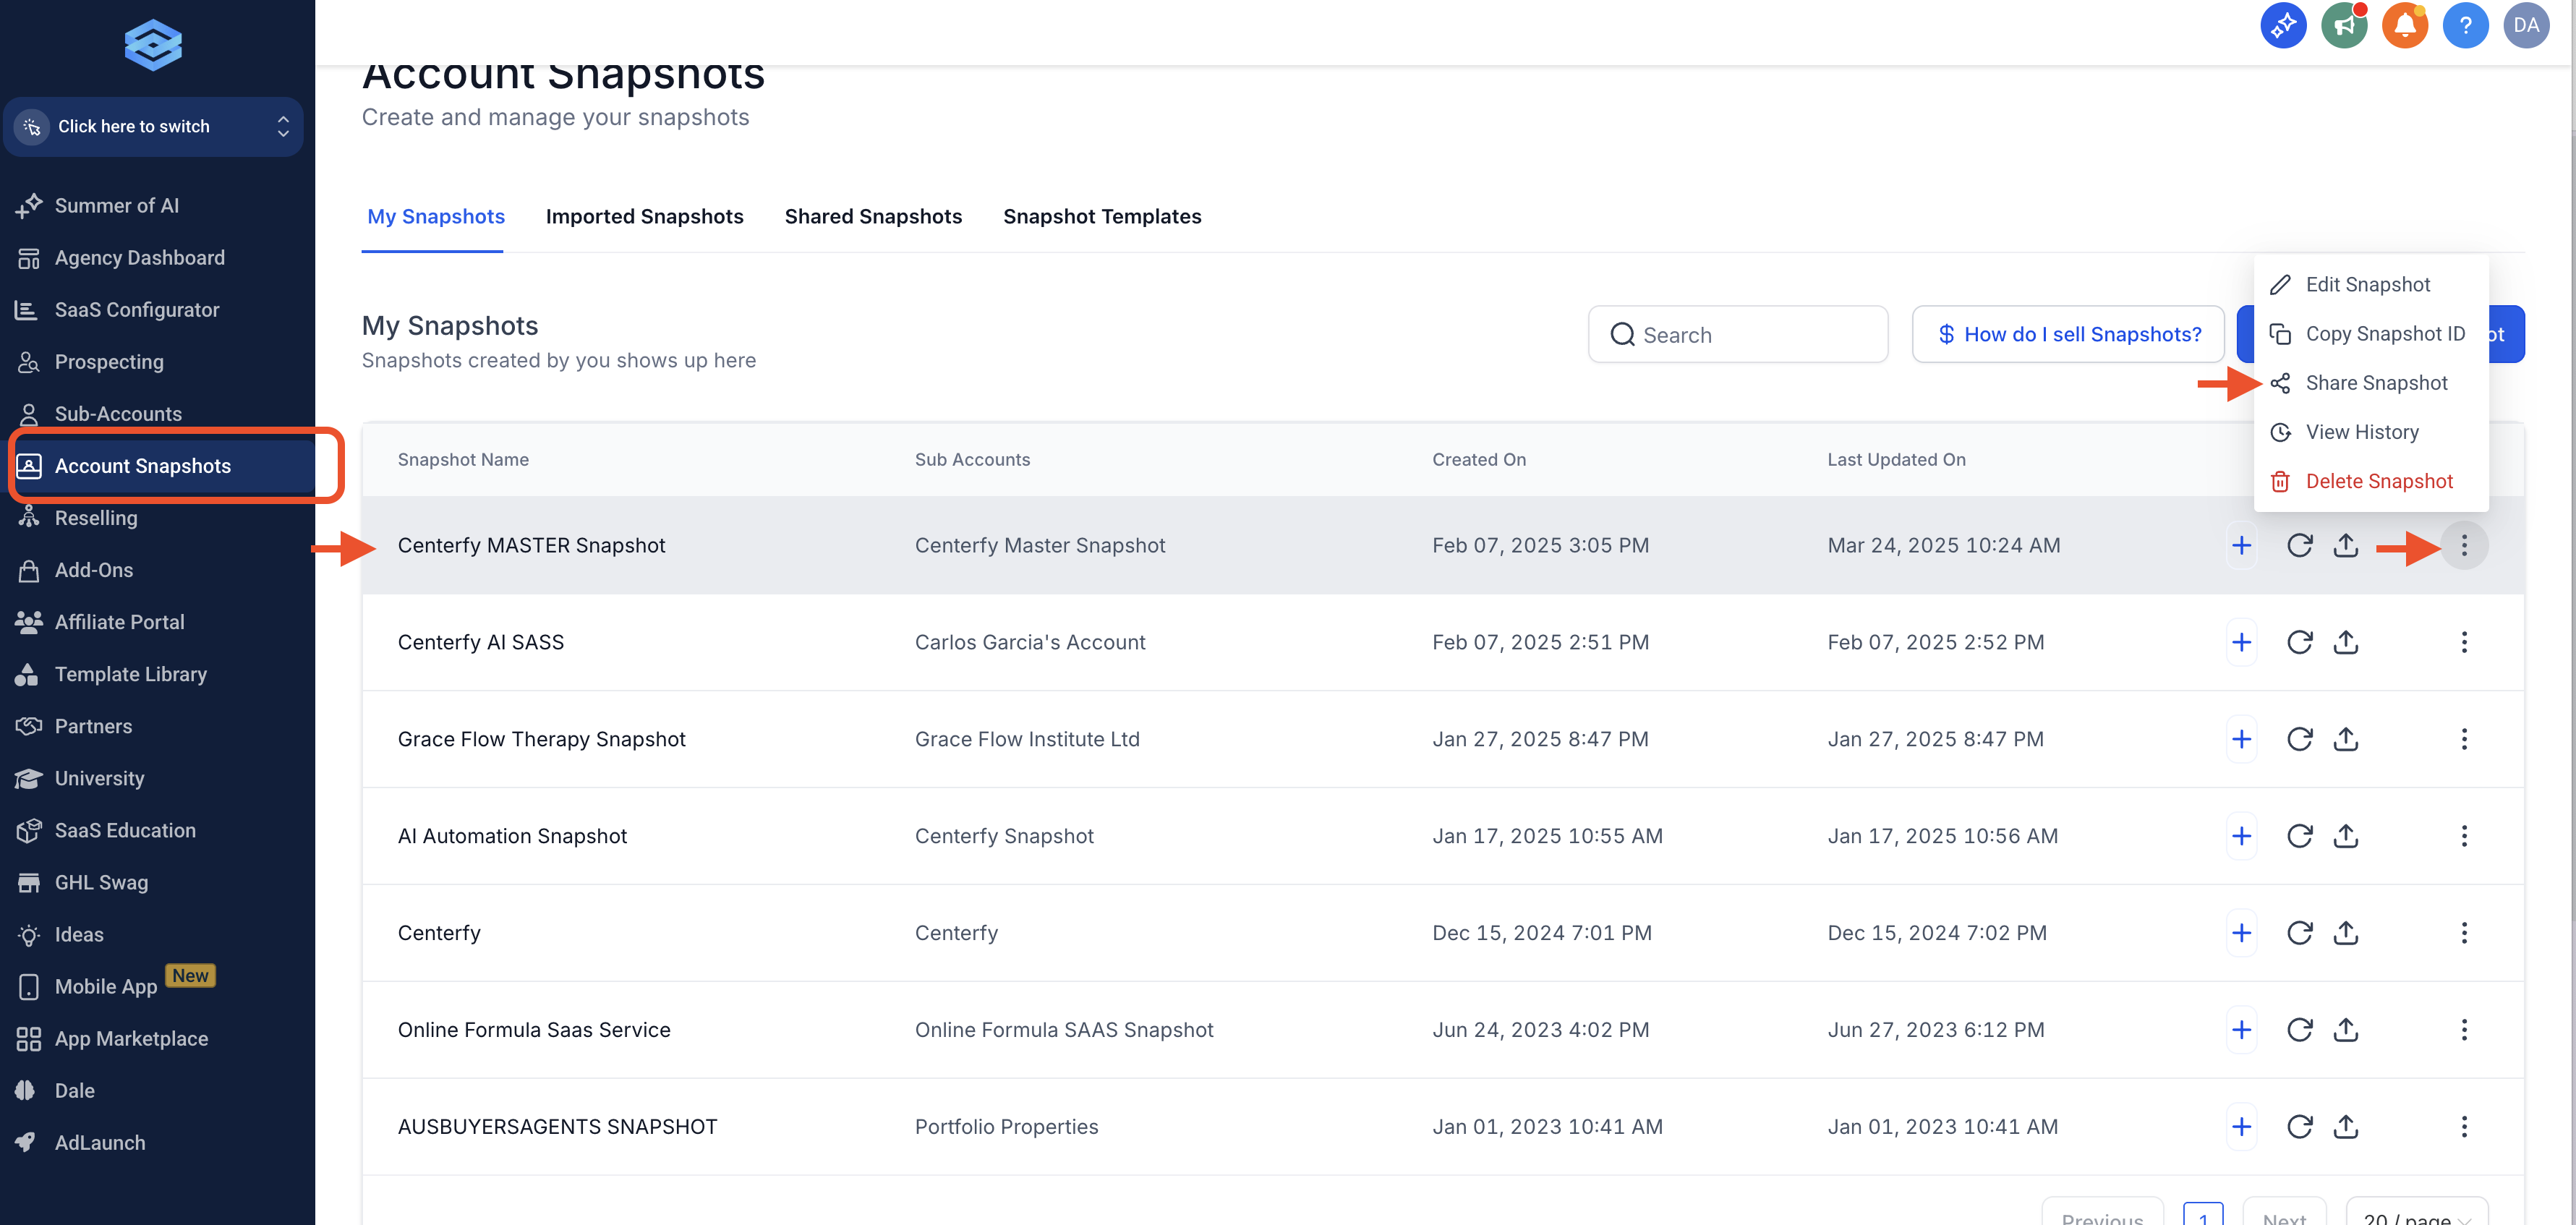
Go to Centerfy's Agency View
1. Click on Account Snapshots
2. Locate Centerfy Master Snapshot
3. Click 3-dots
4. Share Snapshots
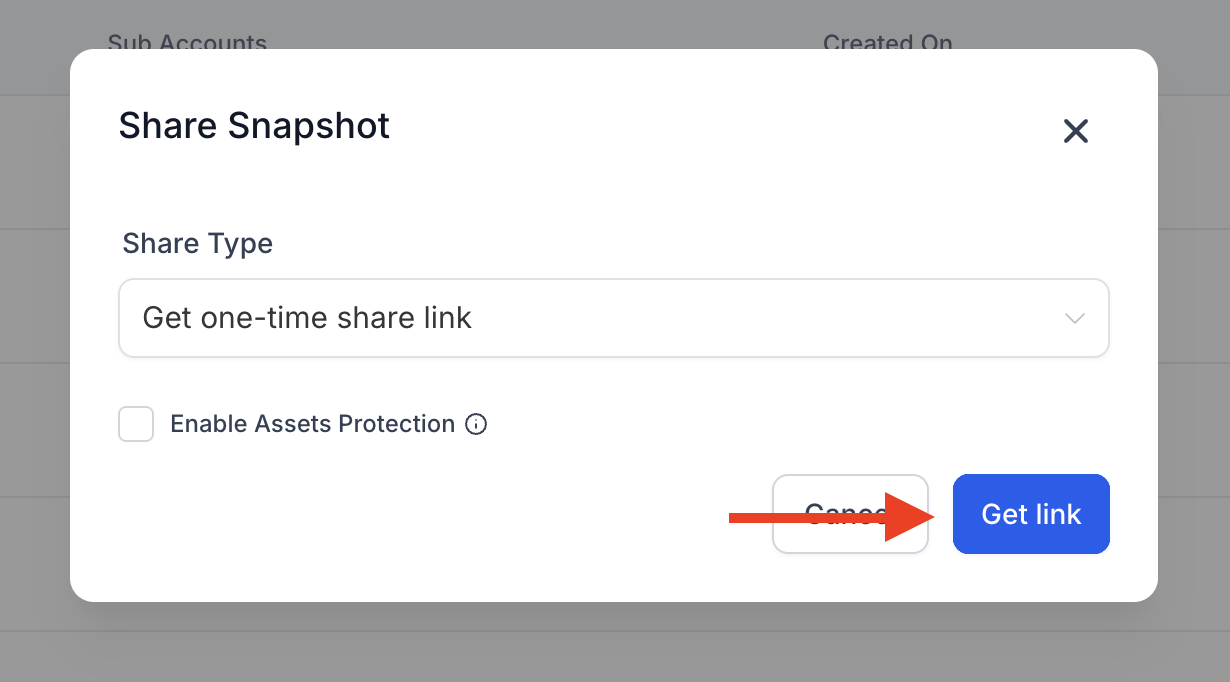
Make sure to follow the steps below:
1. Select "Get one-time share link

Click on "Get Link"
Copy the link.
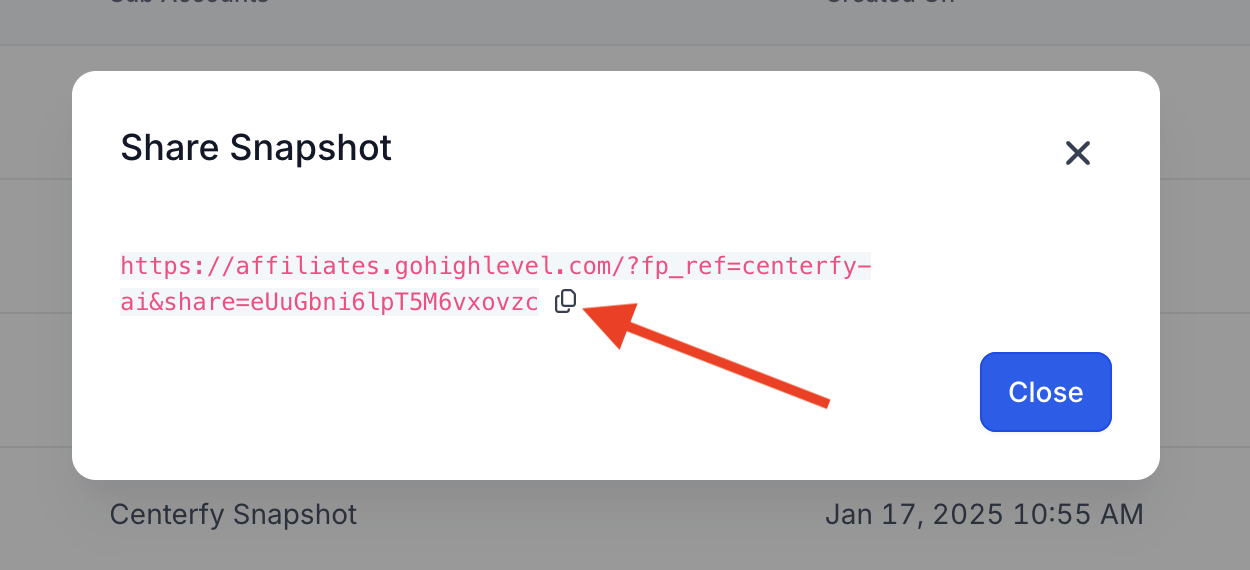
IMPORTANT: Make sure to send this link in Zoom Chat.
Script: I'm sending our snapshot link to the chat. Could you please click that for me?
Once the link is clicked, it will open a new tab then click on "Import Snapshot"
‼️ Make sure to Load Snapshot to client's preferred subaccount. They can later on decide to import the snapshot on the subaccounts that they want to implement the AI System.
STEP 5
Connect Open AI API:
1. Visit: https://auth.openai.com/log-in
2. Create a API key and insert into the workspace.
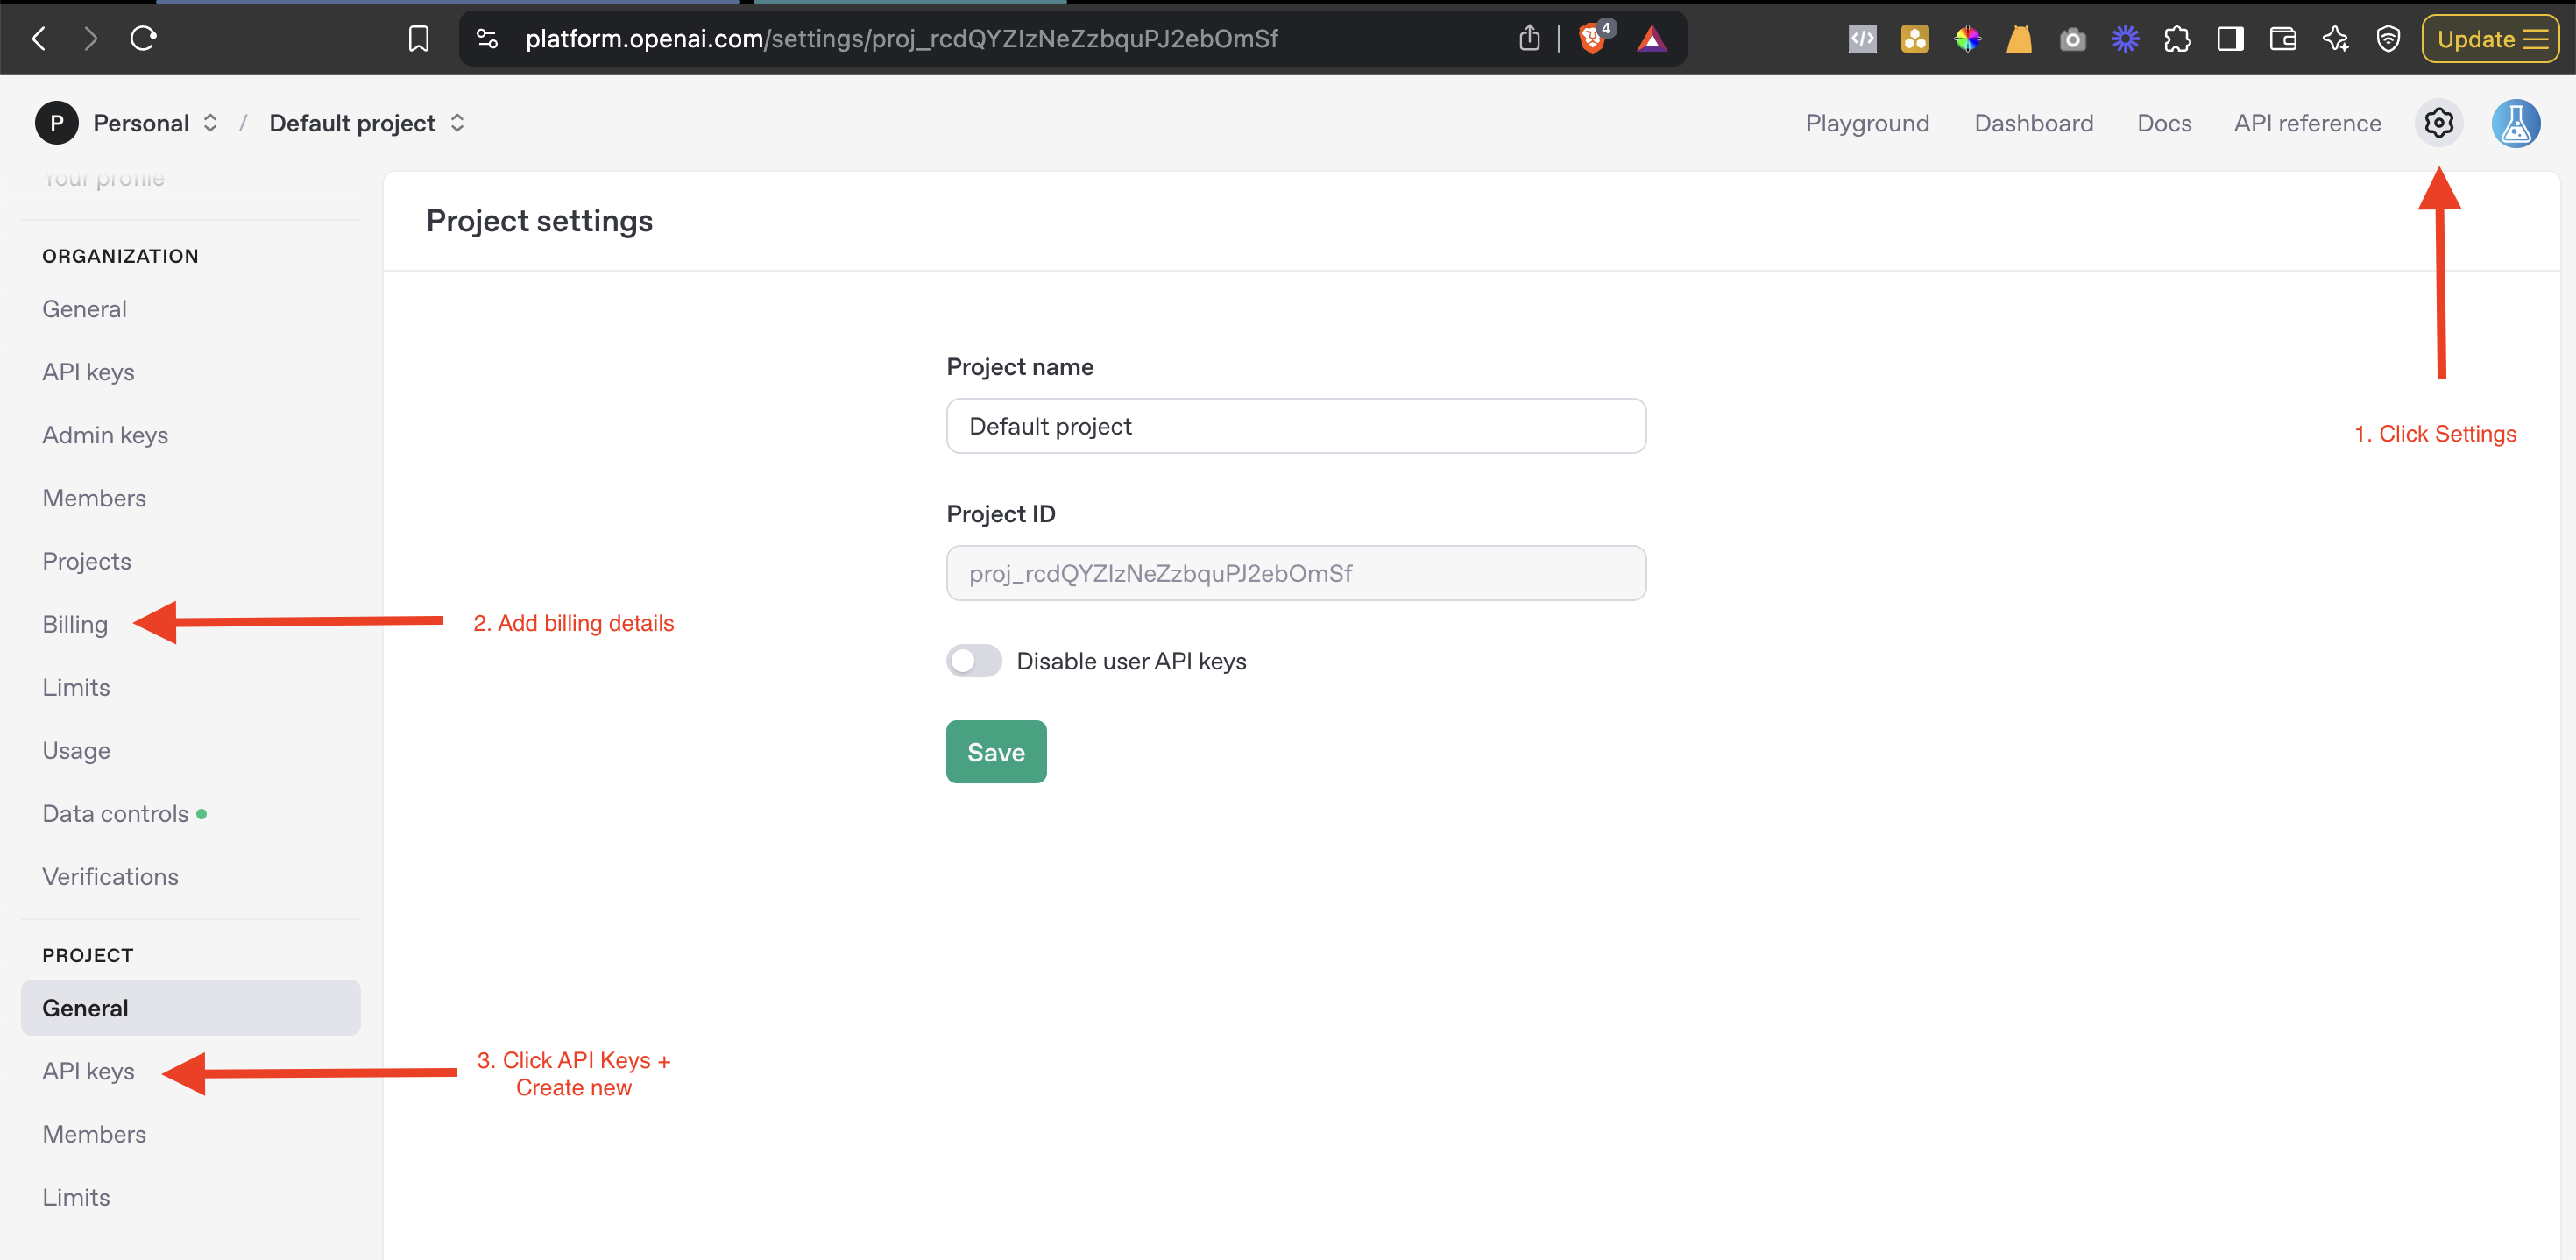
Make sure to paste the API key under the OpenAI Integration in the workspace.
Make sure to add credits in their OpenAI Account + select auto top up to avoid errors. If it has no balance, Livechat and Non-voice communication will not work.
STEP 6
BREAK STRIPE CONNECTION & RECONNECT