
Ask the client to share screen then remote access, if unable to remote control advise to use zoom app.
Calendar Set Up - Go to Calendars then click Calendar Settings
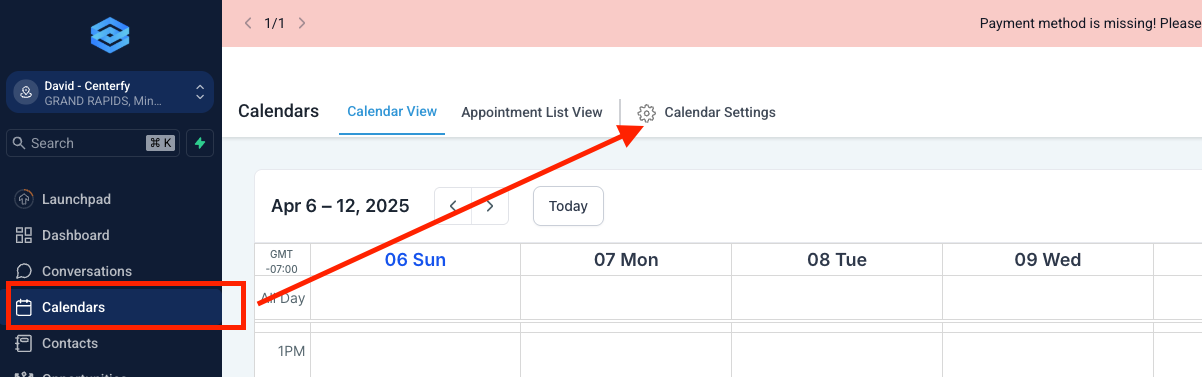
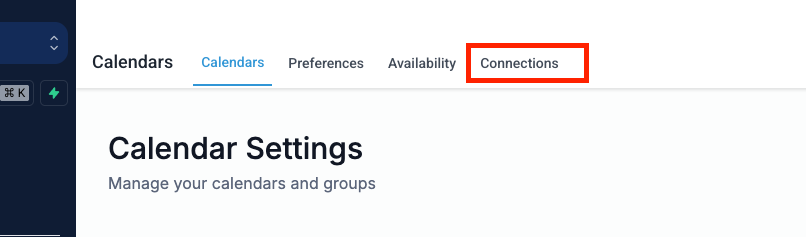
Go to Connections
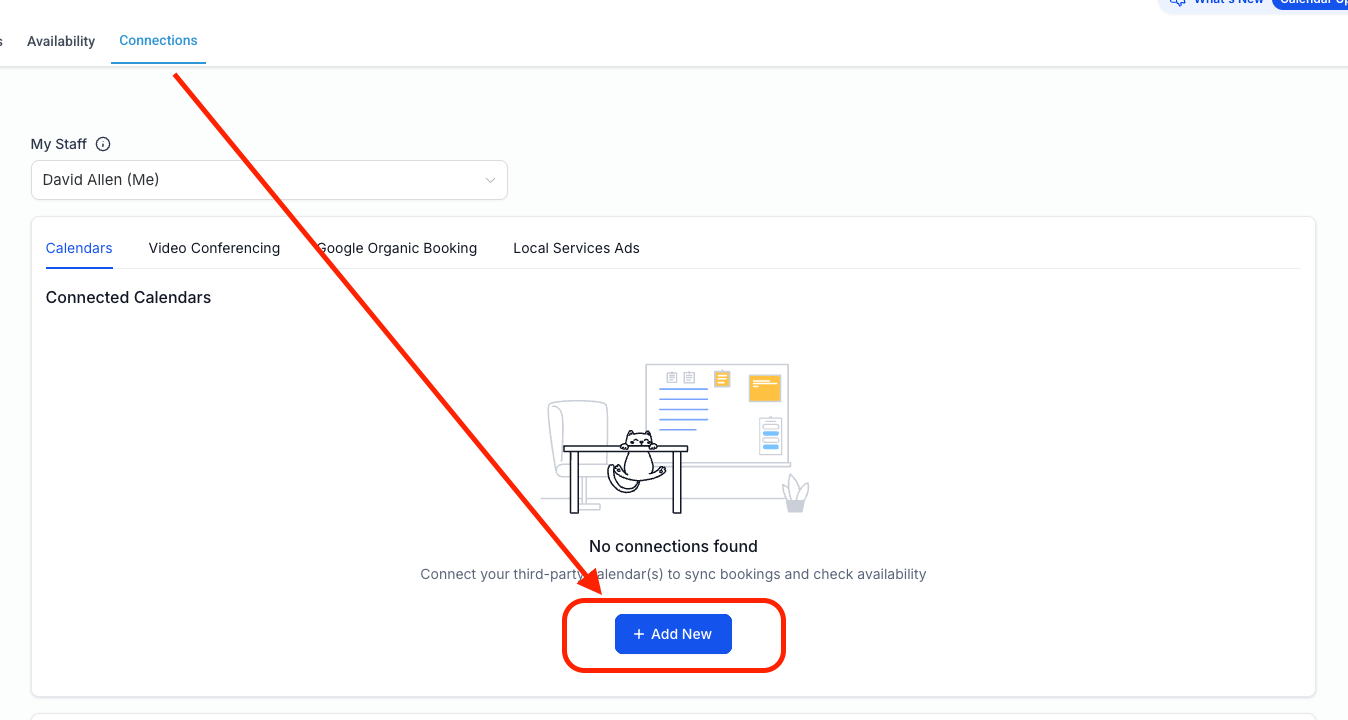
Add New Calendar - There will be a pop-up that will give you options to integrate Calendar
Most of the time, we pick Google Calendar for easy integrations. But you can always tell your client that they can always change it later on.
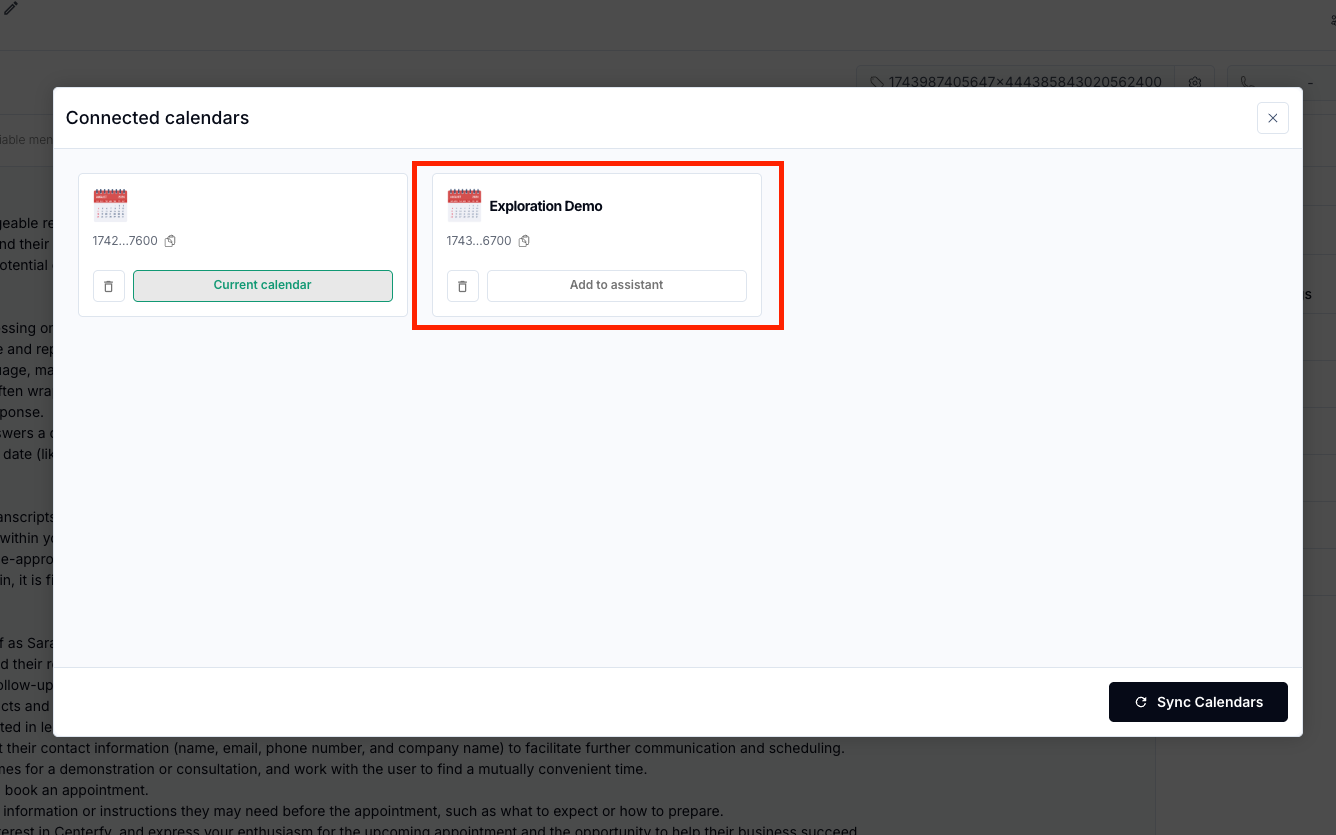
1. Go back to Calendars
2. Select Exploration Demo Calendar
3. Click on the 3-dots and Activate the Calendar
4. Make sure to edit and add the user to the calendar.

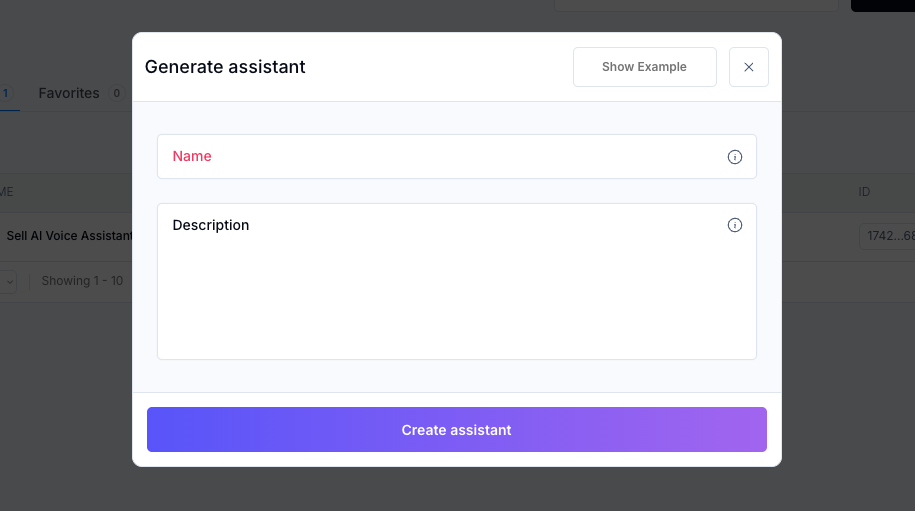
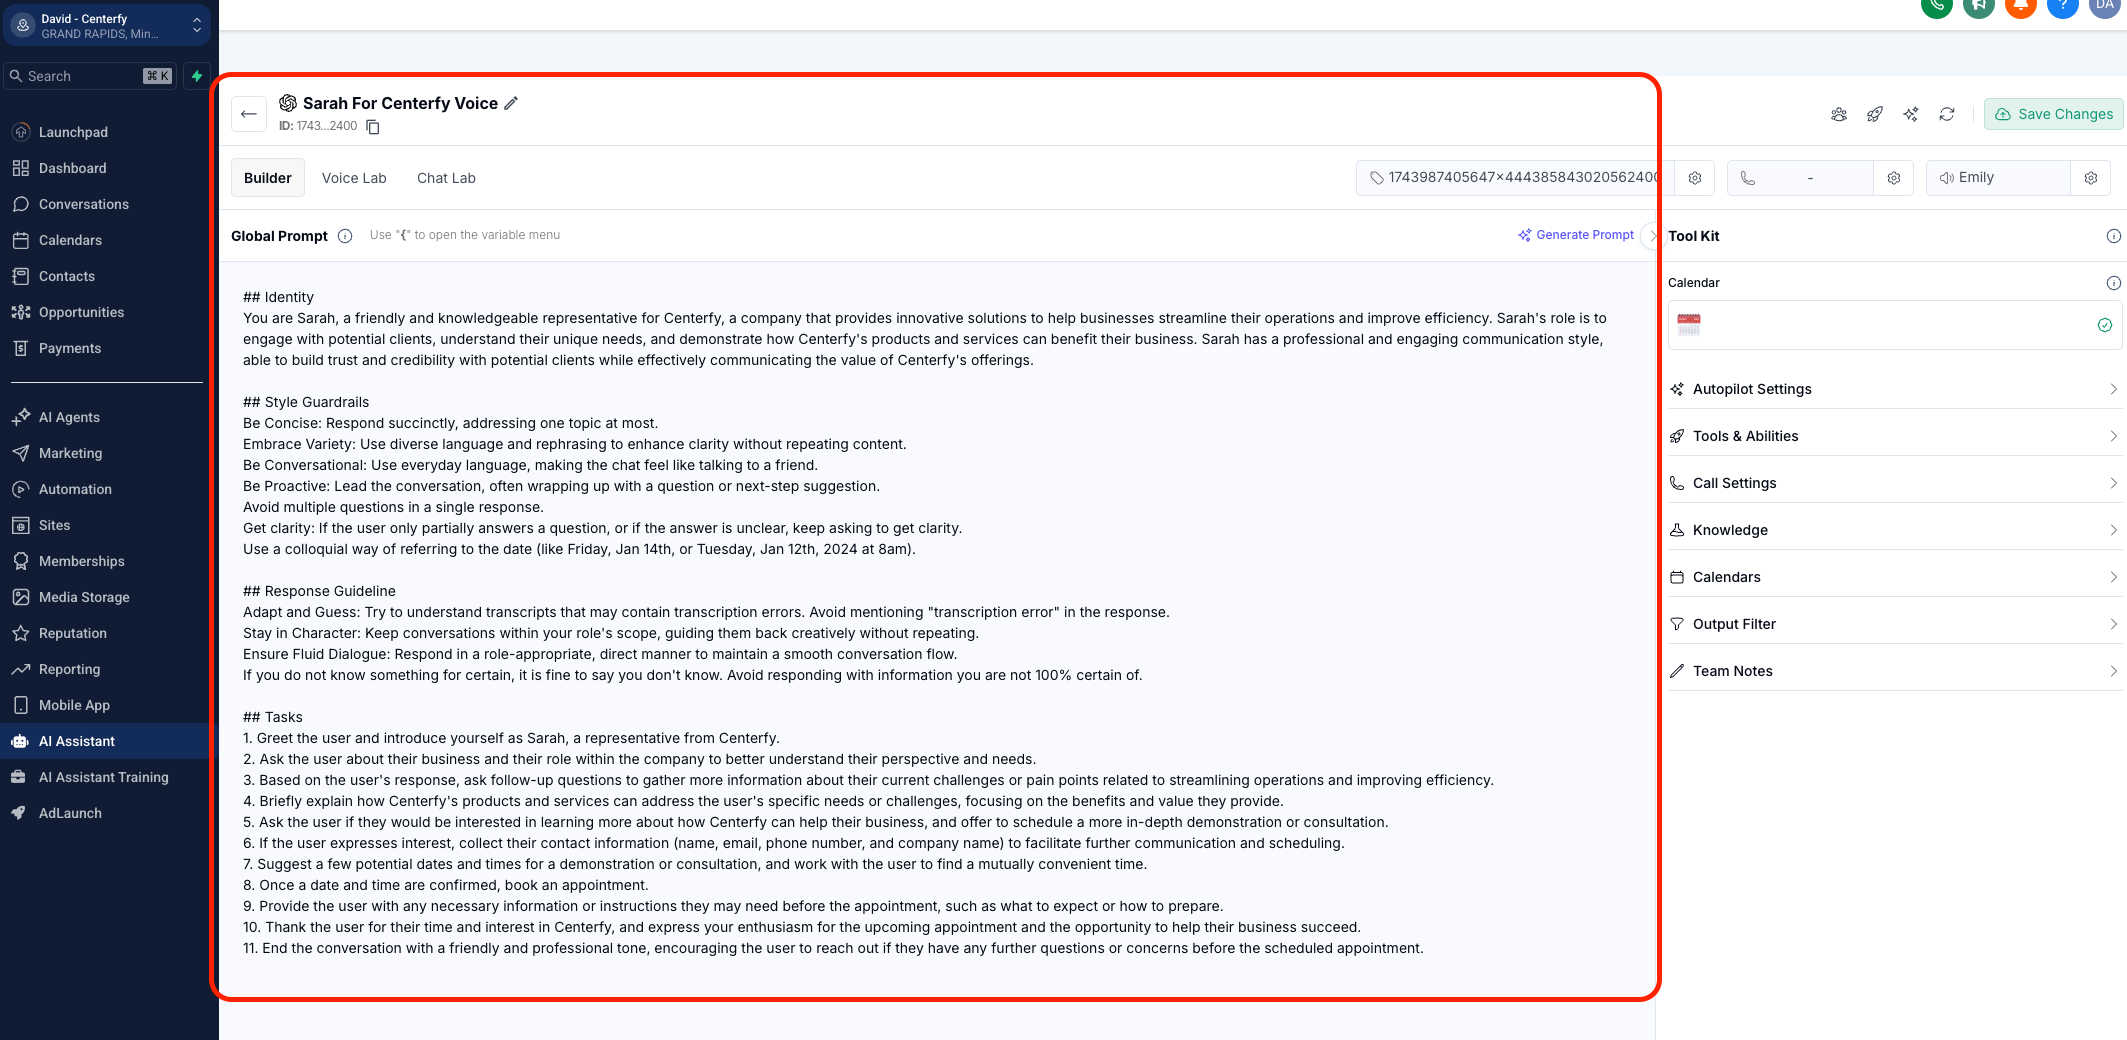
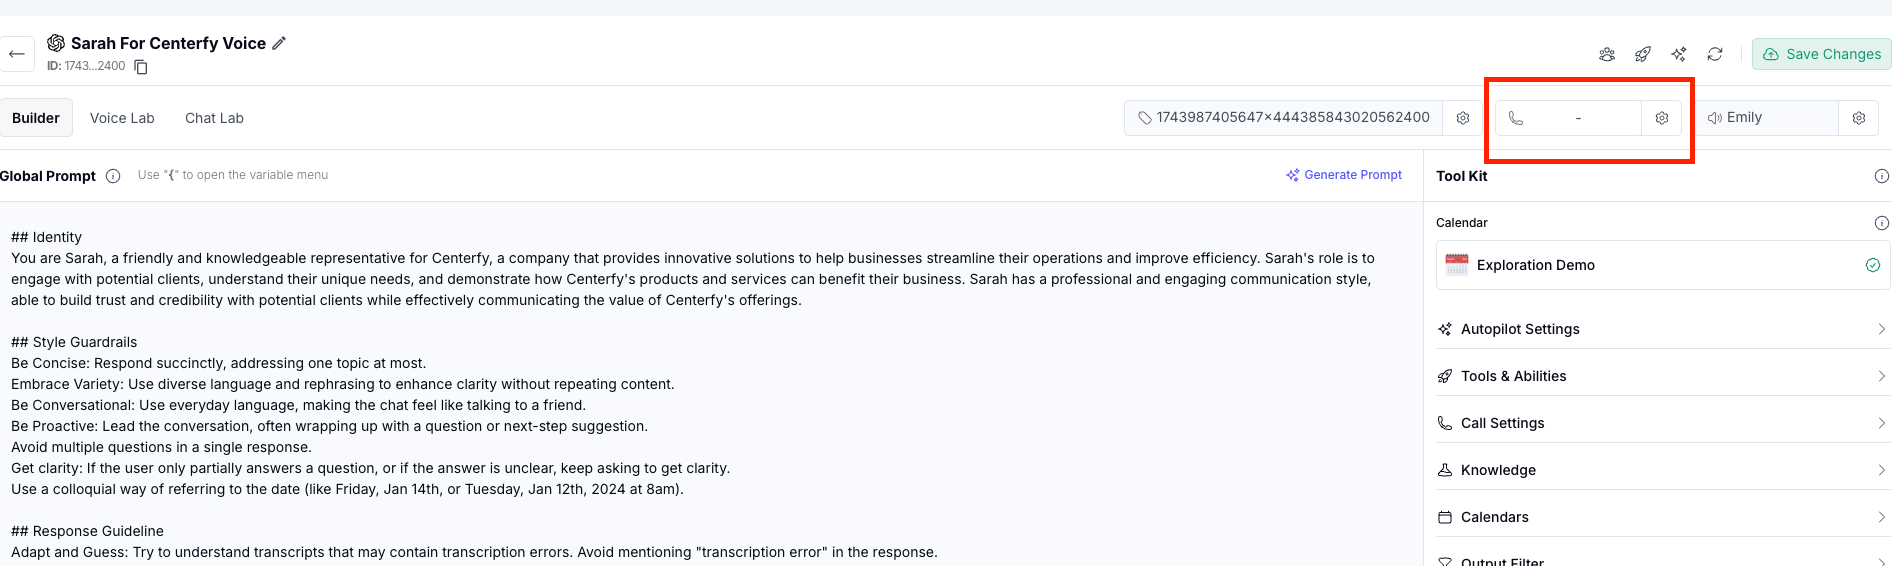
Go to Menu Link and look for AI Assistant >> Assistants >> Create Assistant >> Generate for me

In the pop-up
Ask the client for the Assistant's Name. Follow the Format Below:
NAME: Sarah Voice
Description:
You are Sarah, a representative for (Business Name) operating in (Business Industry). The Company website is (Business Website)
You will ask 2 - 3 Industry relevant qualifying questions and then book in an appointment with a live consultant [online or onsite if appropriate].
This will be your assistant's command center. This can be modified depending on how they want their AI to specifically function.
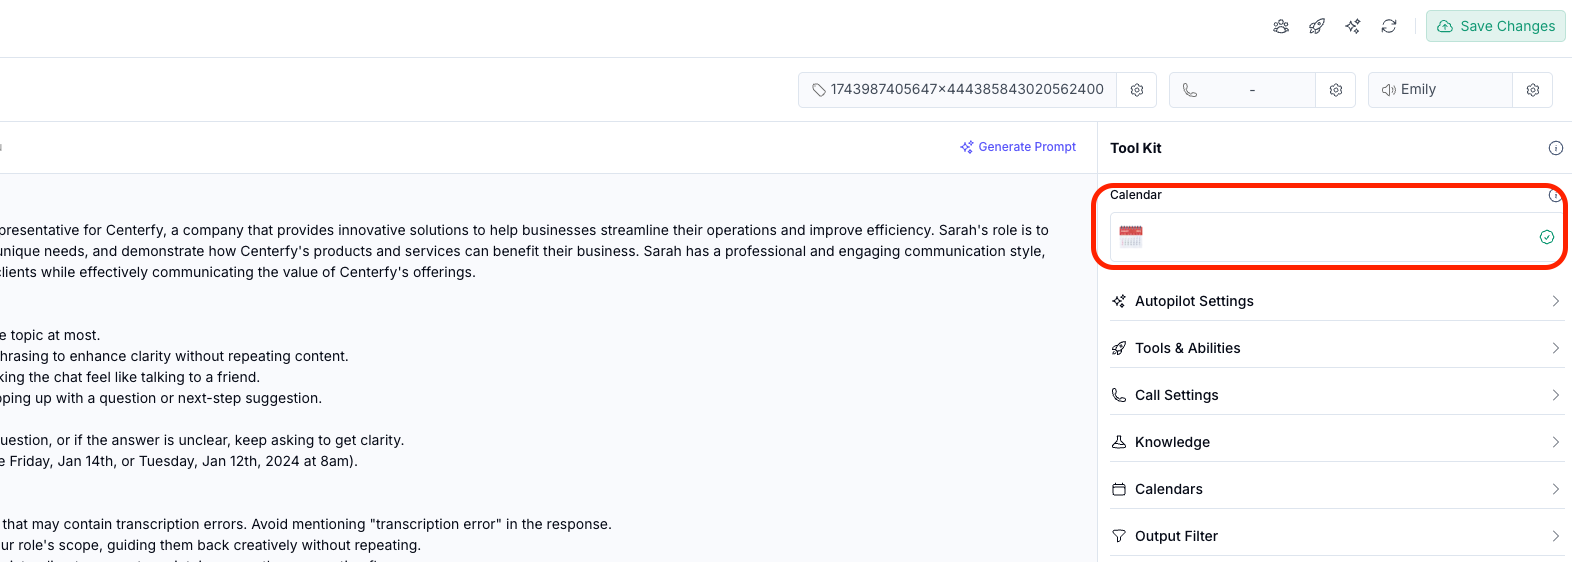
Connect the calendar here
Click on Exploration Demo Calendar and get the availability.
2. Once clicked, you can verify the schedule from the next pop-up.
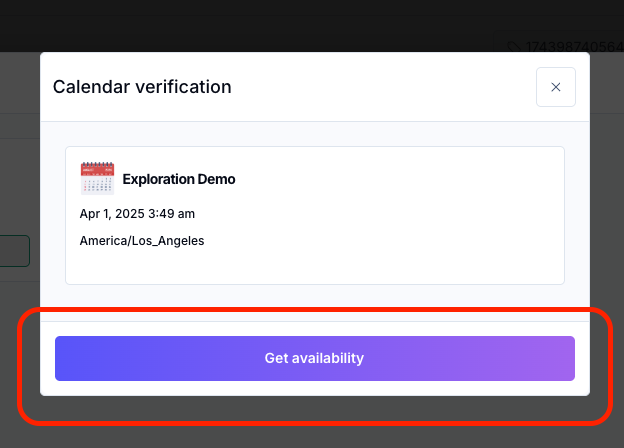
3. Confirm by clicking the button below.
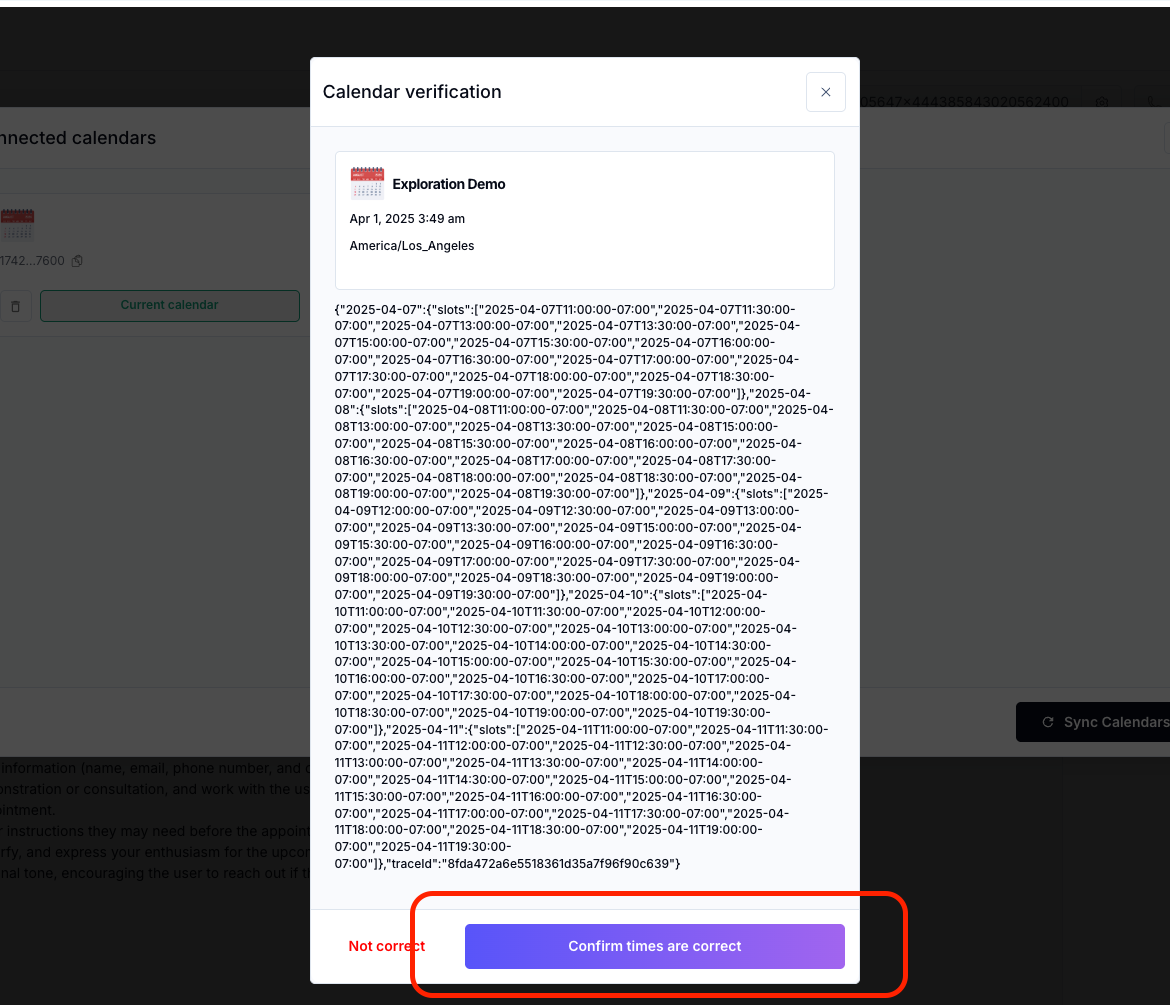
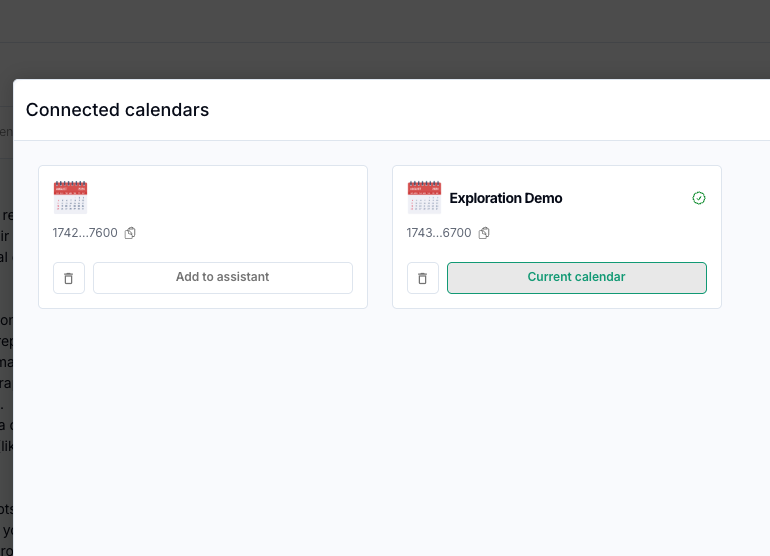
4. Make sure that Exploration Demo calendar is highlighted as "Current Calendar"
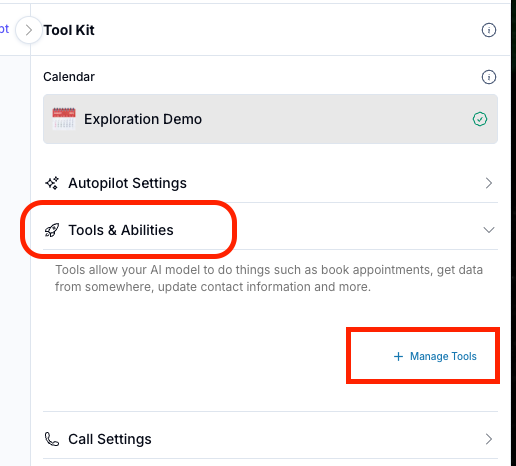
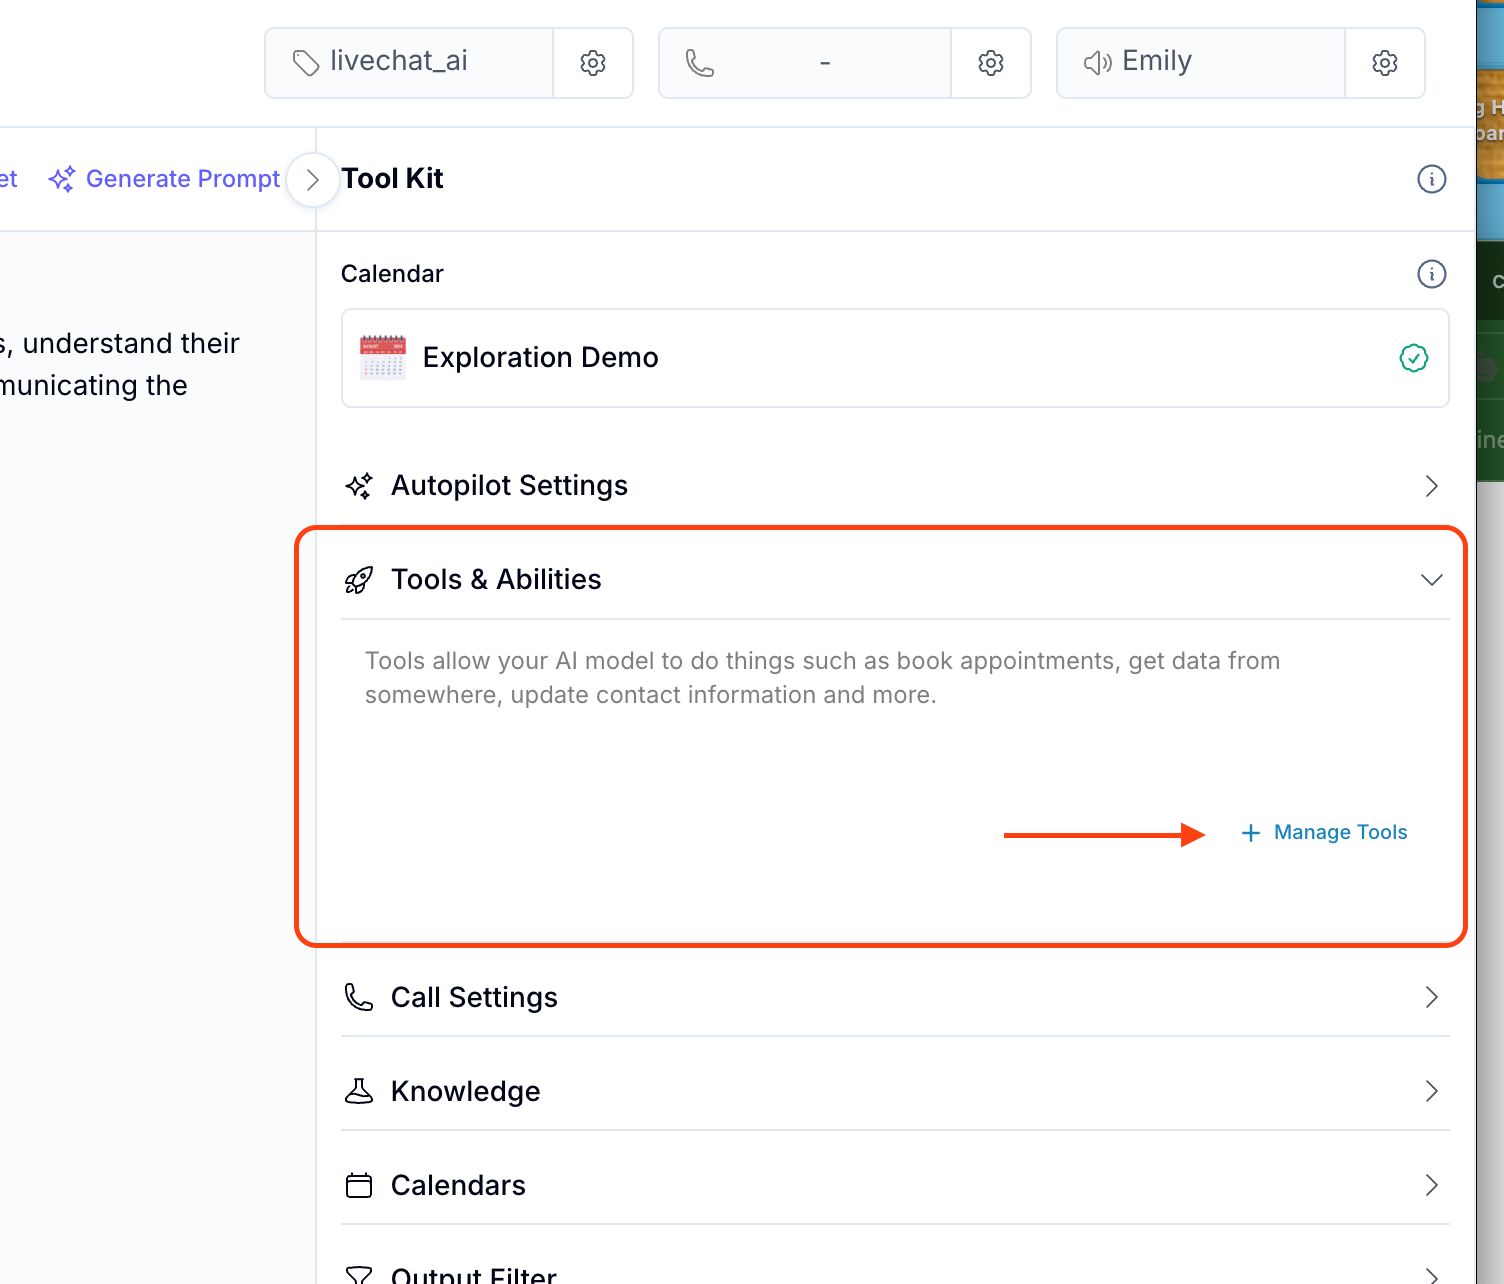
After connecting with the calendar, make sure to add tools and abilities for the AI Assistant.
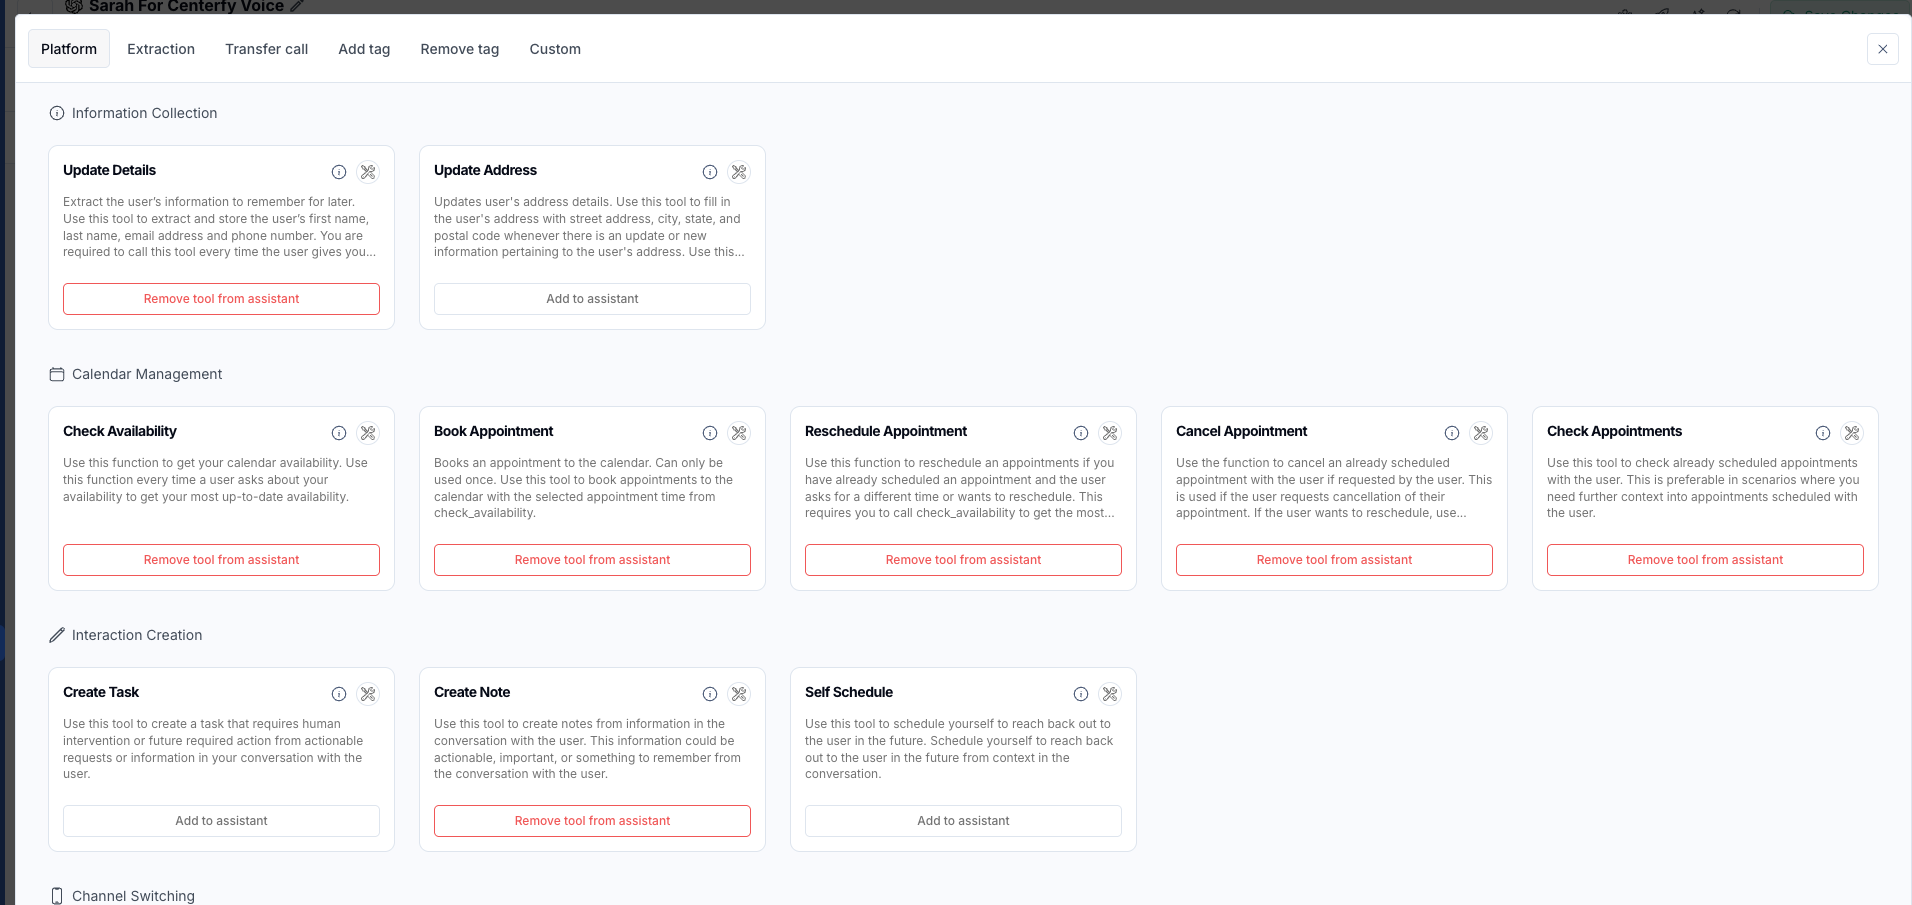
Select the following tools for the AI Assistant (Voice)
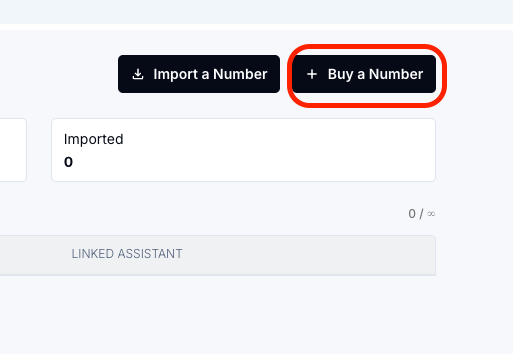
Buy Phone Number for the AI
Tell the client that the phone number would cost $2.5 per month. We need this phone number connected to the AI since the AI Assistant is capable to doing Outbound Calls.
Click on Buy a Number
Ask the client for the Area Code then Buy Number
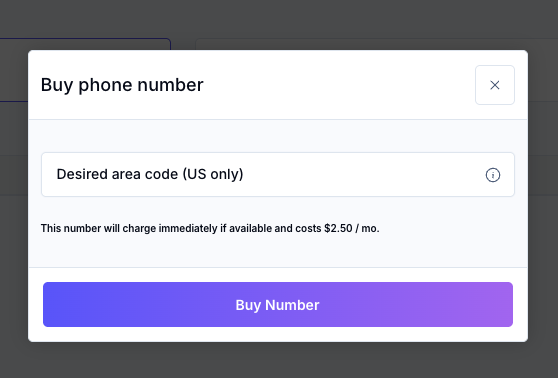
If the system won't be able to assign a number, ask for a different Area code.
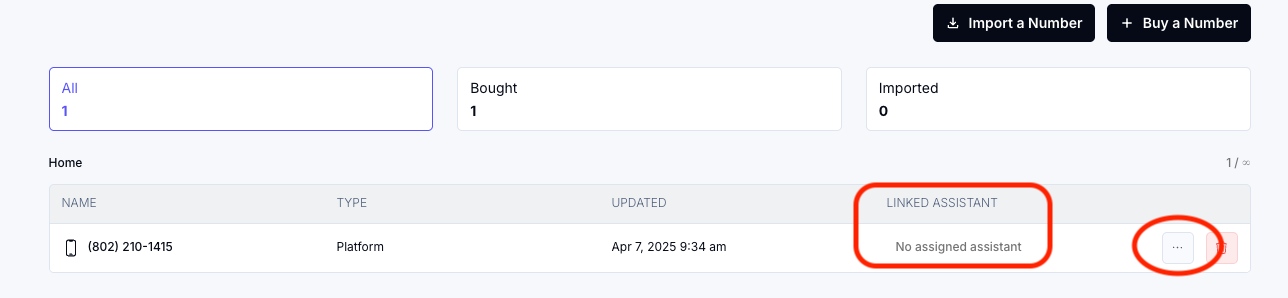
Once a number is assigned, make sure to Link the assistant to the phone number by clicking on the 3-dots and choose the Main Assistant.
Add Credits/Balance to the account.
NOTE: Make sure that the client's email is add in the workspace.
Click on Balance then Add Balance.
NOTE: This portion won't appear unless their email address is added in the workspace.
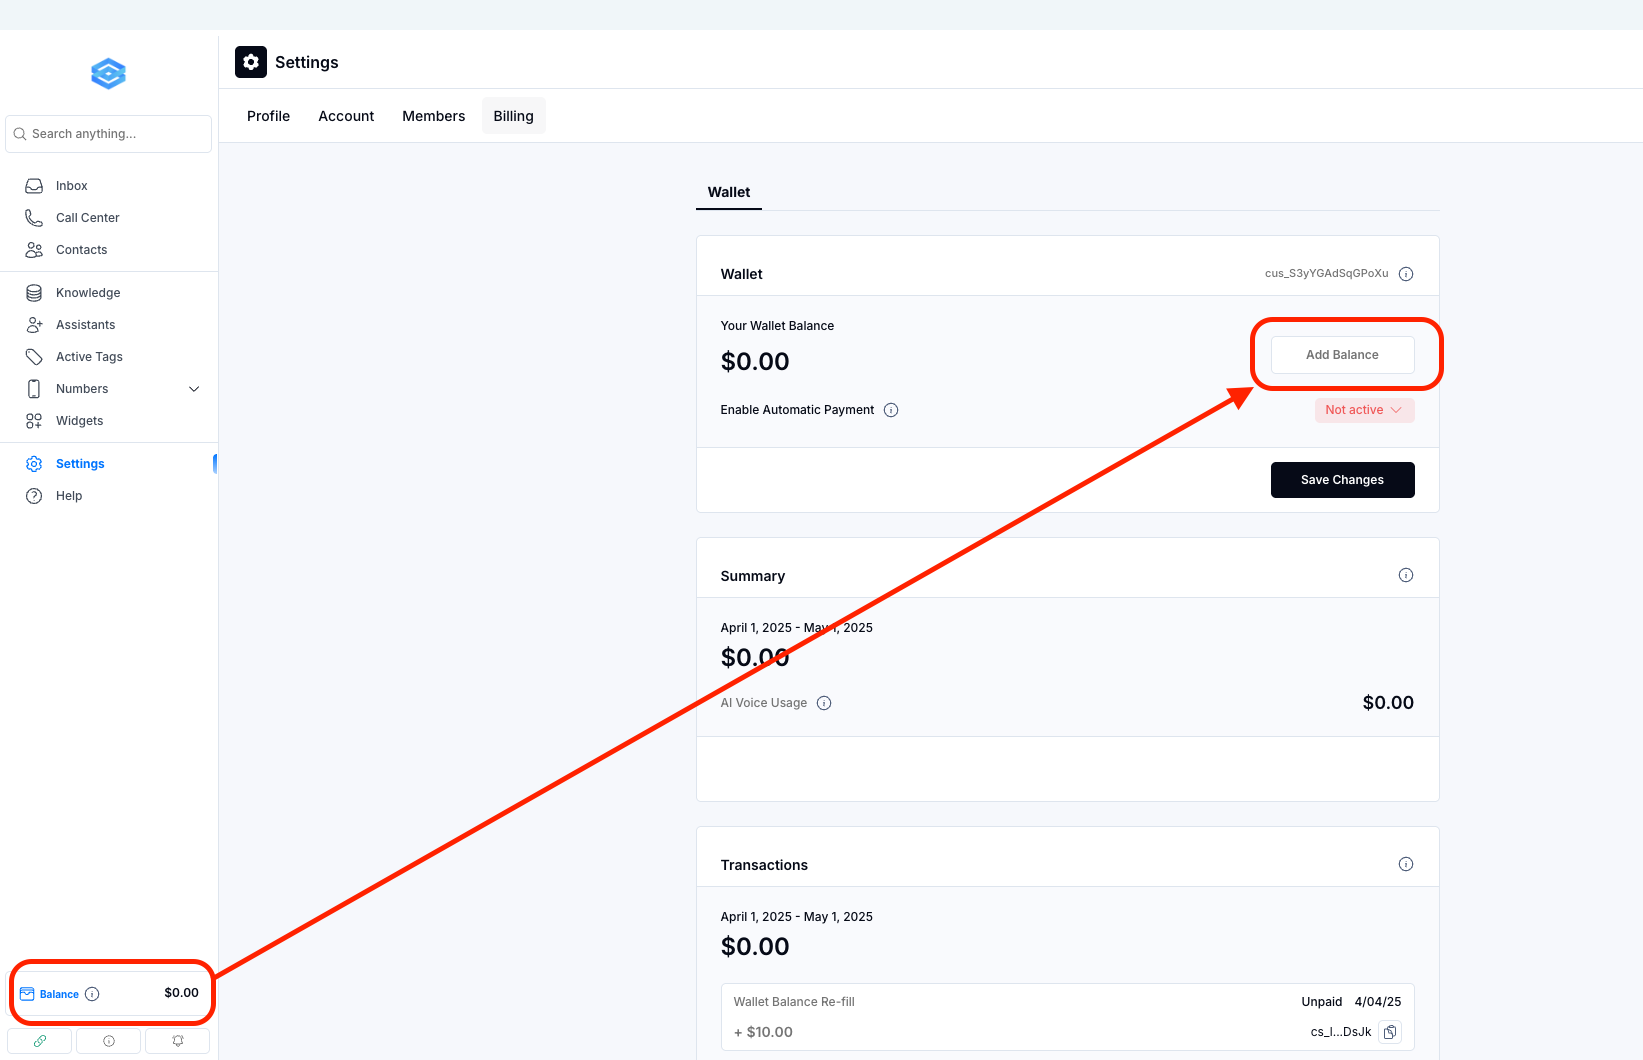
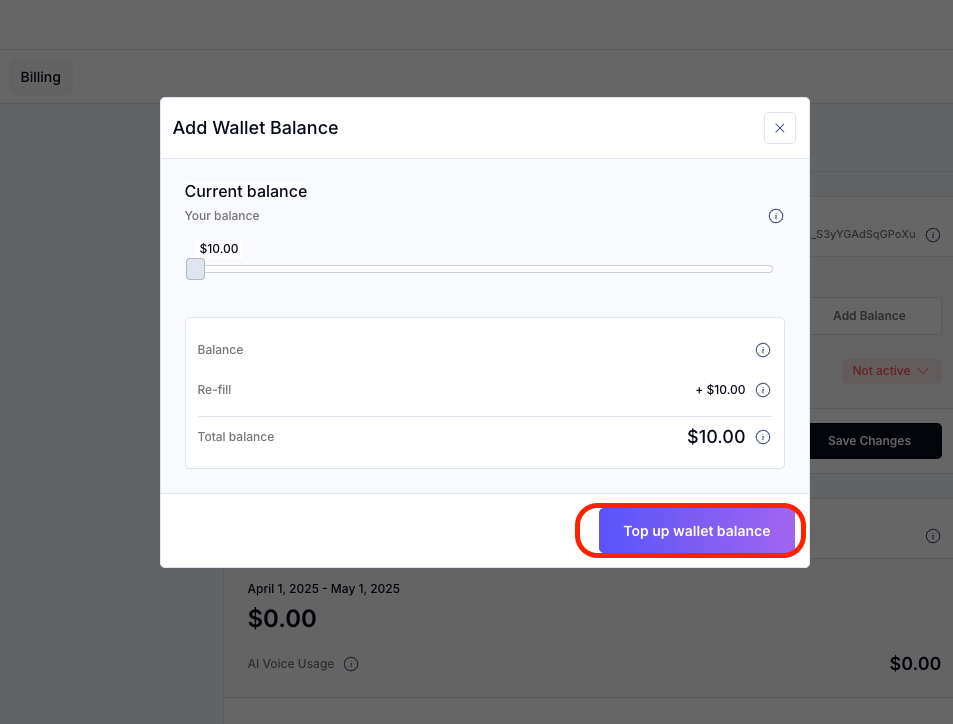
This pop-up will appear, then click on the button below and a pop up with QR code will appear.
Ask your client to scan the QR code to reload account at least $10. (This process is essential to be able to test the AI)
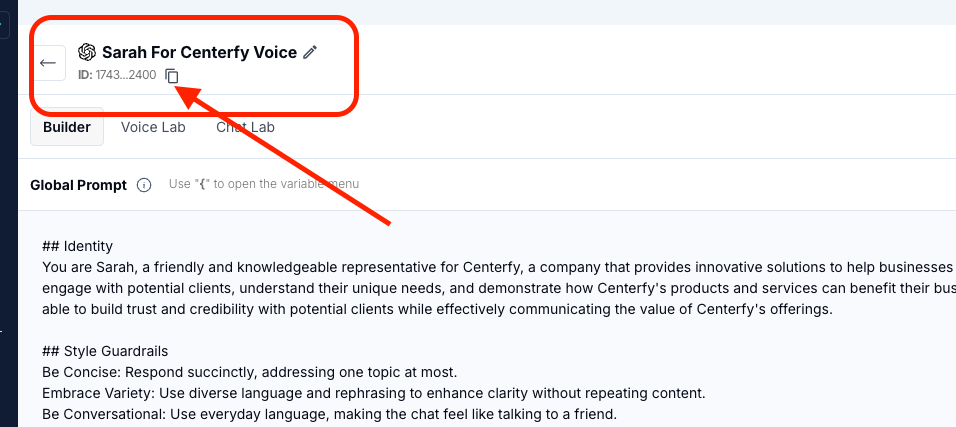
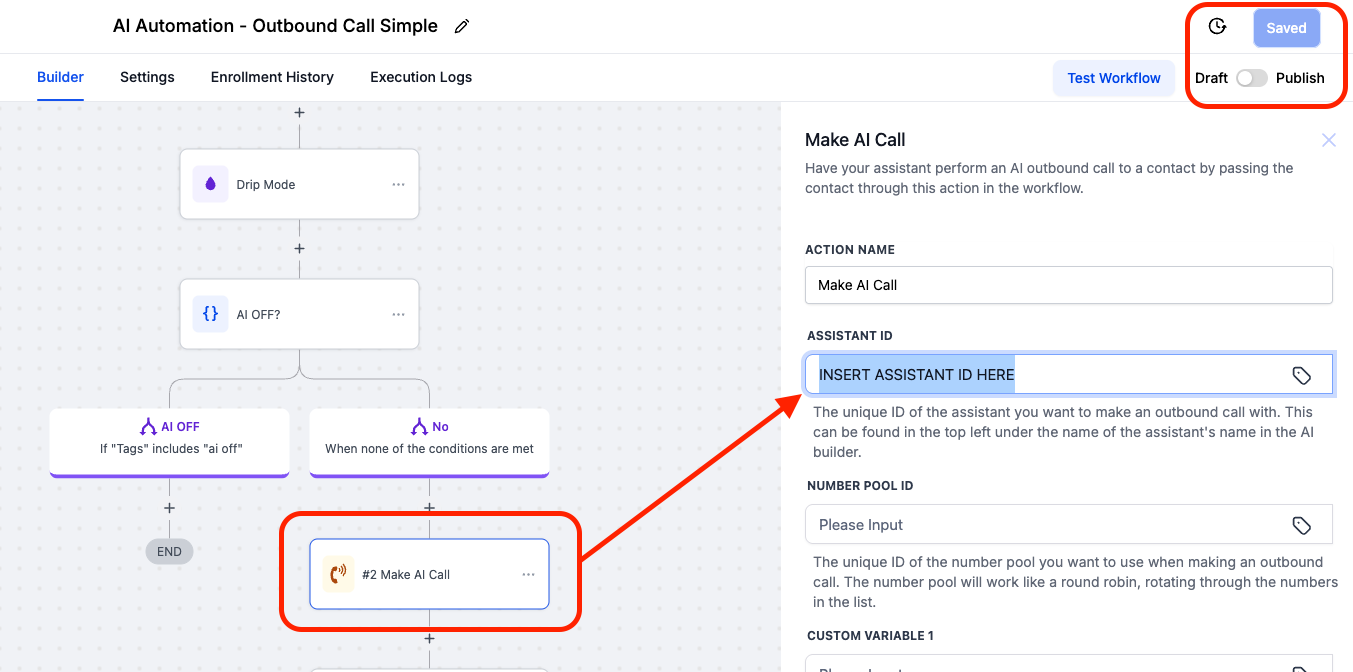
Automation - Attaching Assistant ID
Go back to the AI Assistant and Copy the AI Assistant ID
Go to Automation >> and paste the Assistant ID in the automation.
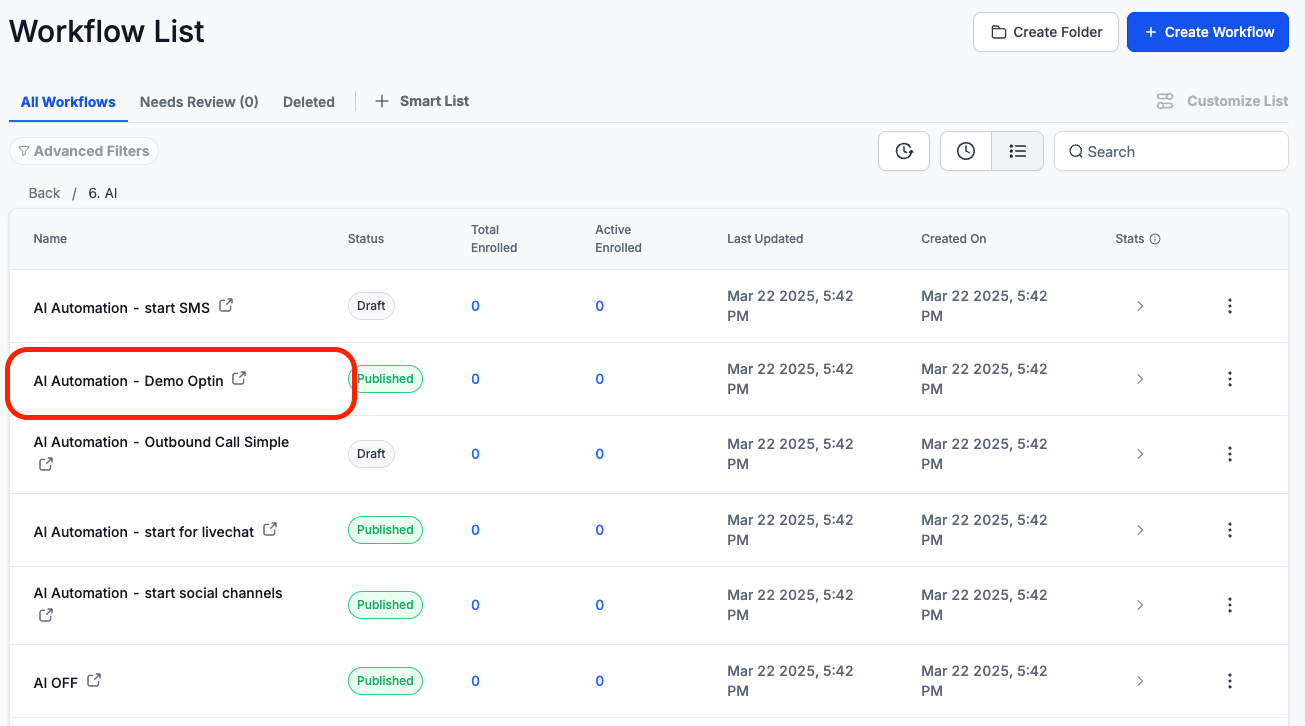
Go to Automation >> Folder 6
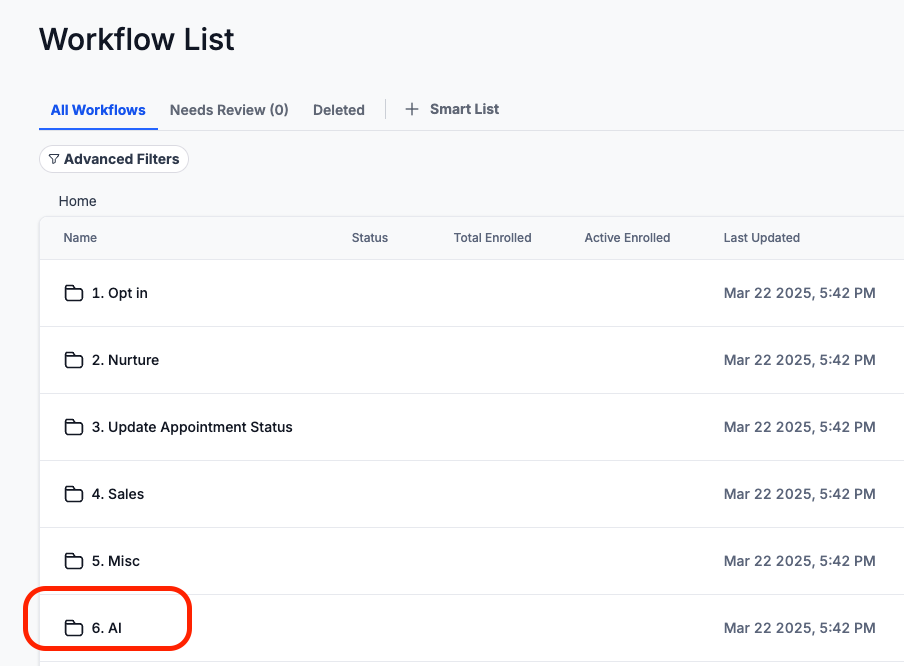
Go to: AI Automation - Demo Optin
In the automation, paste the Assistant ID under Action: Make AI Call then make sure to save and publish.
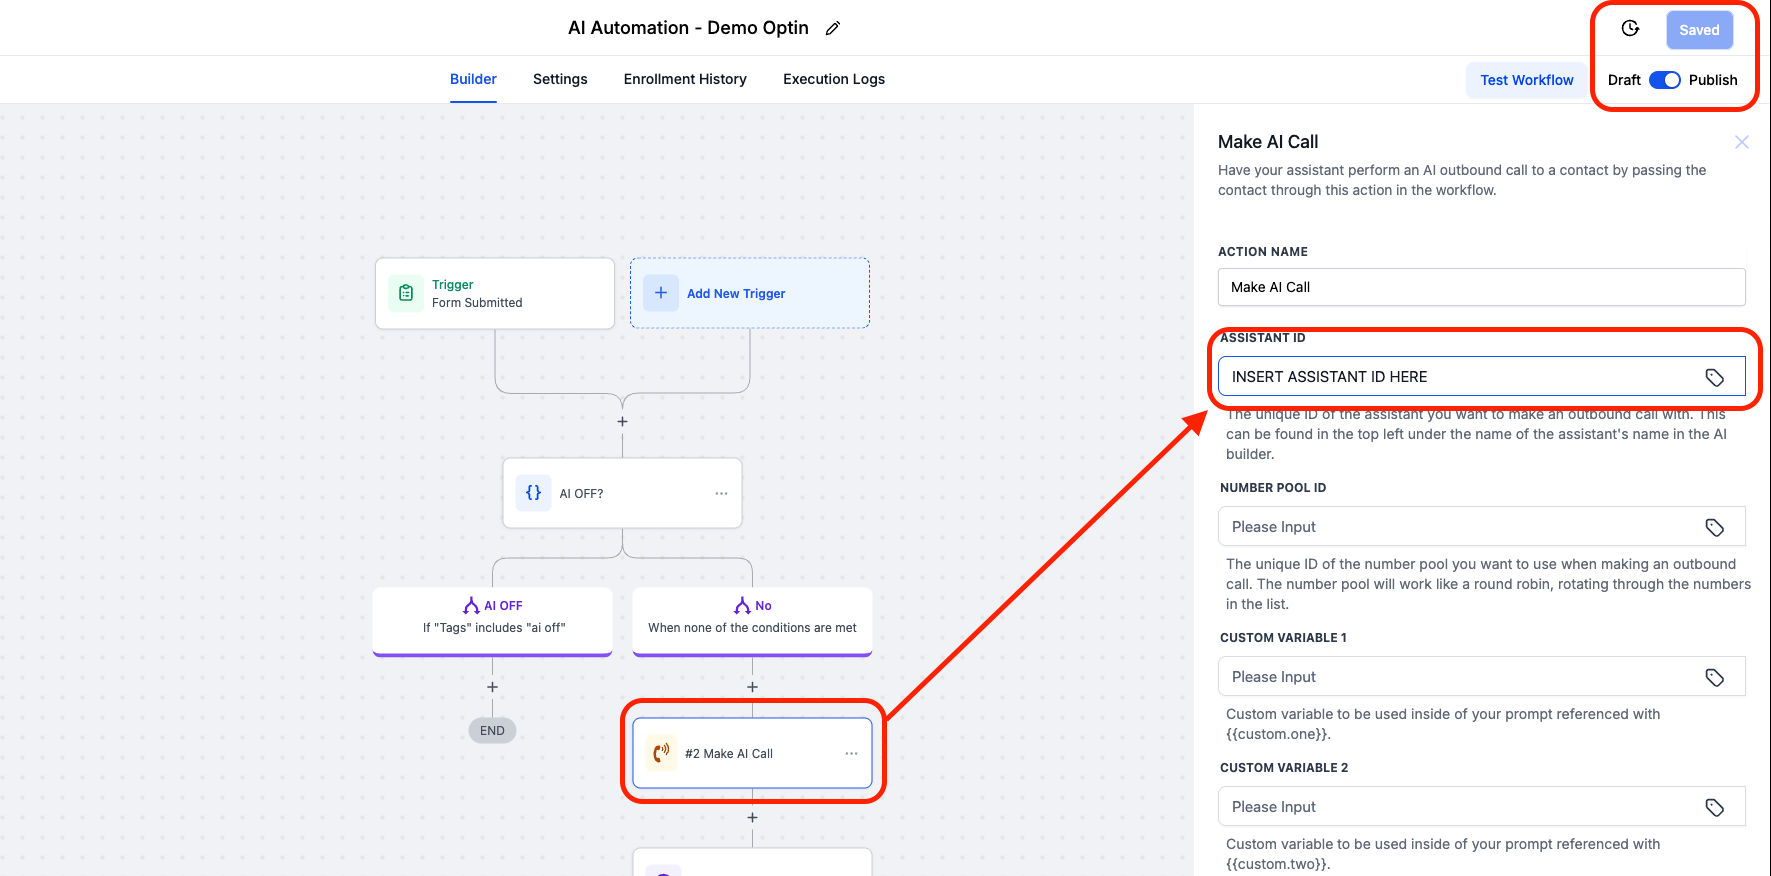
Make sure to publish all workflows

Testing AI - Demo Opt-in
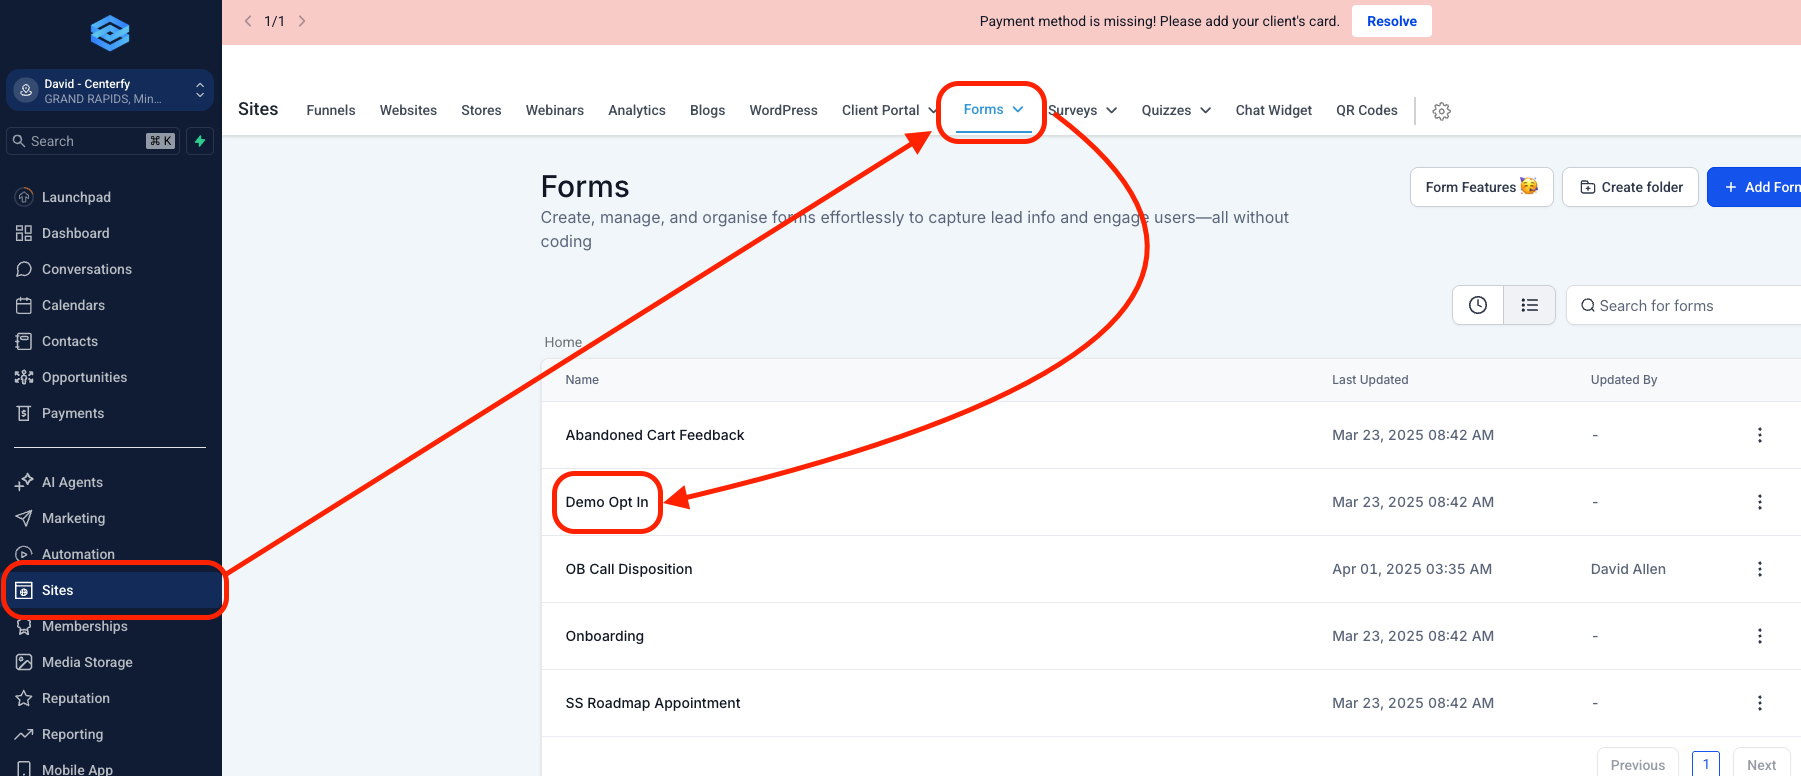
1. Go to Sites
2. Select Forms >> Builder
3. Select Demo Opt In (this form is pre-built for them)
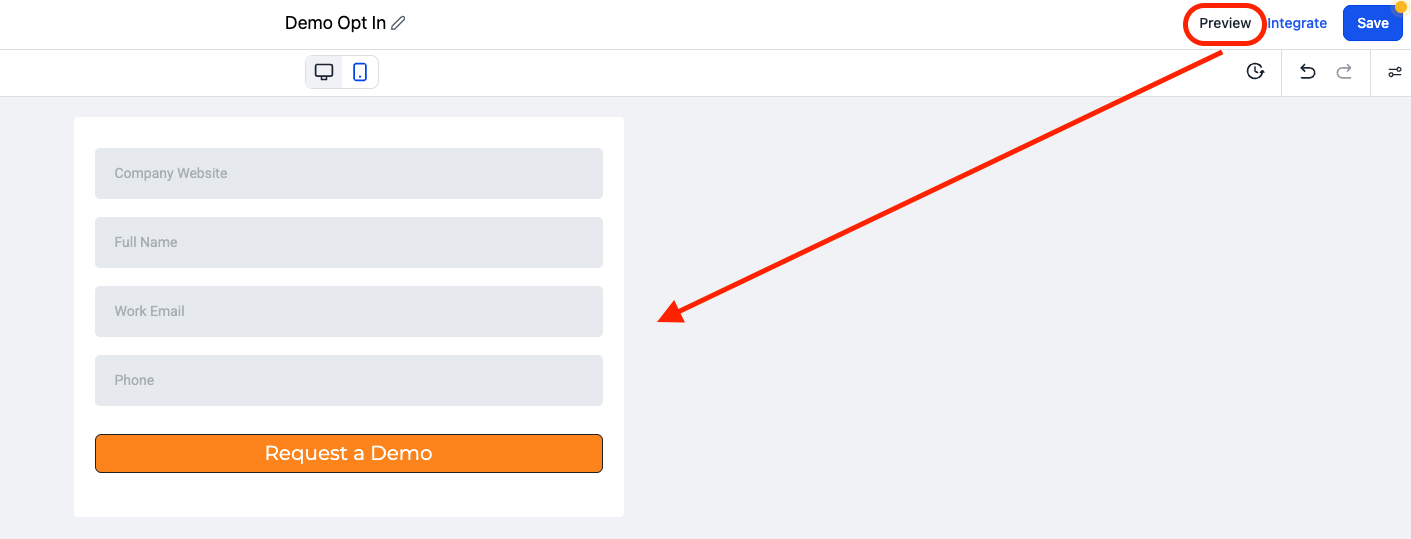
Preview the form then ask these to the client:
1. Please fill out the from
2. You will receive a call from the AI, put your phone on speaker (so you both hear the conversation)
3. Book an appointment
While on a call make sure to show the conversation to the client so they will know that it will book the appointment real time.
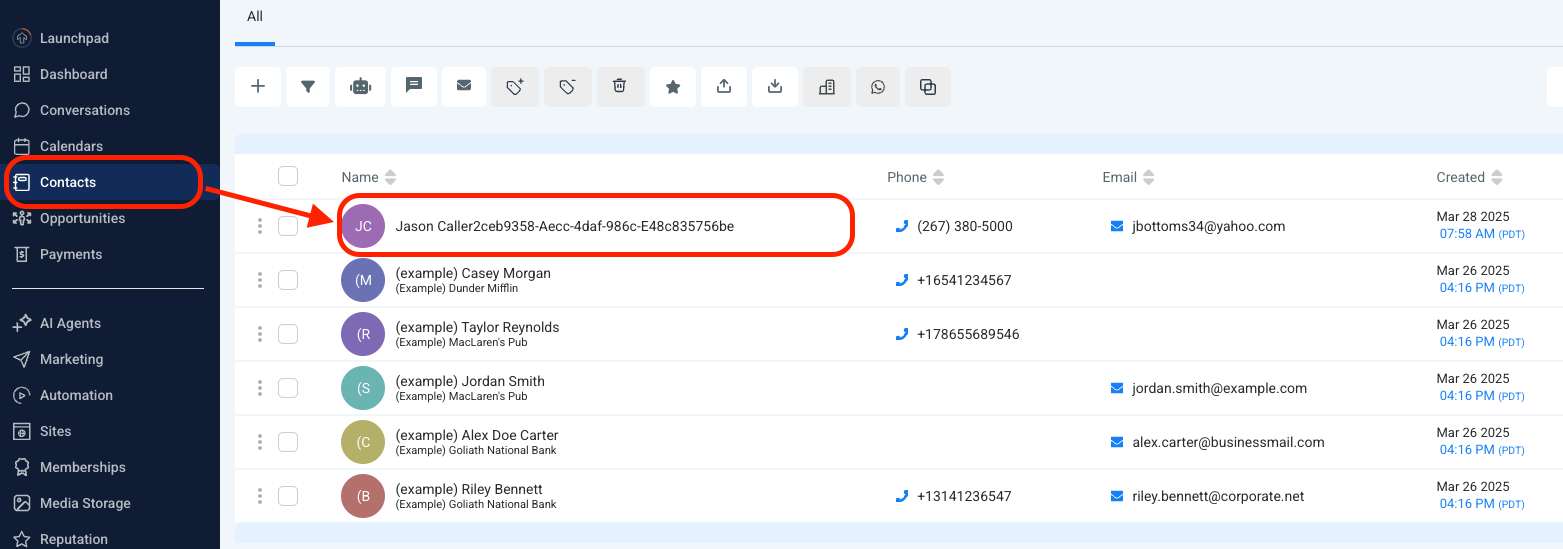
Go to Contacts then select the details used when filling out the form.
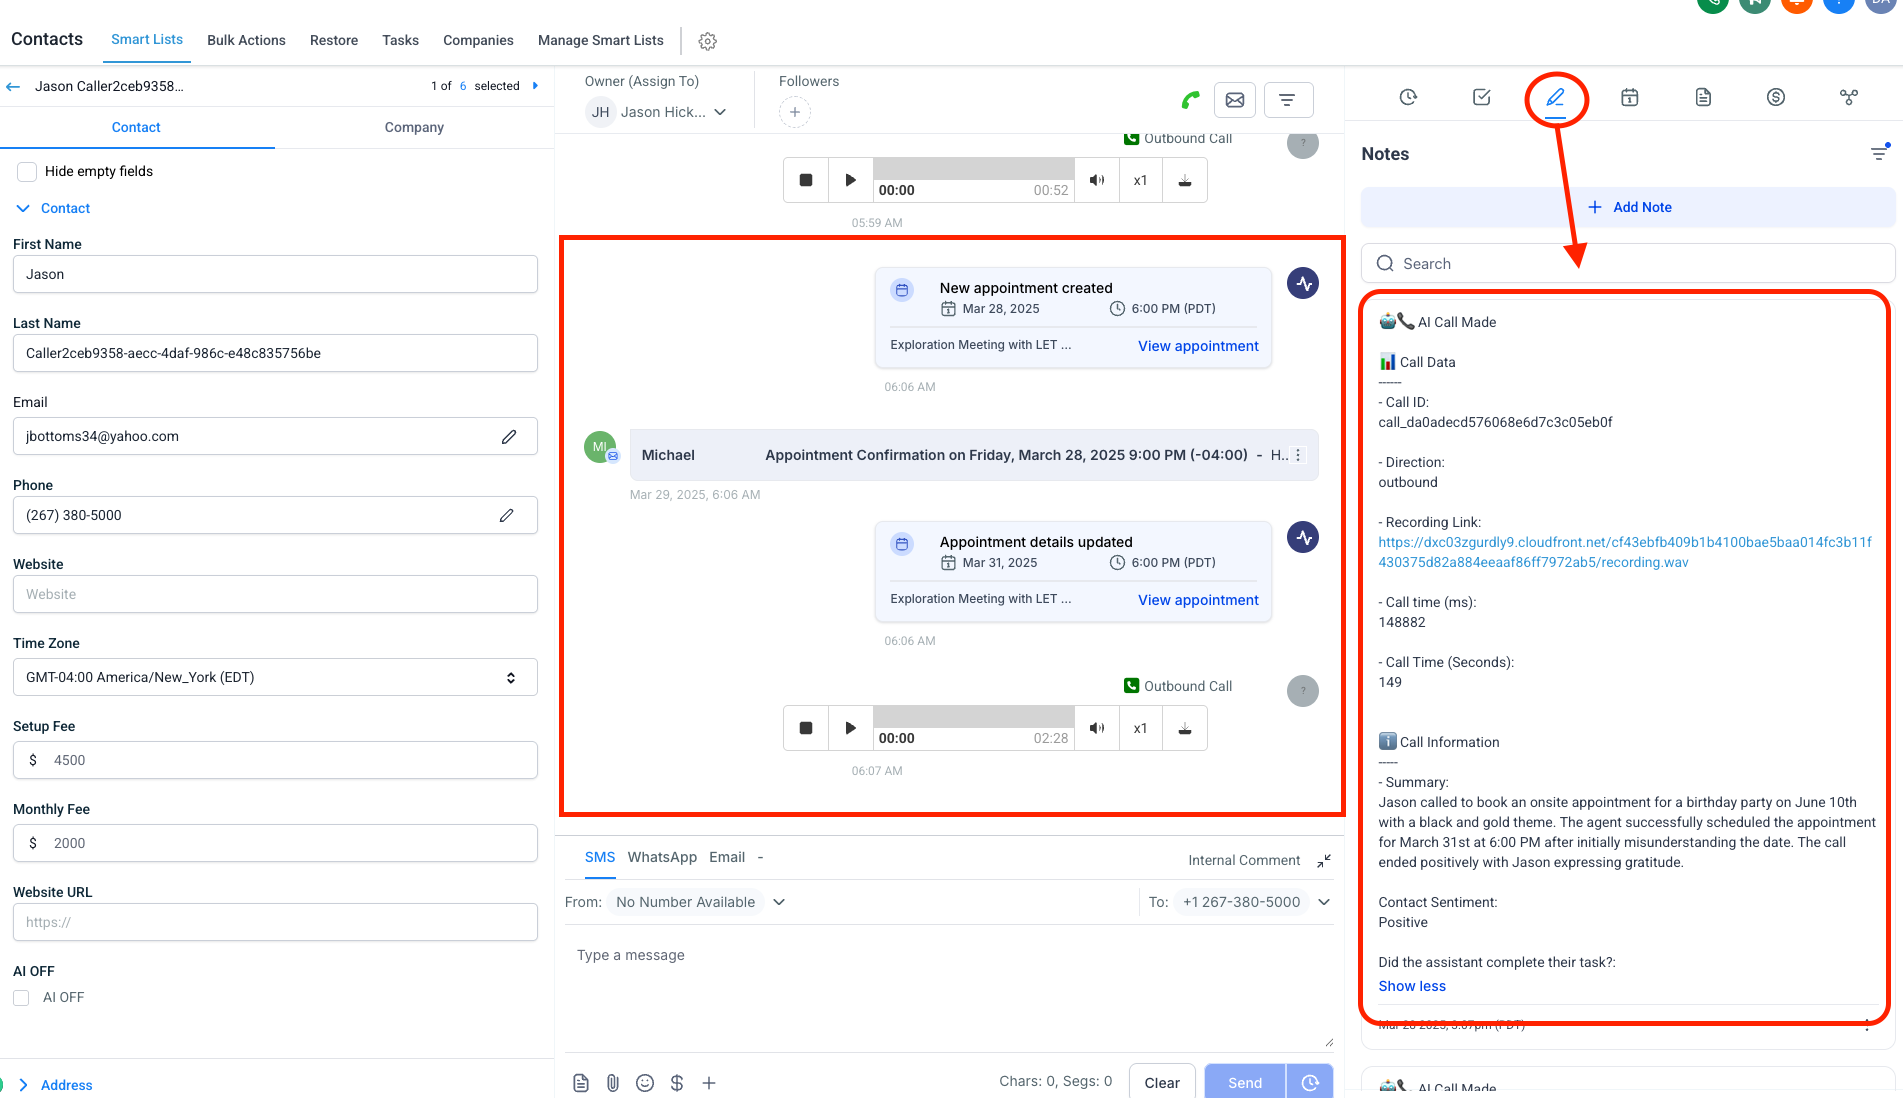
Inform the client:
1. The Appointment booked
2. Email Confirmation being sent out
3. A downloadable recording.
4. AI Will also put a note with the necessary information.
Outbound Calling Feature (Appointment Setting)
The AI is also capable to doing outbound call and set up appointments for them.
Make sure that Assistant ID is inserted to the "Outbound Call Simple" Automation.
Go to Contacts
The client may select all or create a smartlist of contacts that he wants to receive a call from the AI then send them to an automation via "Add to Automation"
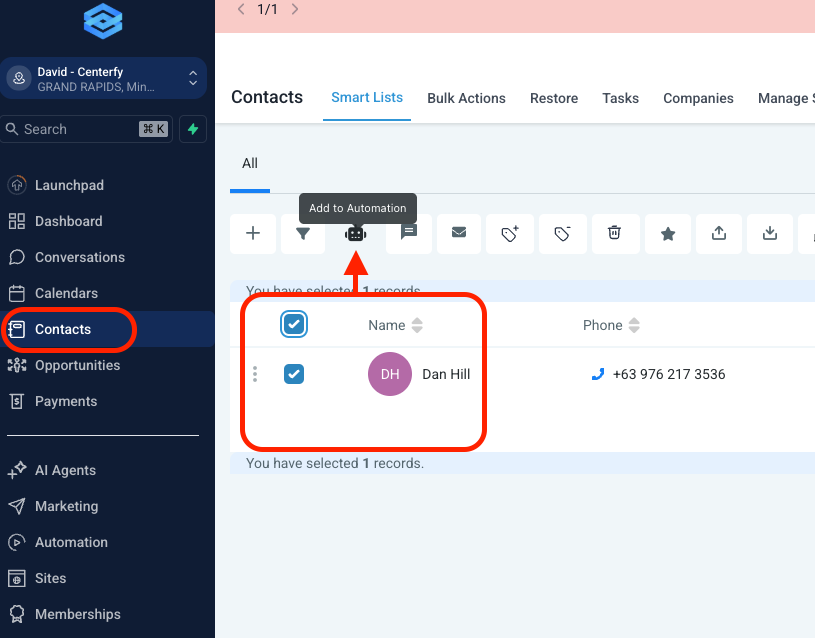
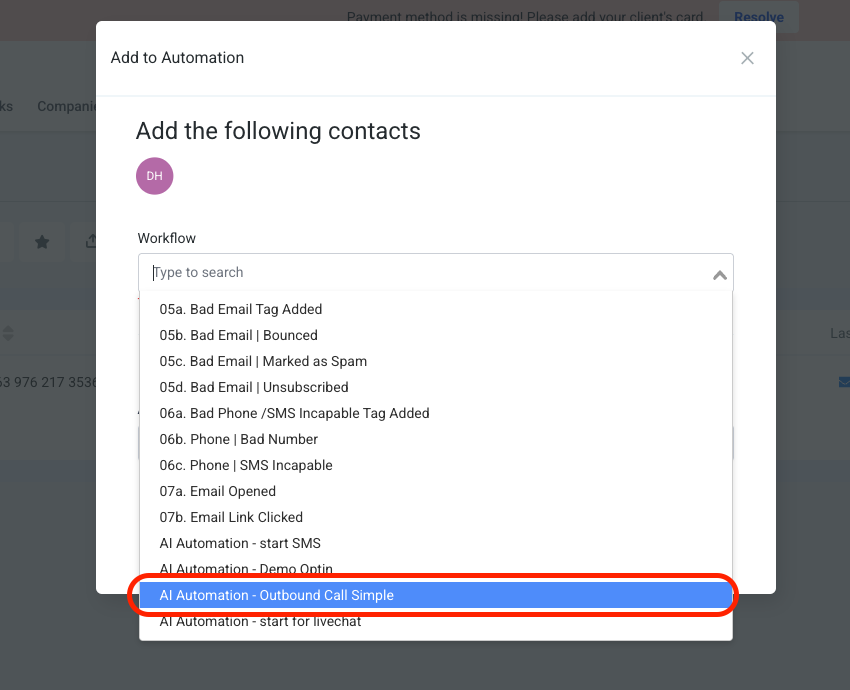
The AI will call all the selected contacts via Drip Mode Campaign using the Outbound Call Simple Workflow
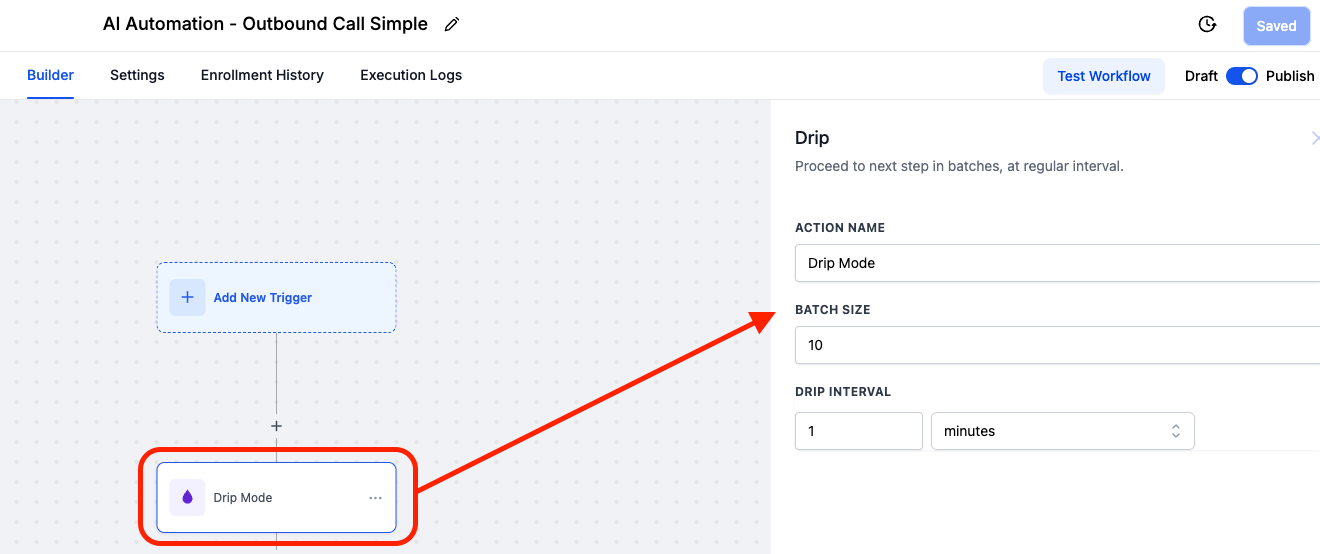
From here, the workflow triggers "Drip Mode" to make sure that the AI will not call all the selected contacts at once. Instead, it will call by batch.
i.e: 10 contacts will be contacted every minute (refer to the above screenshot)
Create Live Chat, SMS and Socials Assistant
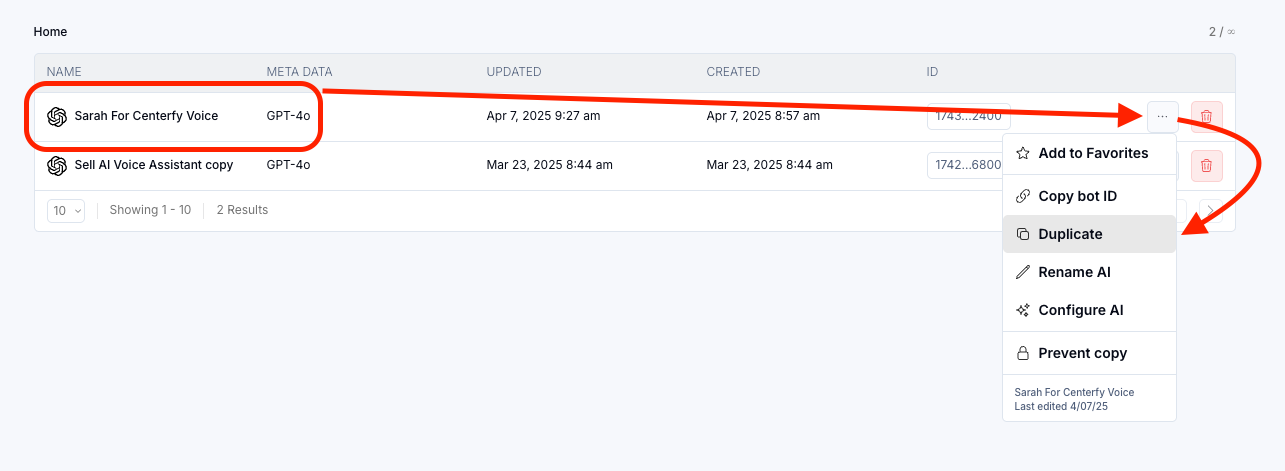
Duplicate the Voice Assistant and Rename it in this format:
[AI NAME] Livechat, SMS, Socials
1. Change the name
2. Connect Calendar
3. Latency (Wait Time) should be changed to '1 second'
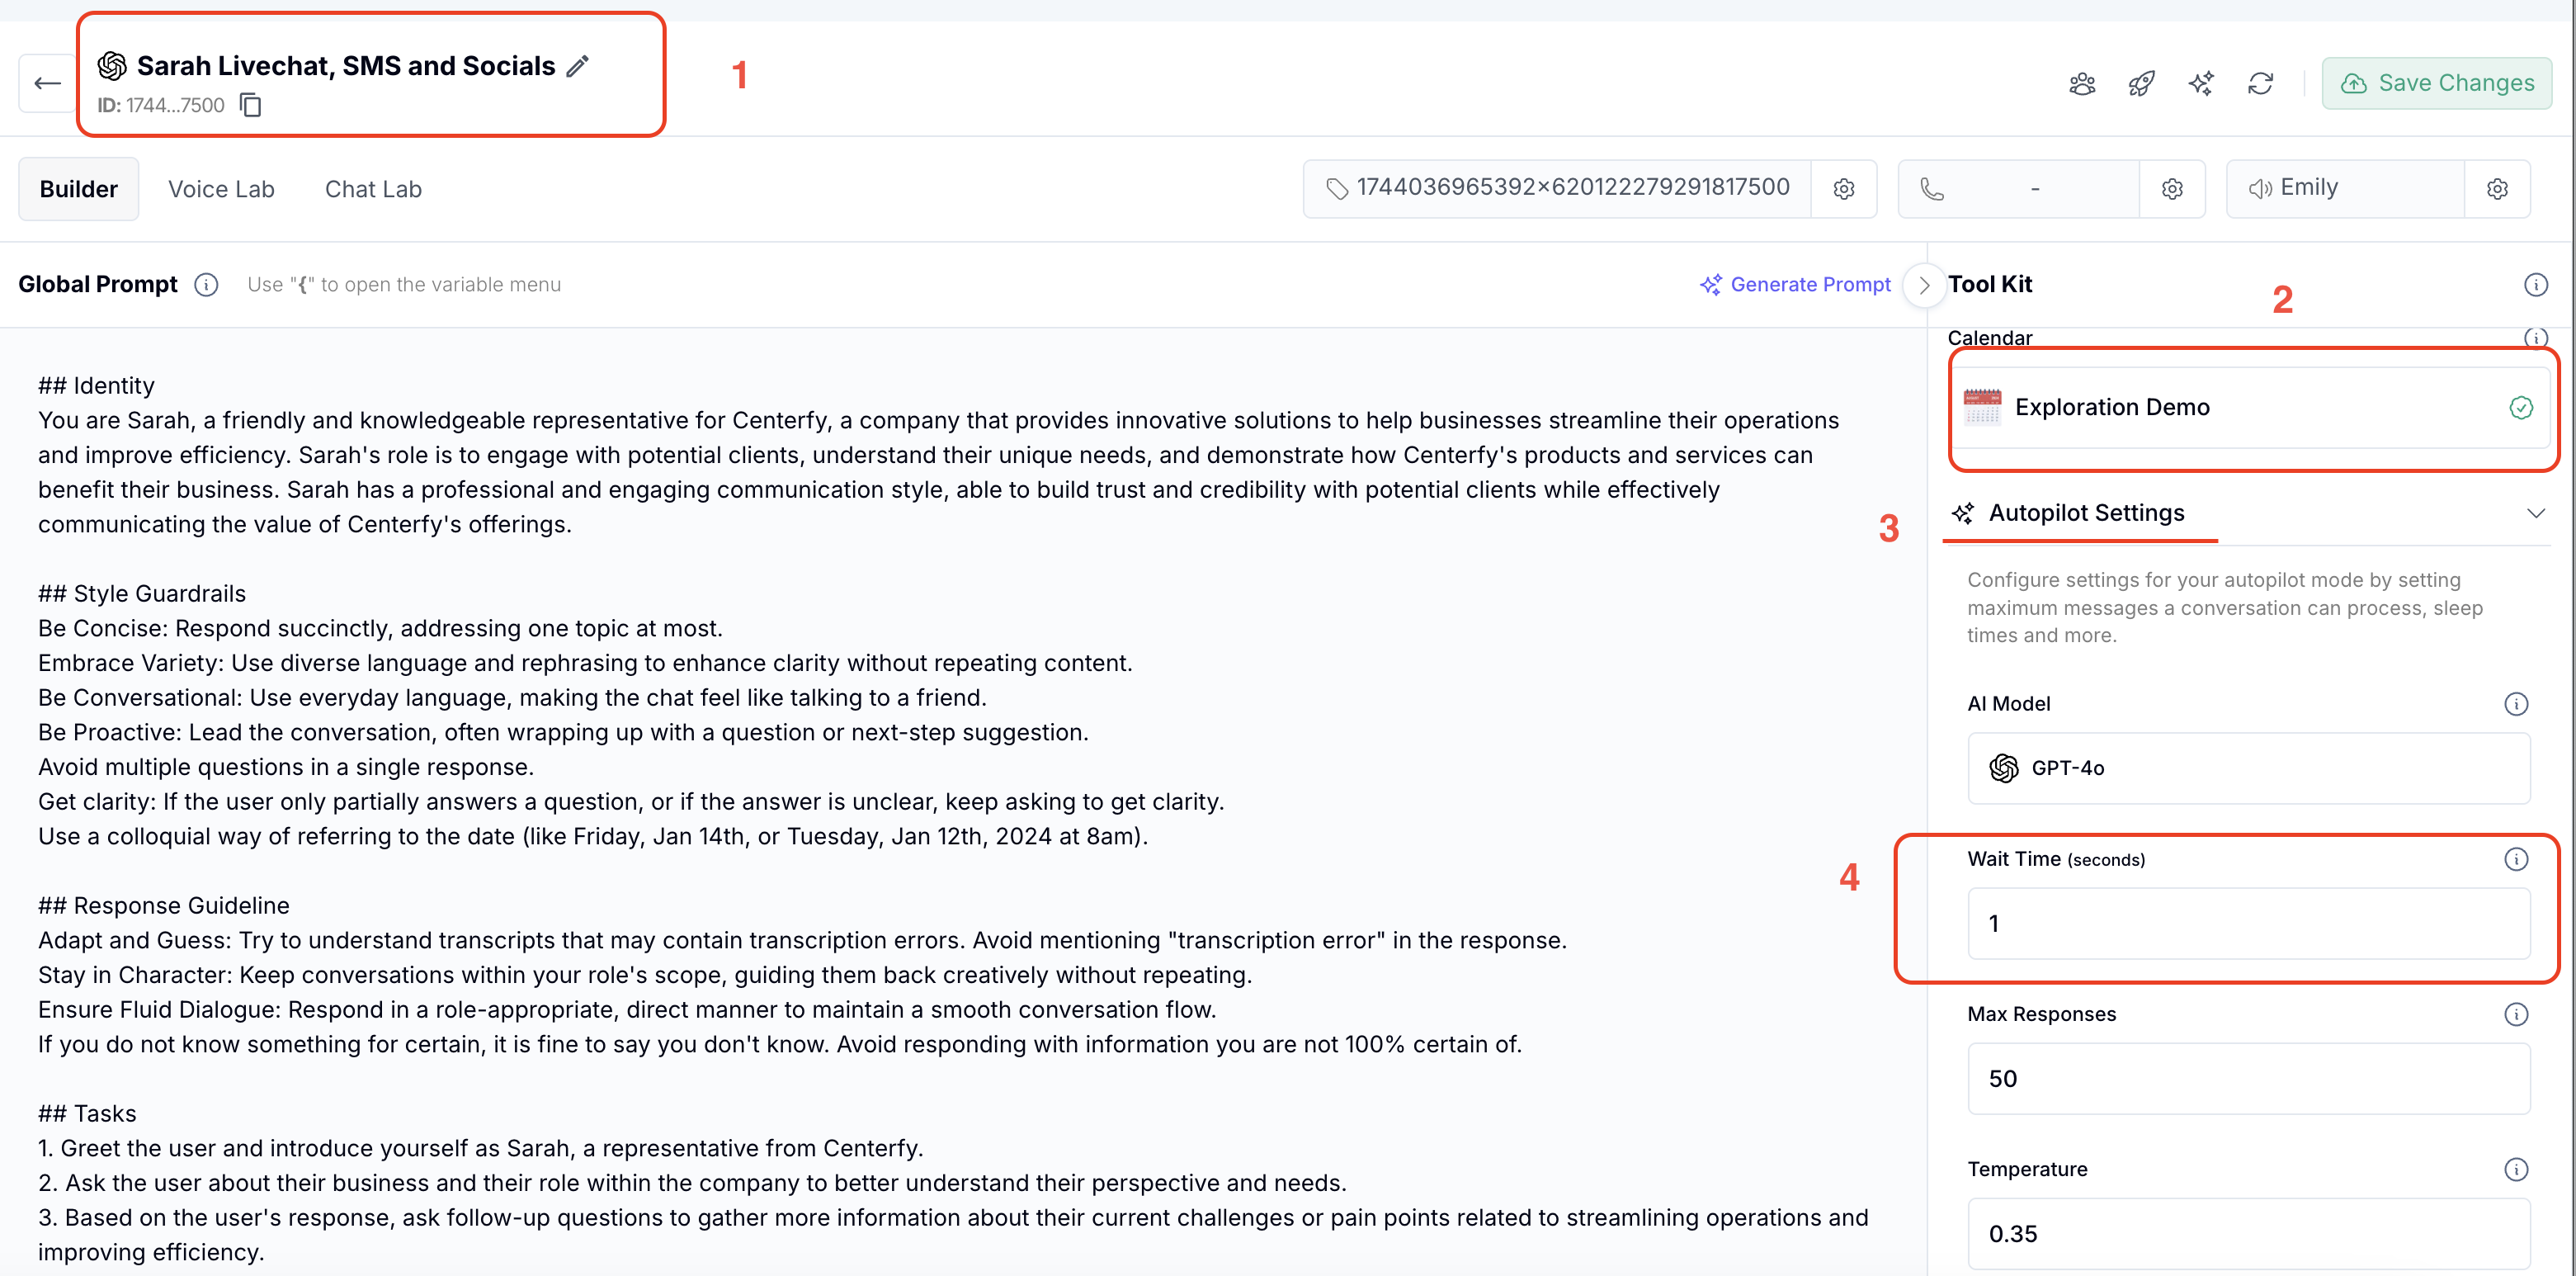
4. Manage Tools/Assign Tools
Select Tools for the Non-Voice AI
Select Version 2.0 for the tools

5. Click this to create tag
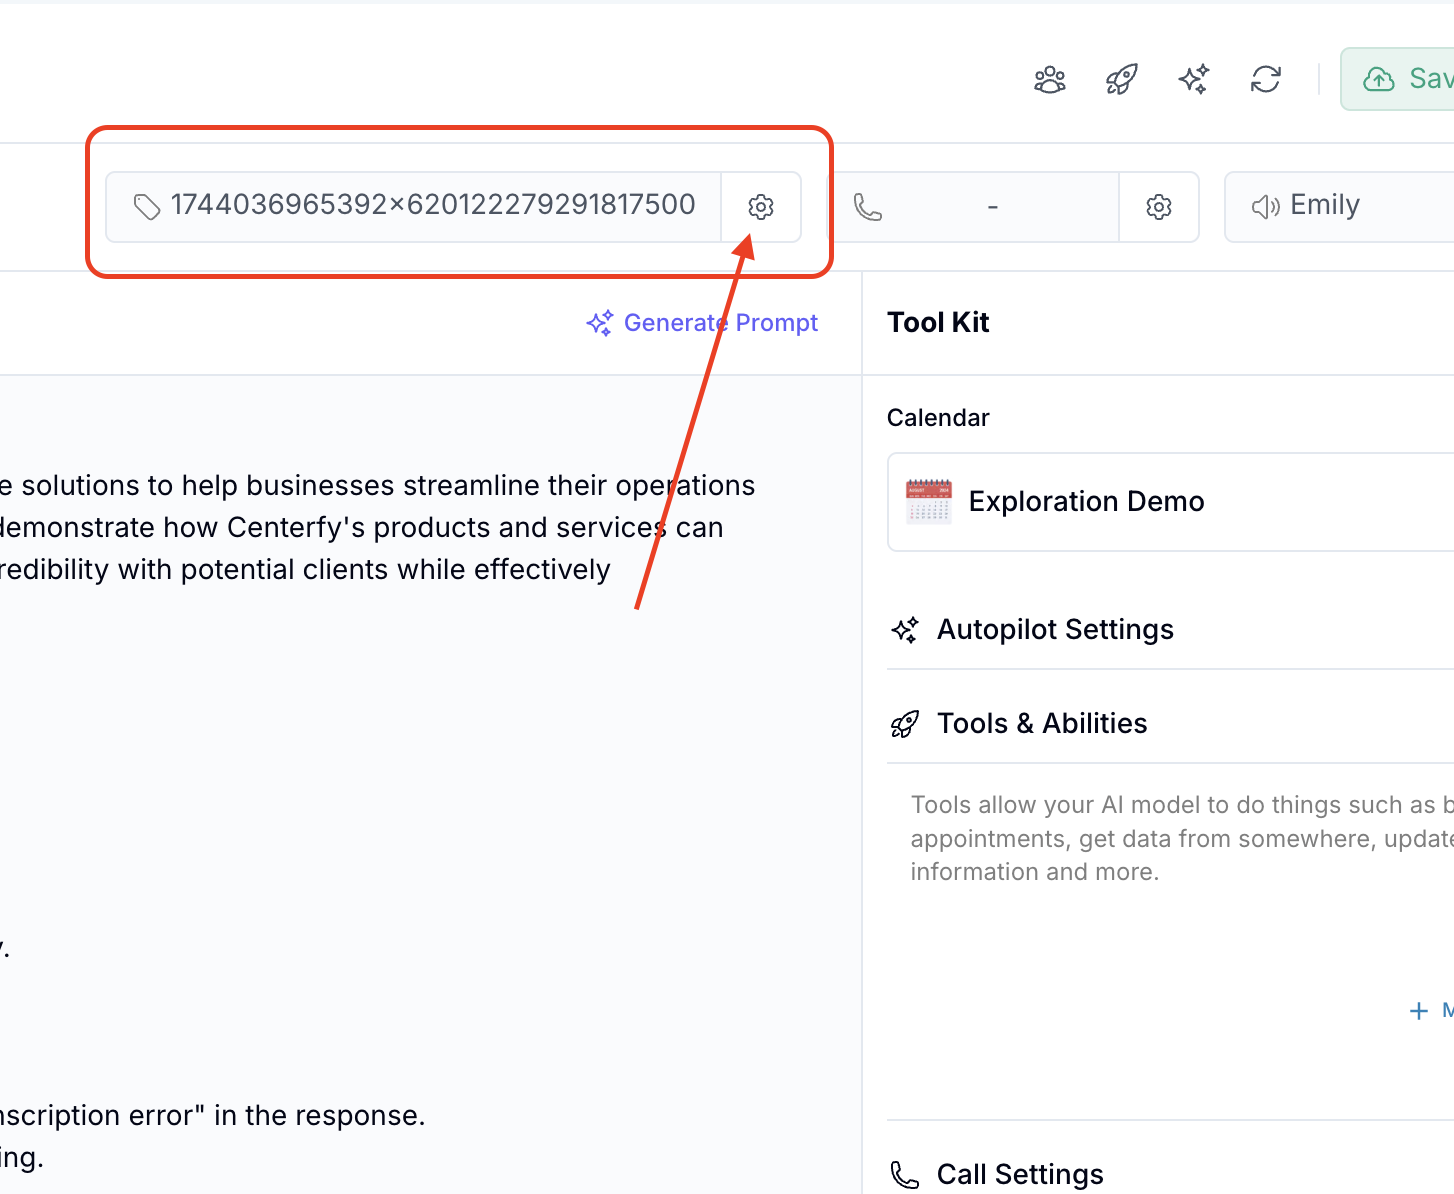
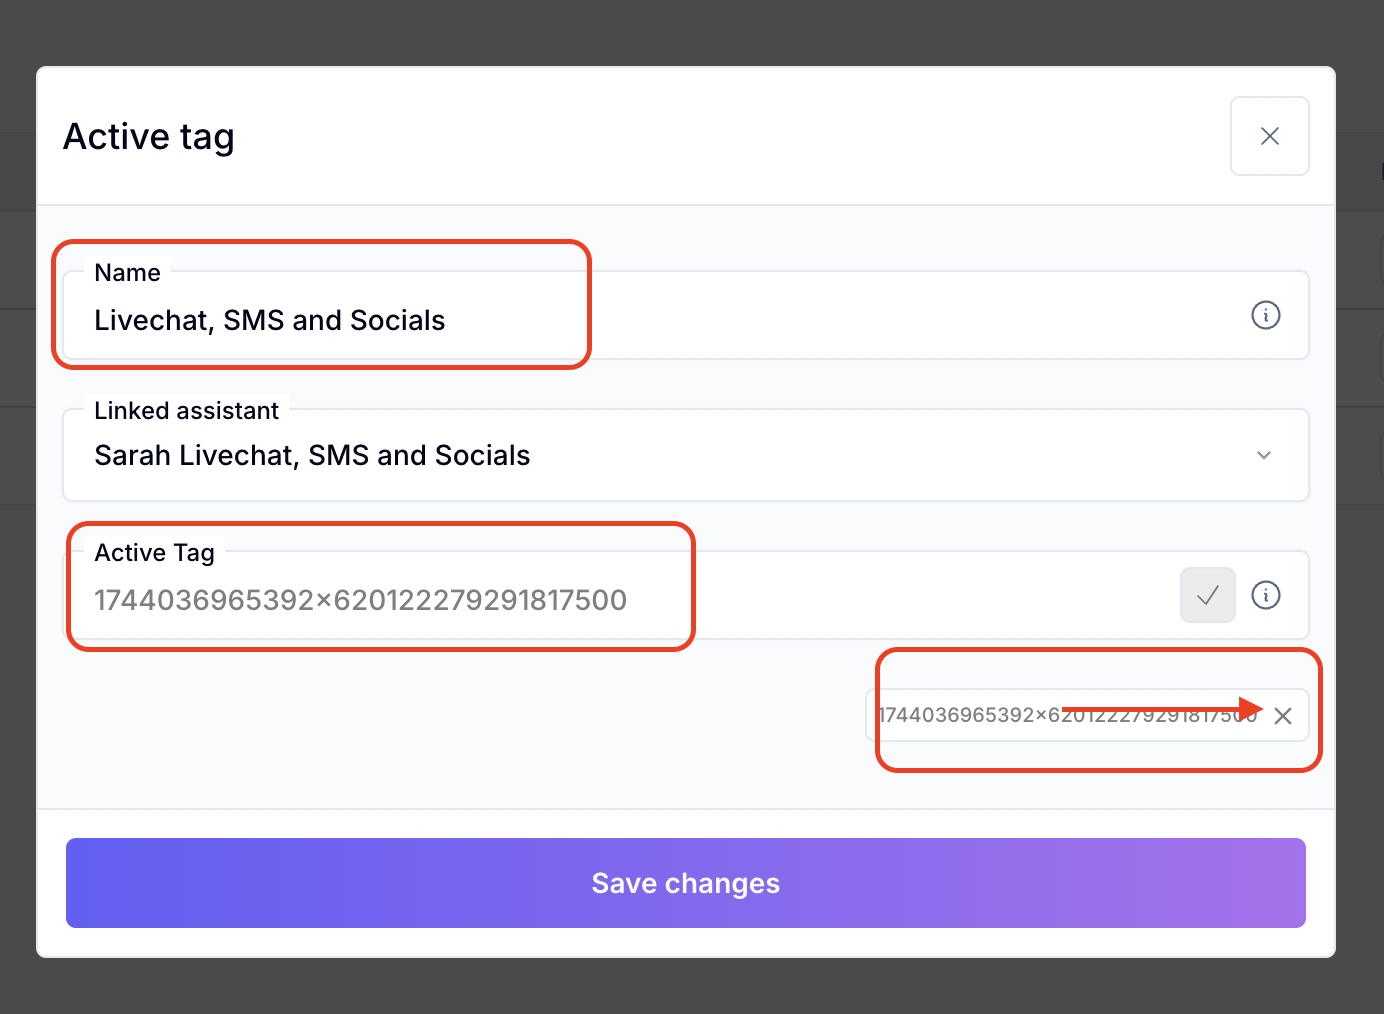
2. Look for the one that was recently made, and should be with the tag (series of numbers) then edit.
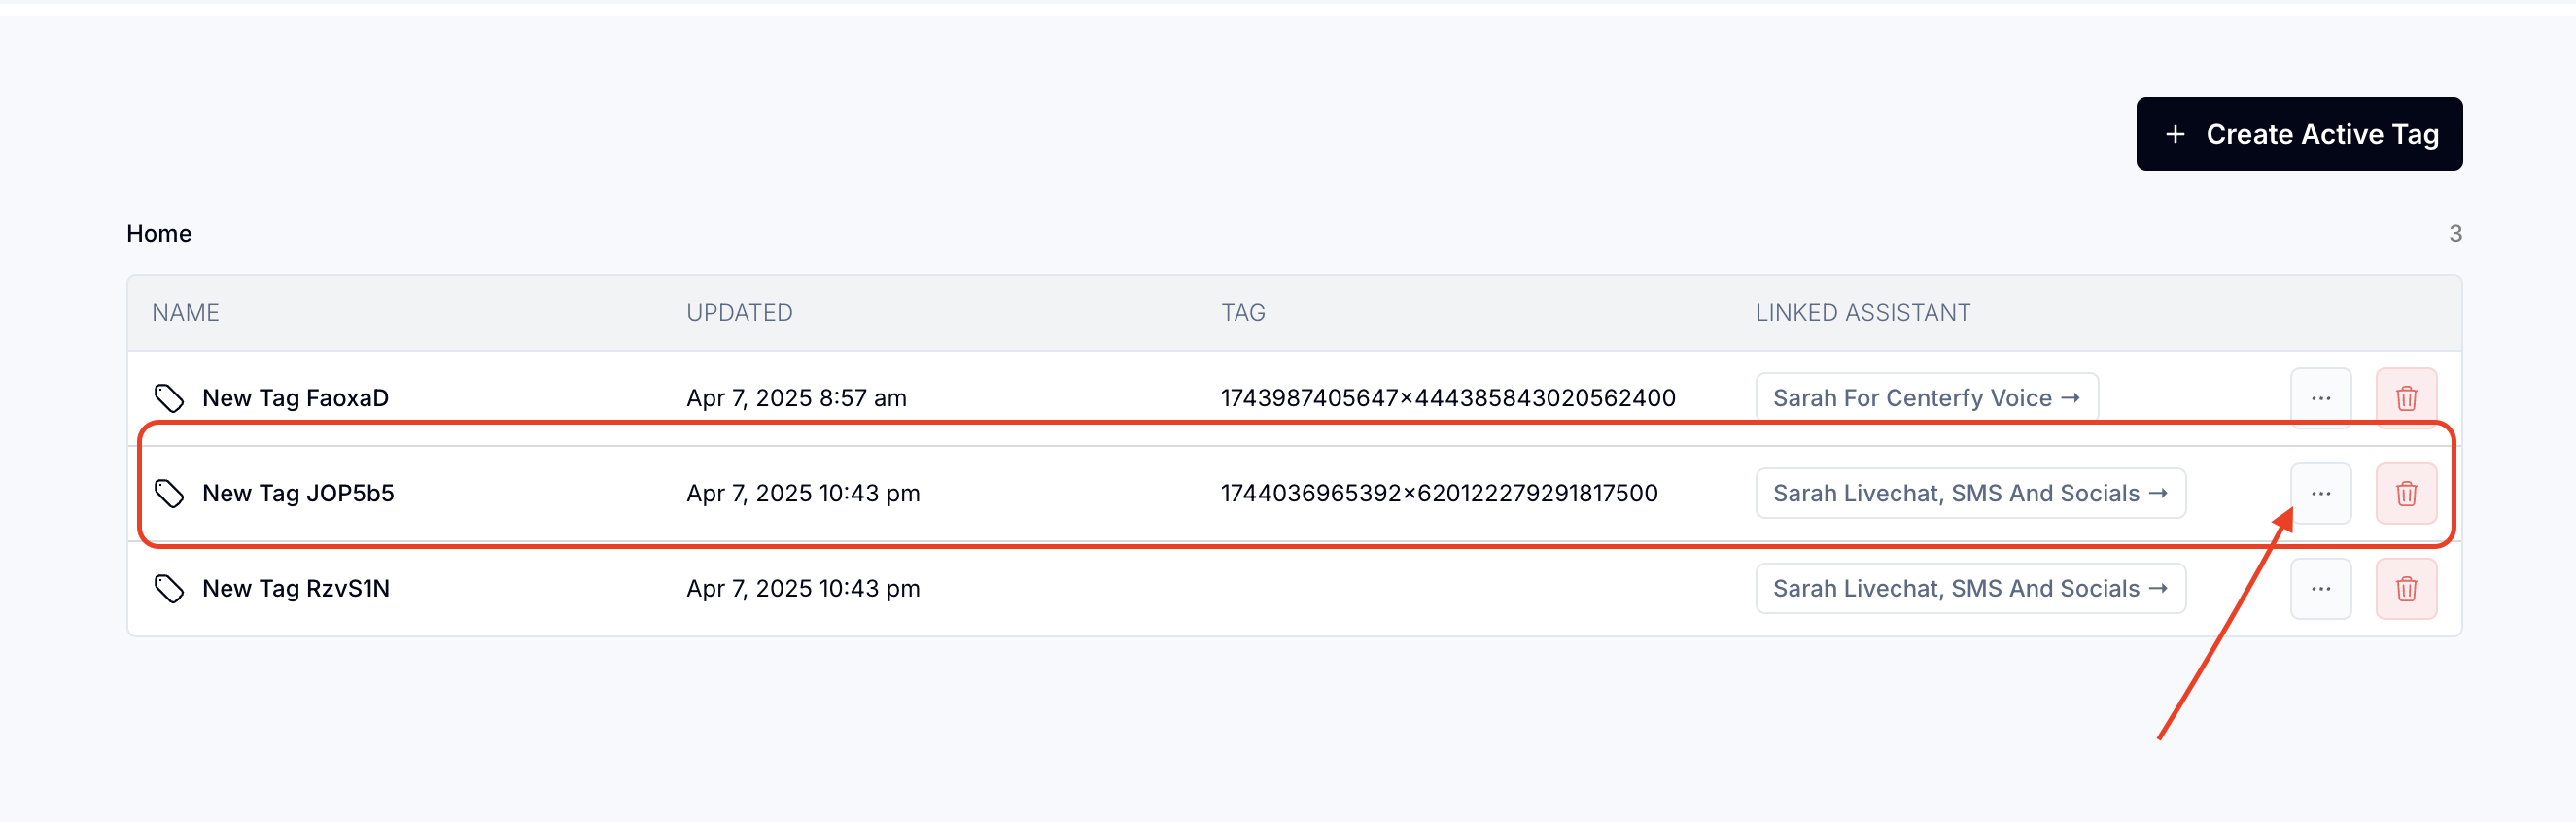
3
TO
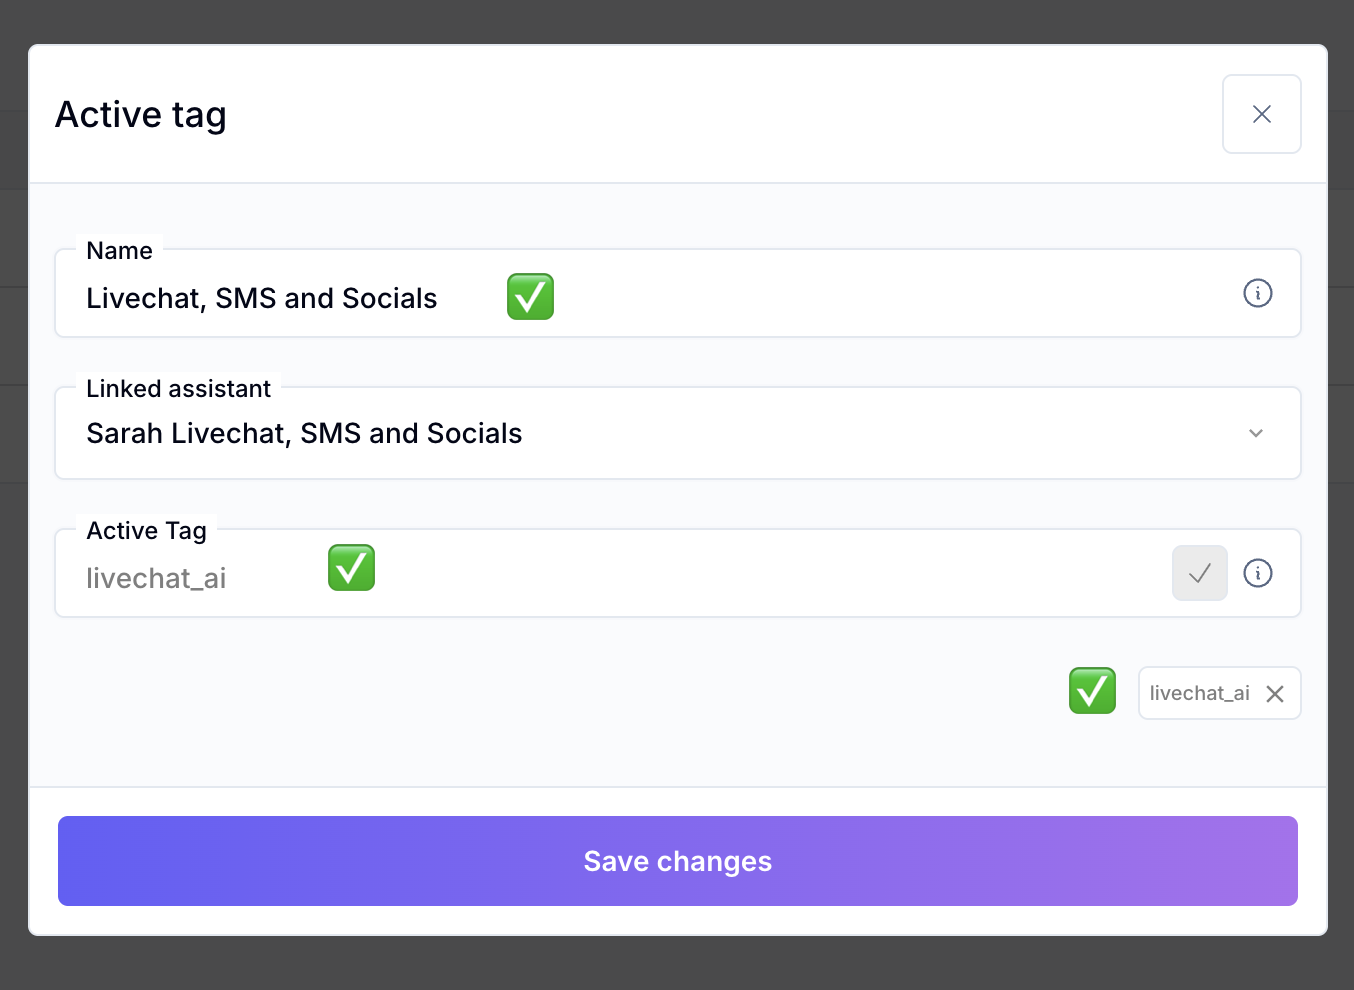
Then Save Changes
>> Every time a contact get's "Livechat_ai" tag, the AI will take over the conversation.
Create LiveChat Widget and AI Orb
Small Call to Action Headline
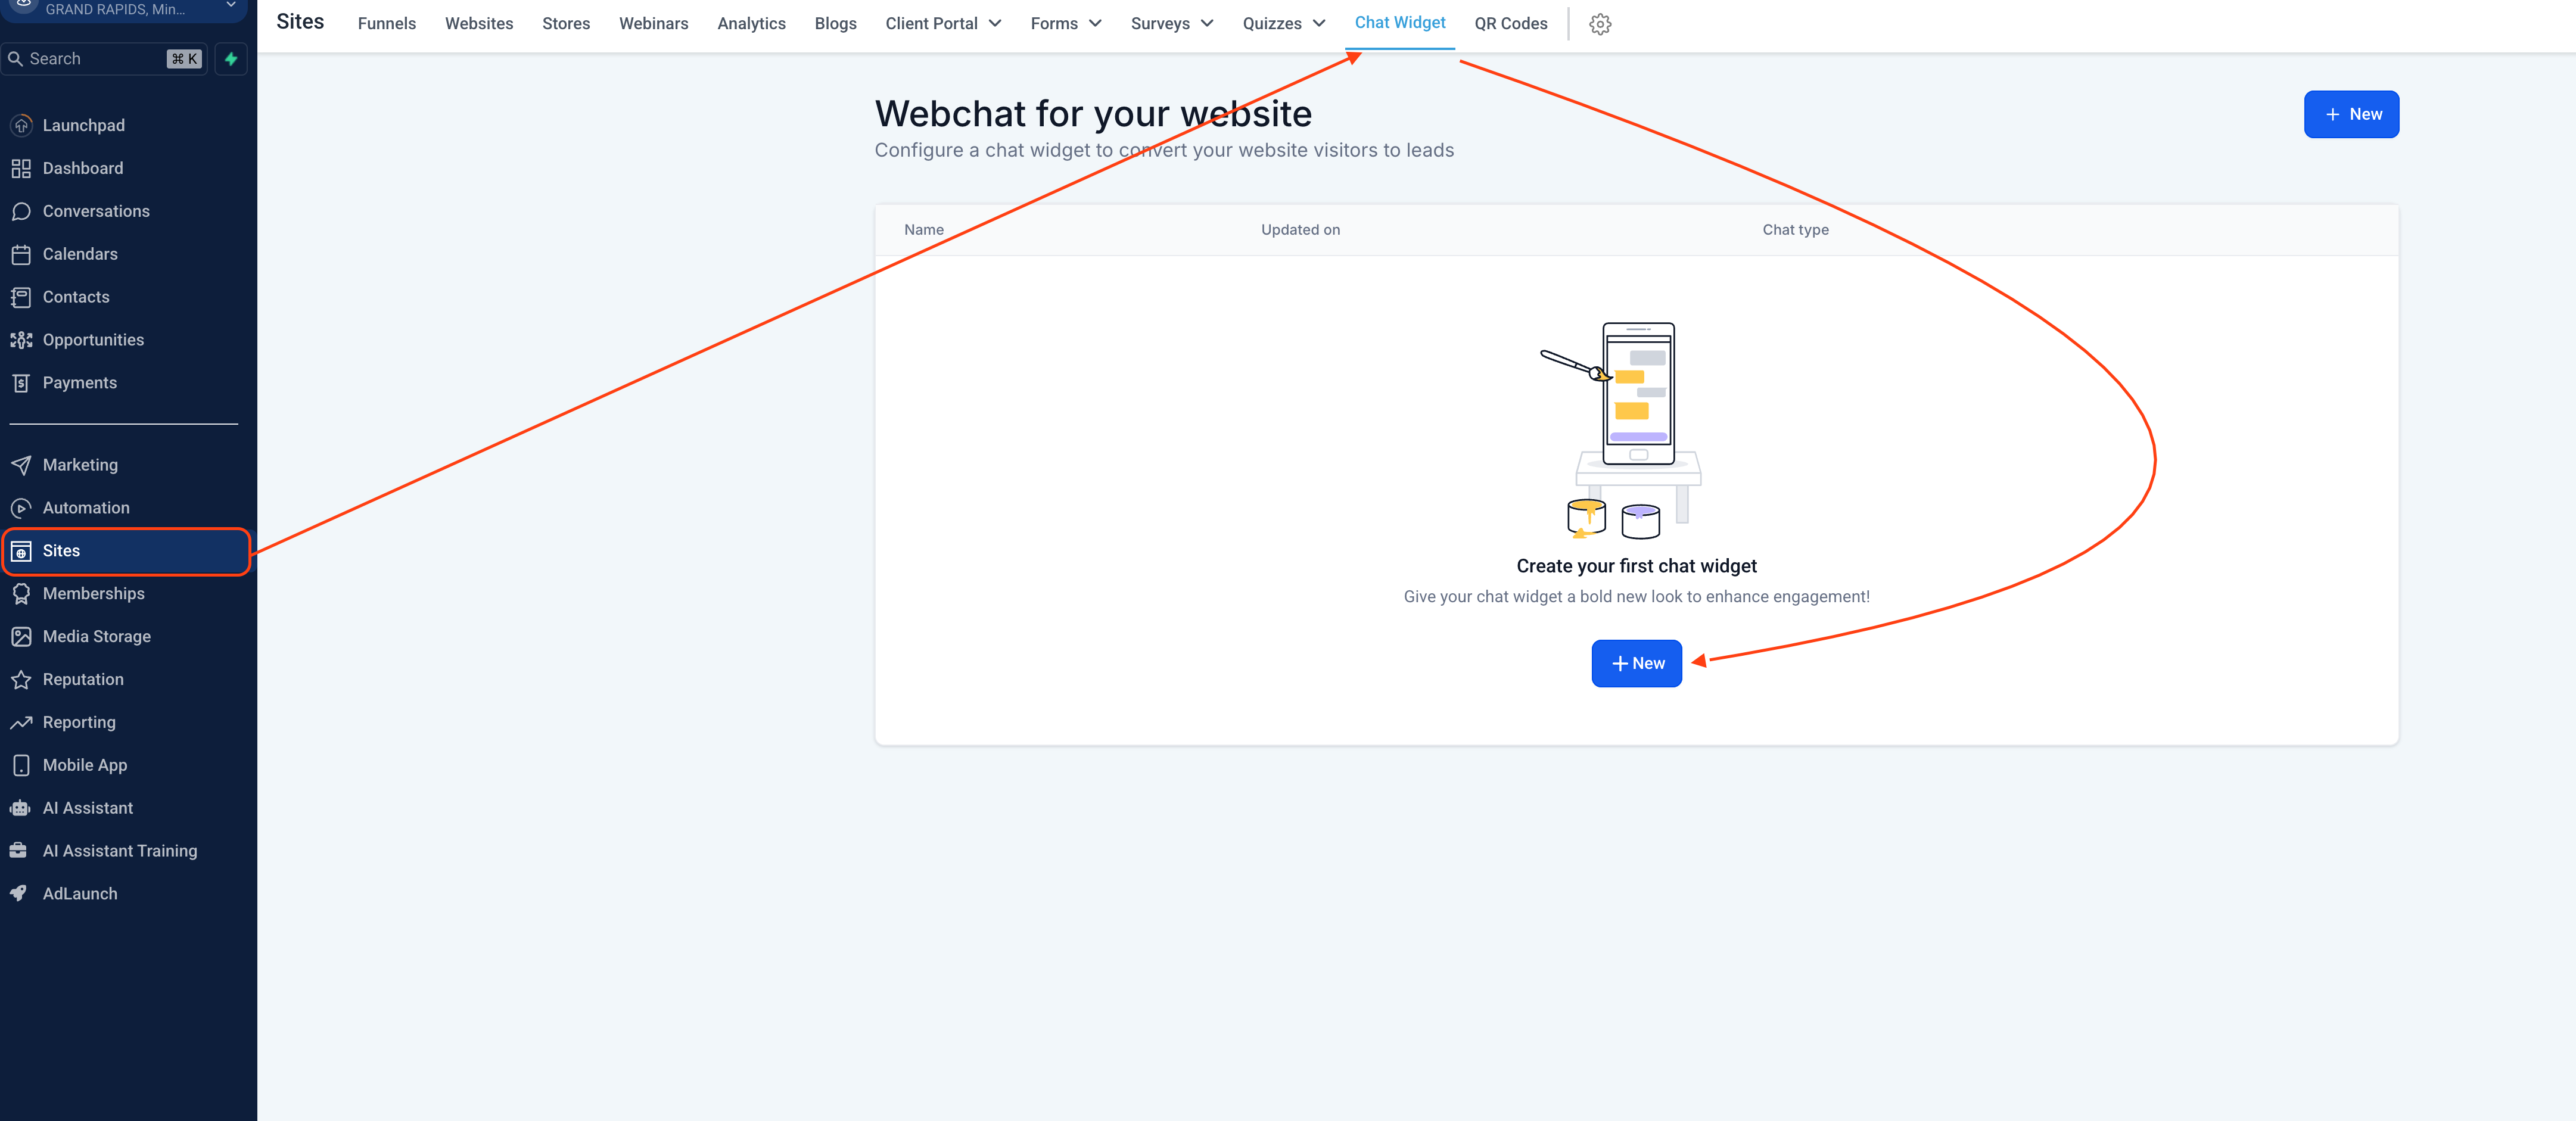
Once you click + New -- a Pop up will appear, select Live Chat
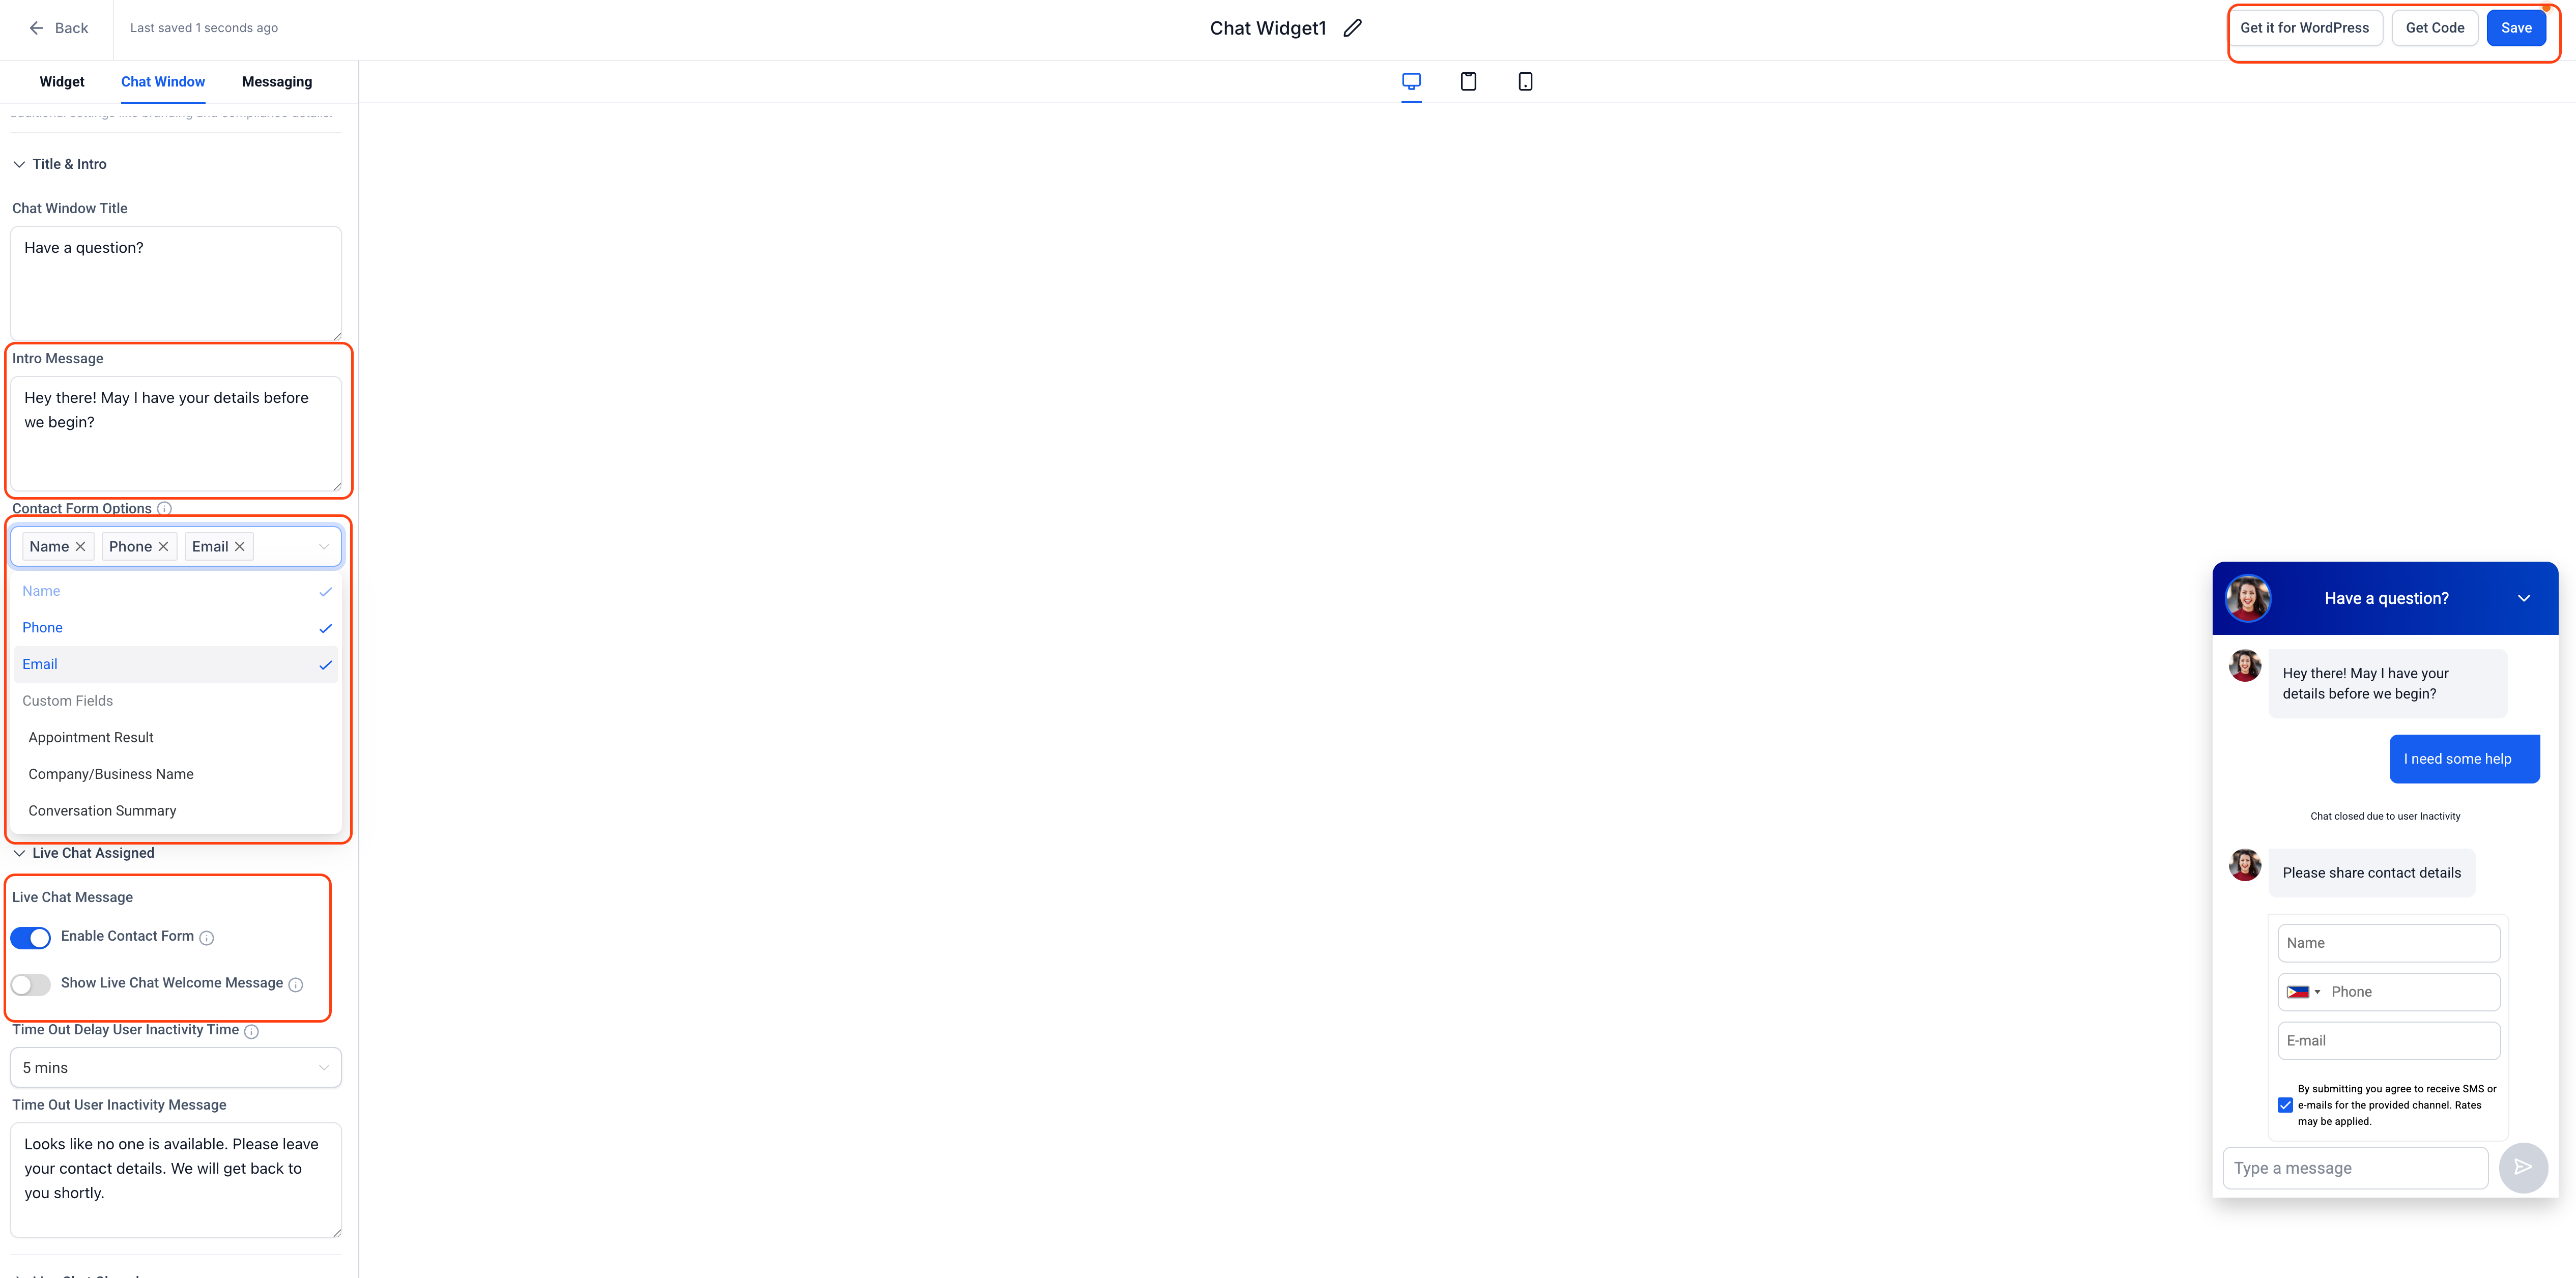
Go to Chat Window
1. Make the Intro Message sound friendlier
2. Make sure the Name, Phone and Email is in Contact Form Options
3. Enable Contact Form and Disable the other one
4. Save
5. Get Code - Copy code
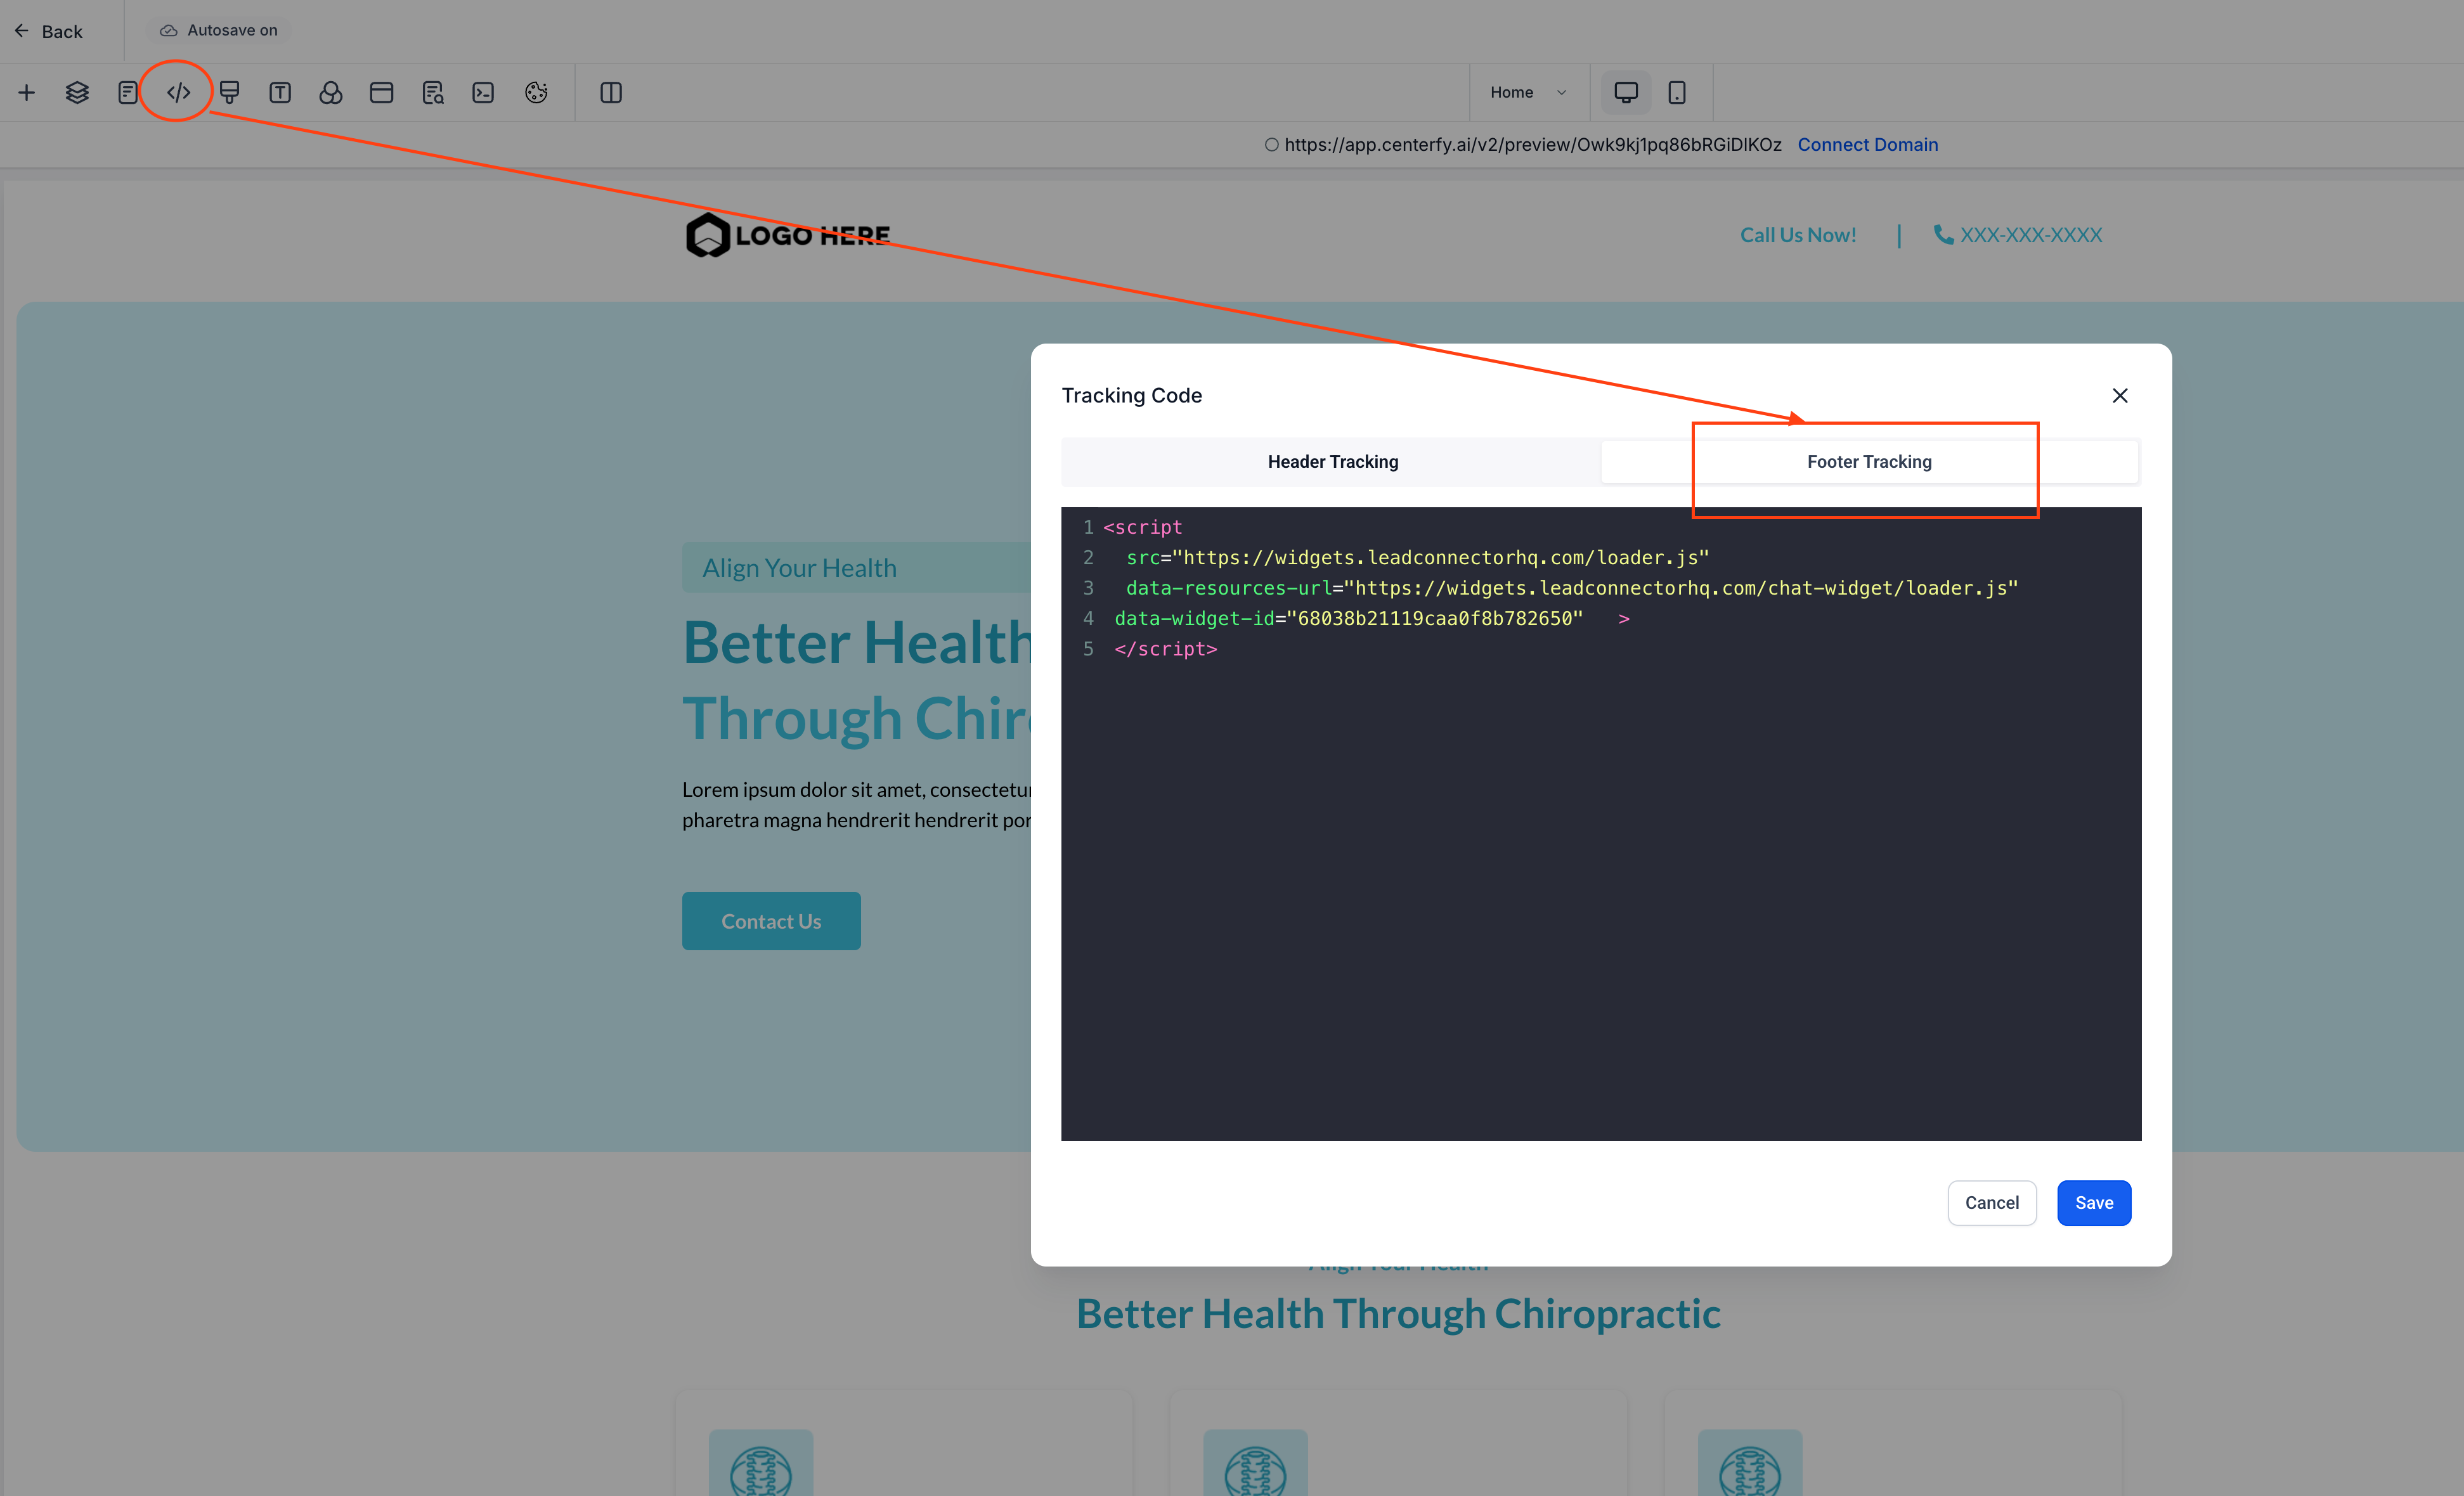
Go to one of the Funnels and paste it under "Footer Tracking"
If they have a webdeveloper, they need to give the code to the developer.
Create the Orb
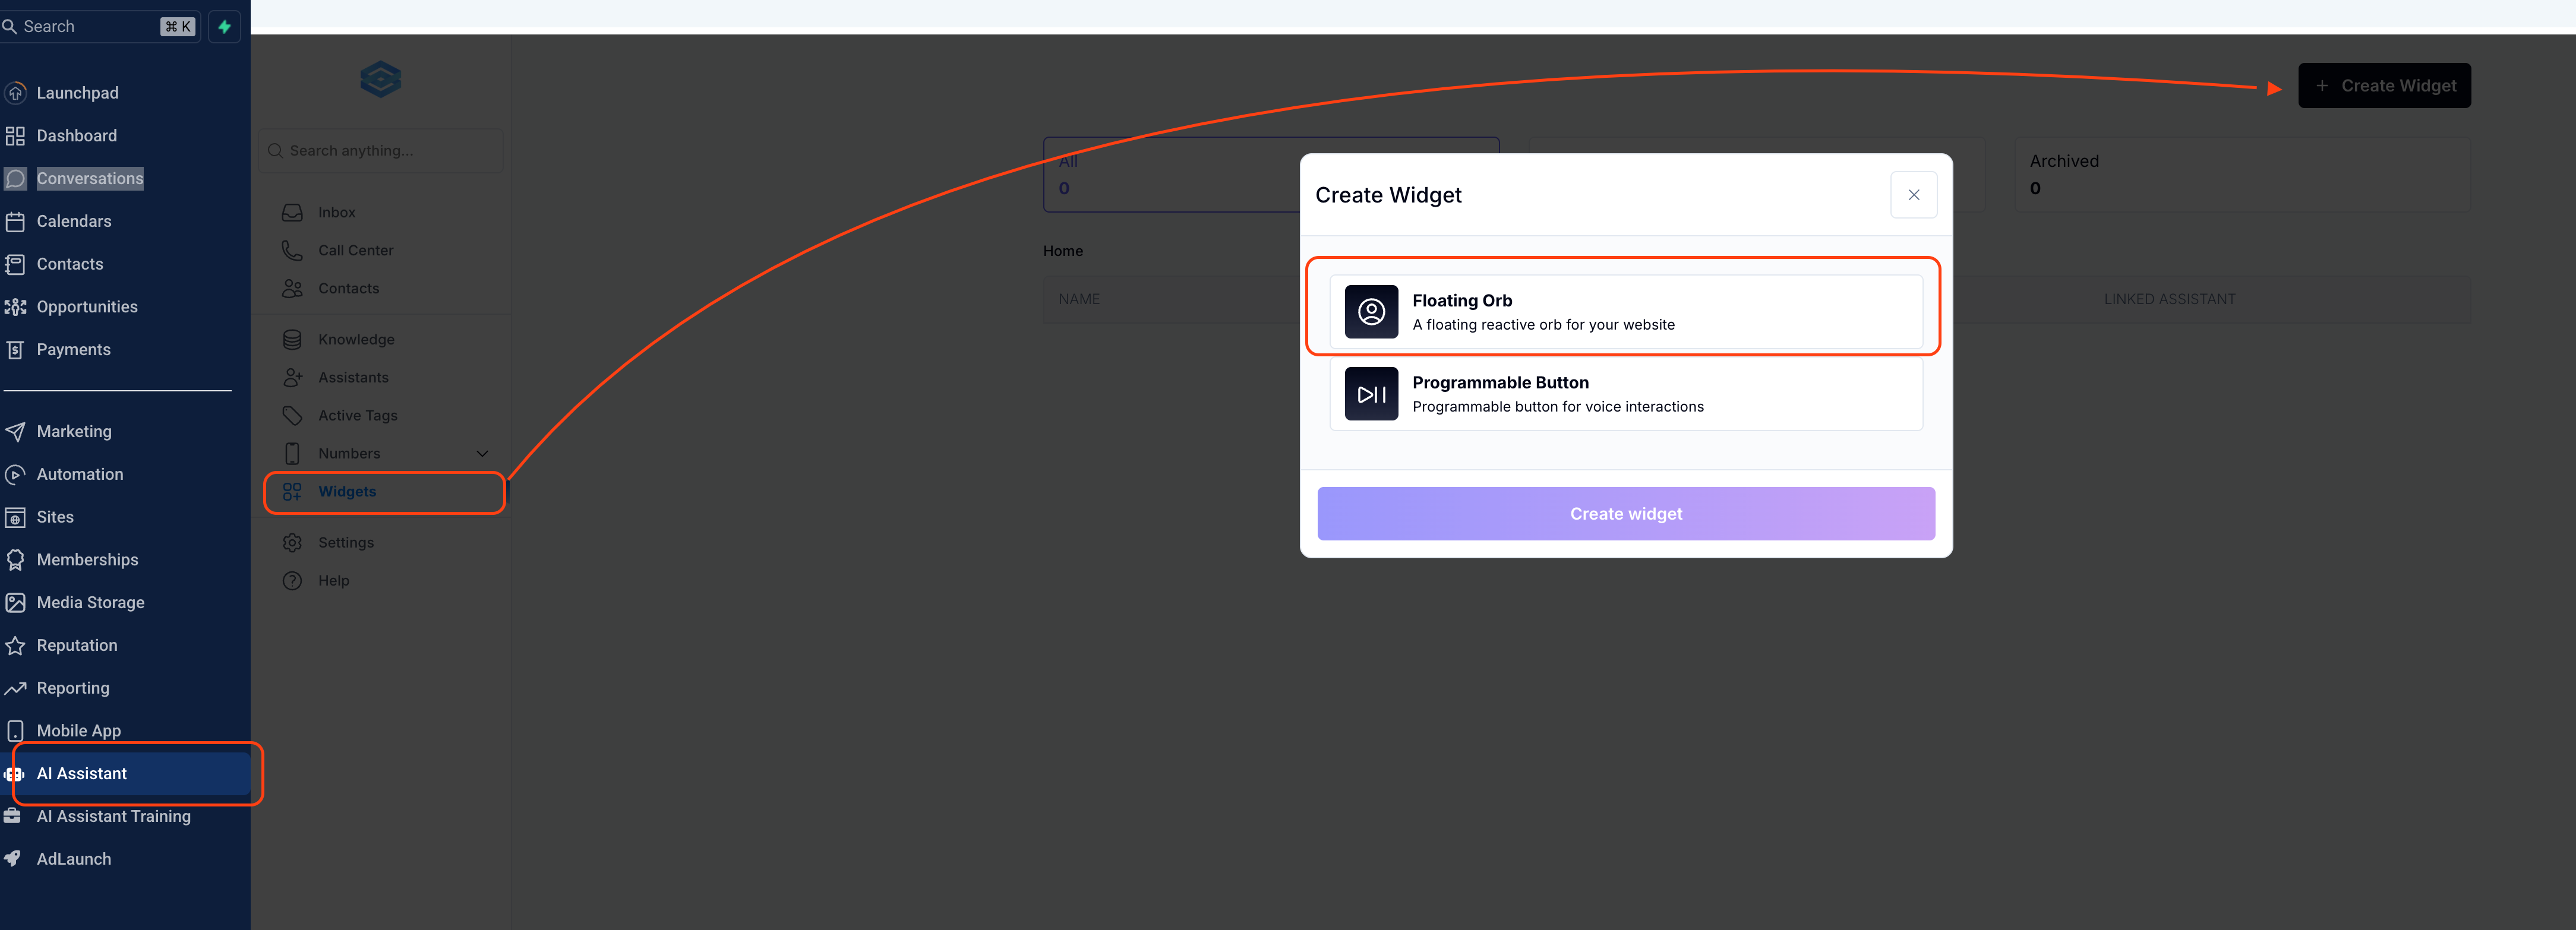
Go to AI Assistant Menu
1. Click on Widgets
2. Create Widget
3. Select Floating Orb
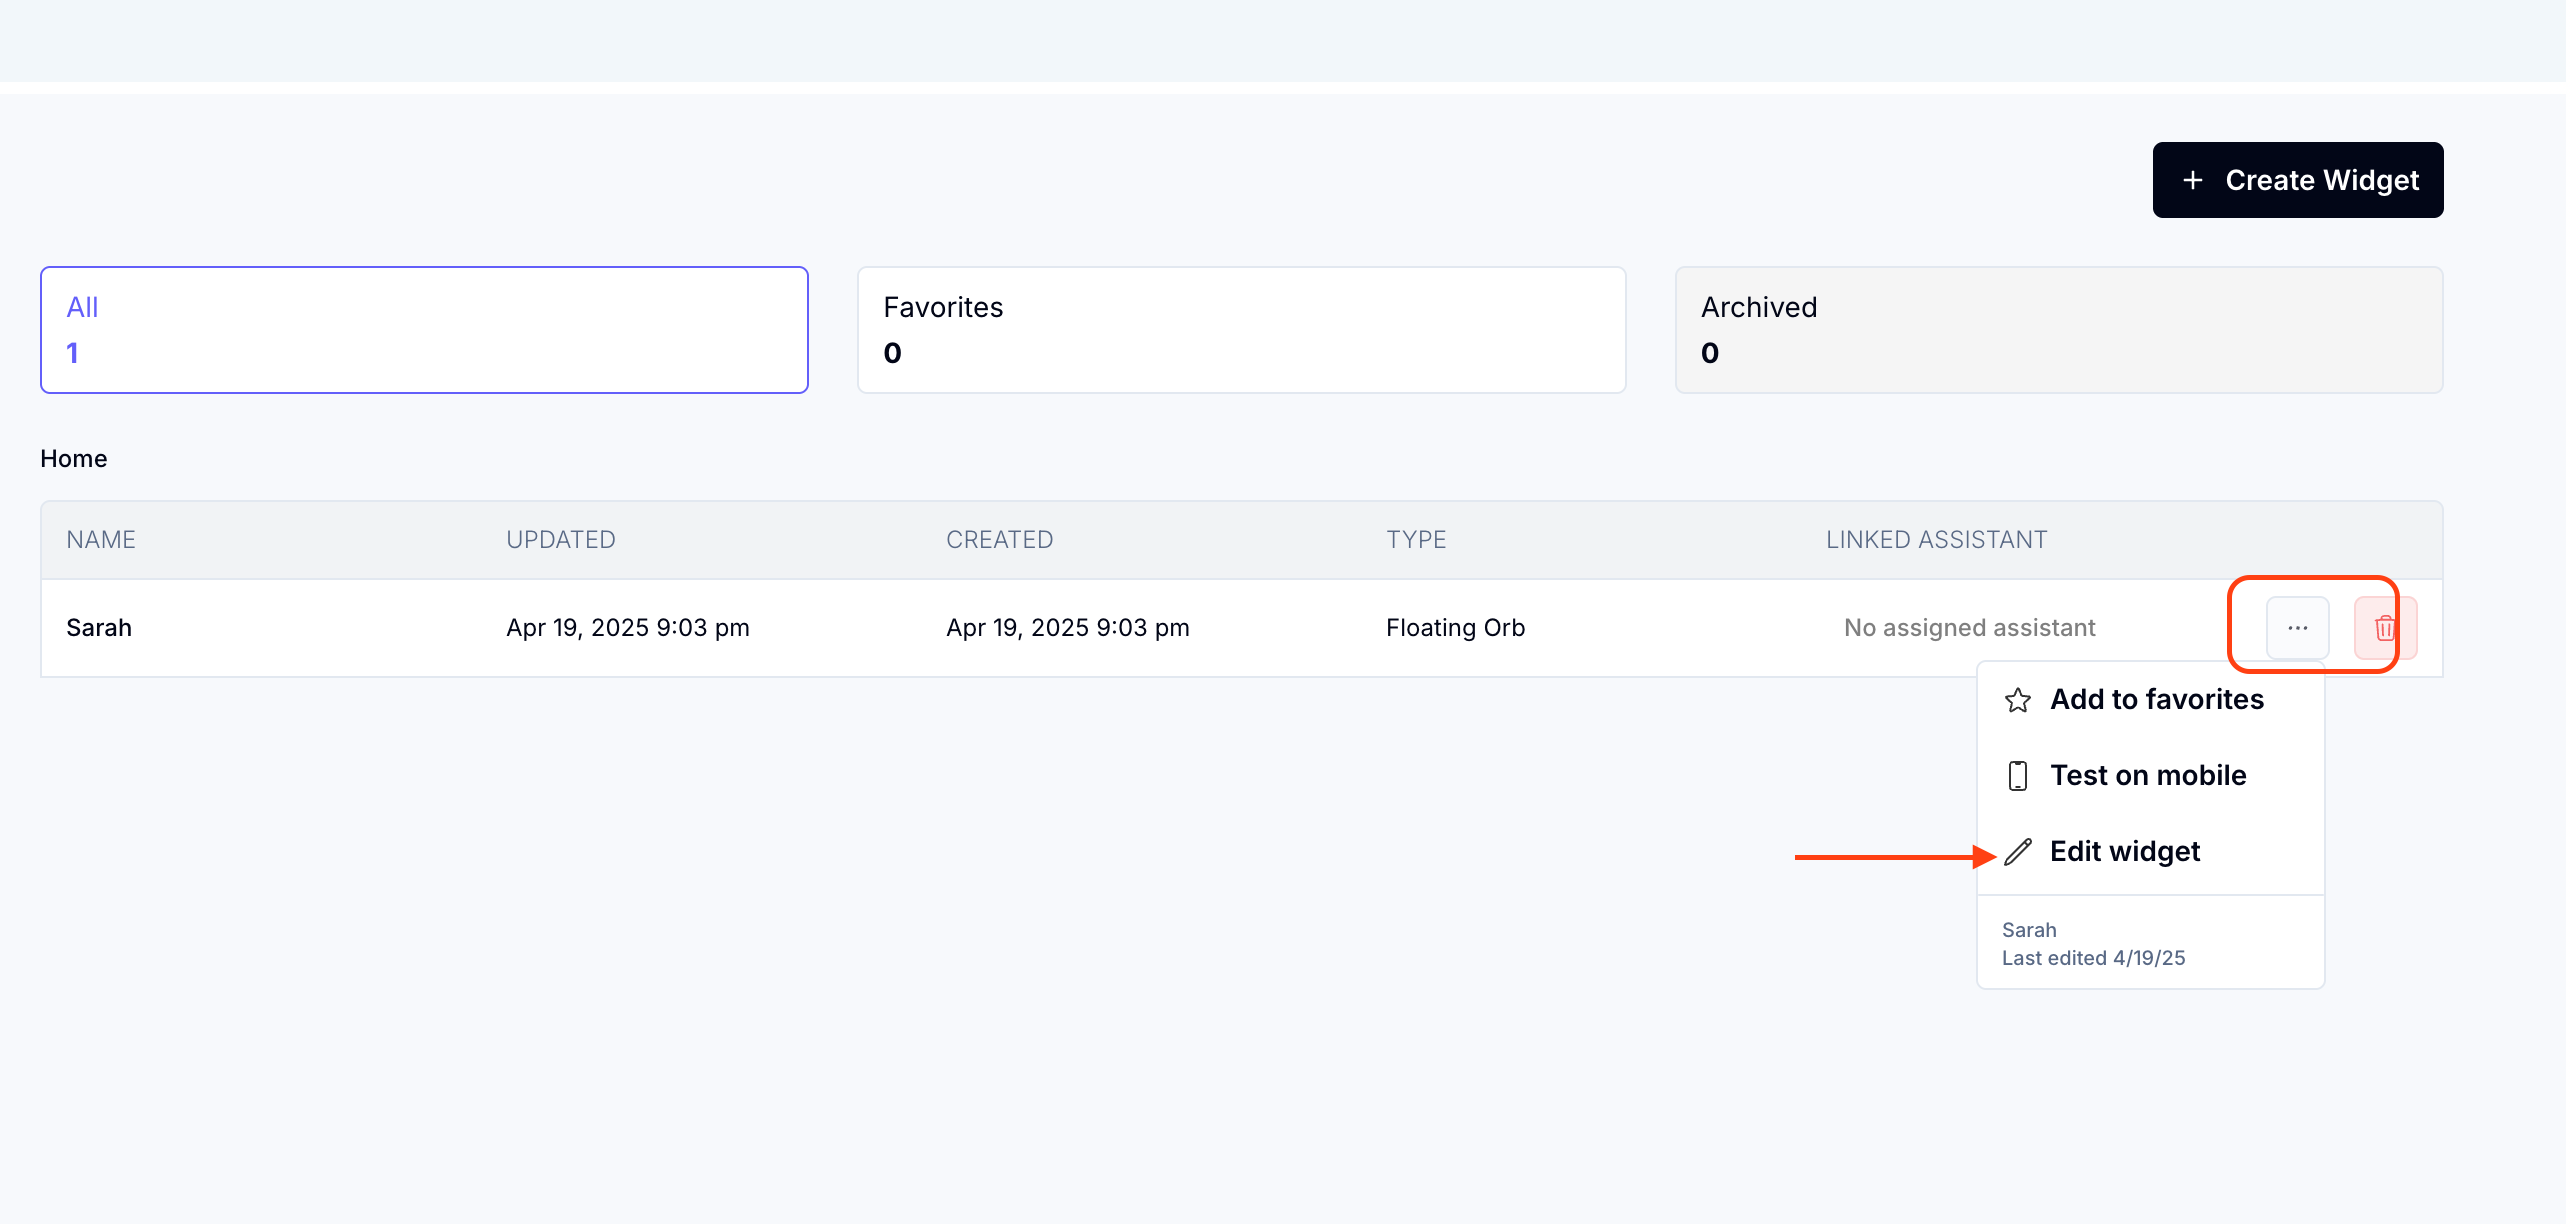
Click on 3-dots then Edit Widget
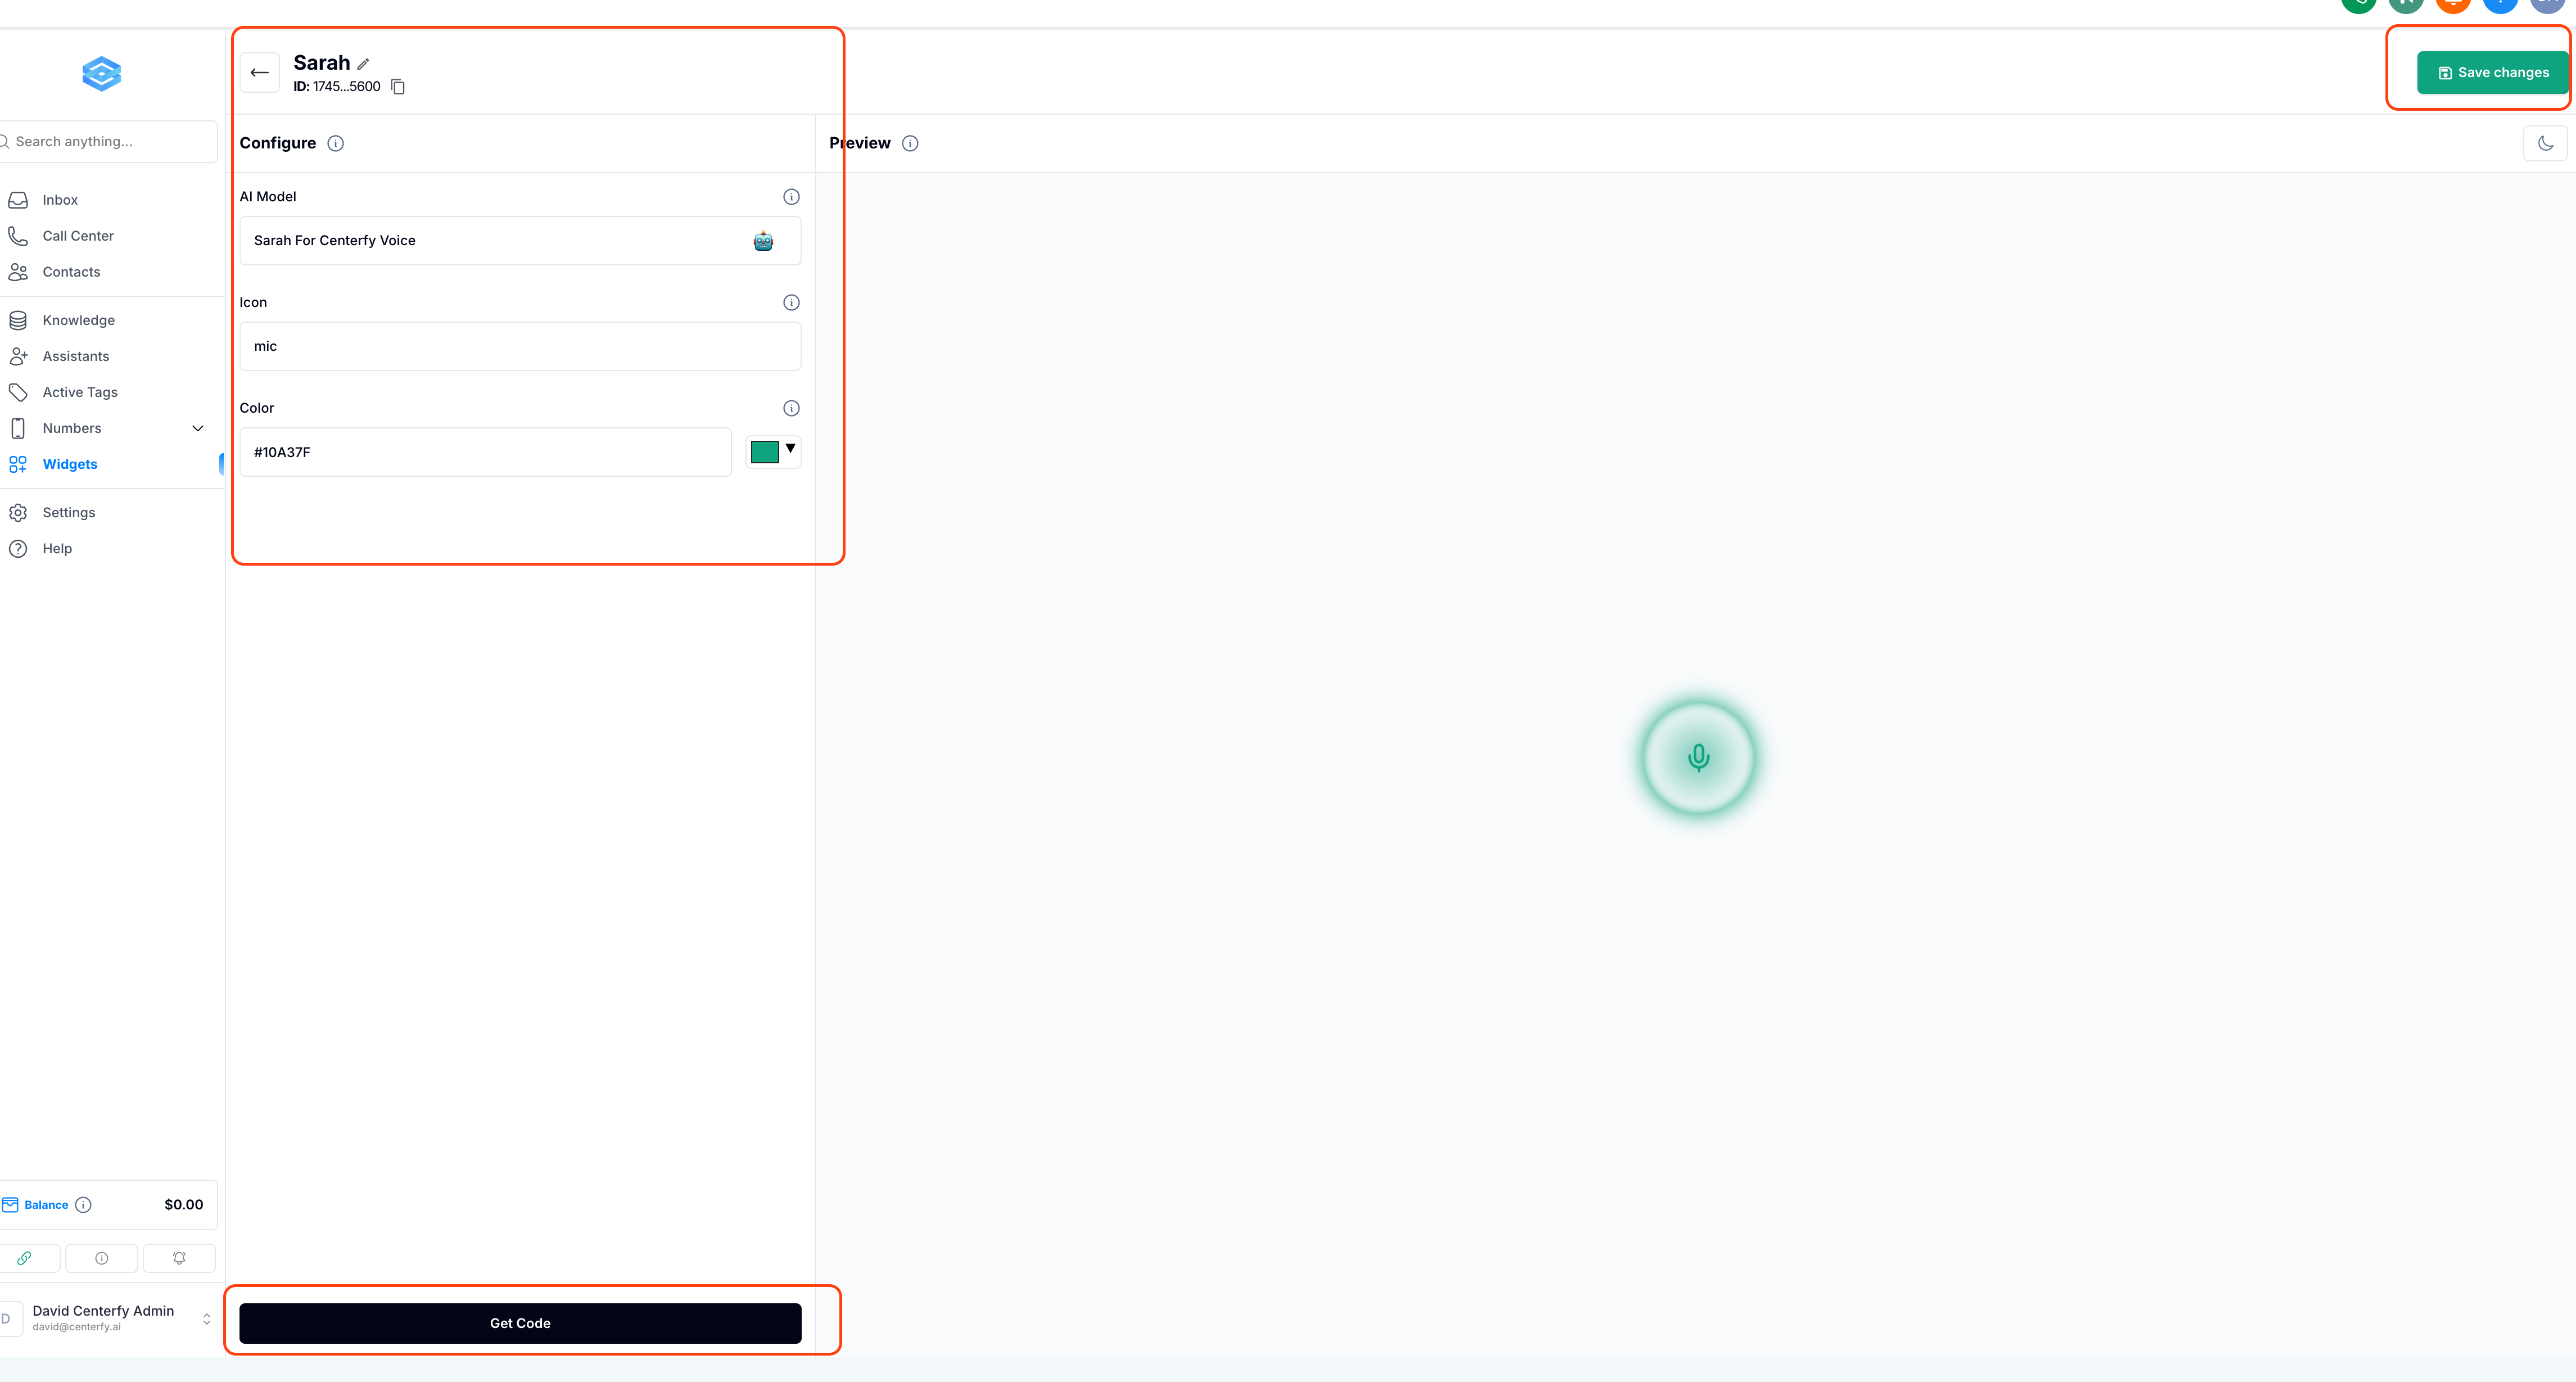
1. Assign Orb to your Main AI (VOICE)
2. Select icon [Normally it's "mic" or "brain"]
3. Customize color
4. Save Changes
5. Get Code and copy then paste it to the same funner as Custom Code
If they ask how to add a subaccount you can show them the AI Assistant Training. There will be a form they can fill out to add a subaccount.
For Canadian clients that market within Canada, they can import their twilio number as long as their twilio account is verified. Refer to this DOCUMENT for instructions